Table of Contents
Advertisement
Quick Links
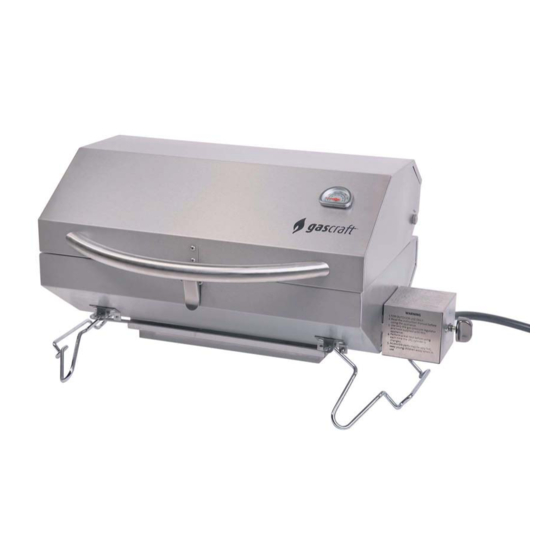
Portable Gas Grill
Model: SRPG0301
This instruction manual contains important information necessary for the proper assembly
and safe use of the appliance.
Read and follow all warnings and instructions before assembling and using the appliance.
Follow all warnings and instructions when using the appliance.
Keep this manual for future reference.
Please verify that all parts are included before beginning assembly by checking the parts and
hardware list.
PLEASE RETAIN YOUR RECEIPT AS PROOF OF PURCHASE
Assembly, Use and Care
Tools required:
Phillips screwdriver / Adjustable wrench
1
1008
Advertisement
Table of Contents

Subscribe to Our Youtube Channel
Summary of Contents for gascraft SRPG0301
- Page 1 Assembly, Use and Care Portable Gas Grill Tools required: Model: SRPG0301 Phillips screwdriver / Adjustable wrench 1008 This instruction manual contains important information necessary for the proper assembly and safe use of the appliance. Read and follow all warnings and instructions before assembling and using the appliance.
- Page 2 Do not store or use petrol or other solution. flammable vapour or liquids in the 5. If odour still exists, immediately contact vicinity. your gas supplier or fire department. Marketed By: Gascraft Products P. O. Box 33-470 Takapuna, Auckland Please keep this manual for future reference...
-
Page 3: Table Of Contents
Table of Contents 1. Product Information......................4 2. Safety instructions.......................5 3. Exploded view & Hardware....................6 4. Assembly instructions......................8 5. Installing with gas supply system..................12 6. Operating instructions......................13 7. Cleaning and maintenance....................15 8. Troubleshooting........................16... -
Page 4: Product Information
1. Product Information SUPPLIED BY: THE WAREHOUSE LTD AUCKLAND 1008 NEW ZEALAND Product Name PORTABLE GAS GRILL Model No. SRPG0301 Pin Number 1008 CM 2507 Serial Number Gas Category Fuel Type 3B/P(30) Injector Size Grill: 0.98mm Total Heat Input Rating 12,000BTU/HR Operating Pressure 2.75kPa... -
Page 5: Safety Instructions
2. Safety instructions Leak test all connections after each LPG cylinder is refilled on first use after a long period, by the method described in the “Operating Instructions” section. This Grill is NOT for commercial use. Never use an LP gas tank with damaged body, valve, collar, or footing. Do not store a spare LP gas tank under or near this appliance. -
Page 6: Exploded View & Hardware
3. Exploded view & Hardware... -
Page 7: Part List
Part List Handle Cooking Grill Flame Tamer Burner Grill Body Grease Tray 2pcs Valve Assembly Hose & Regulator Assembly Hardware List M5x10 bolts(2pcs) ø2R Pin(2pcs) ø1.5R Pin(1pc) ø2mm heat isolation washer(2pcs) -
Page 8: Assembly Instructions
4. Assembly instructions Please read these instructions carefully before assembly and use. Find a clean area to assemble your barbecue. Please refer to the parts list and assembly diagram as necessary. Please use protective gloves when assembling this product. To avoid losing any small component or hardware, assemble your product on a hard level surface that does not have cracks or openings. - Page 9 STEP 2 Insert the burner (5) into the hole to sit over the nozzle of the gas valve and fix it with ø1.5R pin (C) STEP 3 Fix the flame tamer (4) to grill body (6) using two ø2R pins (B).
- Page 10 STEP 4 Attach the handle (2) and heat isolation washer (D) to lid (1) using two M5 x 10 bolts (A). STEP 5 Place the cooking grill (3) into the grill body (6).
- Page 11 STEP 6 Attach the grease tray (7) to underside of the grill body (6) . STEP 7 Check to ensure that the BBQ control knob is in the "OFF" position prior to making the connection. Connect the hose and regulator assembly to the gas cylinder. Turn the nut clockwise to make sure its securely tightened.
-
Page 12: Installing With Gas Supply System
5.Installing with gas supply system Important Notes: To operate you will need a precision-filled standard 4 or 9 kg LPG cylinder with external valve threads. Use standard flexible hose with length less than1.5m. The hose shall be readily visible across its entire length for inspection after installation. -
Page 13: Operating Instructions
6. Operating instructions Warnings Before proceeding, make certain that you have assembled the appliance according to instructions. Use your Grill at least 1m away from any wall or surface. Never use your gas grill in a building, garage, shed, breezeway, or any other enclosed area. -
Page 14: End Of Cooking Session
End of cooking session After each cooking session turn the grill burners to the “MAX” position and burn for 5 minutes. This procedure will burn off cooking residue, thus making cleaning easier. Make sure the hood is open during this process. When you have finished using your grill, turn the control valve fully clockwise to the “OFF”... -
Page 15: Cleaning And Maintenance
7.Cleaning and maintenance Regularly clean your barbecue between uses and especially after extended periods of storage. Ensure the barbecue and its components are sufficiently cool before cleaning. Never douse the barbecue with water when its surfaces are hot. Never handle hot parts with unprotected hands. In order to extend the life and maintain the condition of your barbecue, we strongly recommend that the unit be covered when left outside for any length of time, especially during the winter months. -
Page 16: Troubleshooting
8. Troubleshooting Problem Possible Cause Prevention/Cure Burner will not light No gas flow Check if LPG cylinder is empty. If empty, replace or refill, or with match else refer to “sudden drop in gas flow or reduced flame height” Coupling nut and regulator Turn the coupling nut about one-half to three quarters not full y connected additional turn until solid stop.


Need help?
Do you have a question about the SRPG0301 and is the answer not in the manual?
Questions and answers