
Related Manuals for gascraft G2082


Summary of Contents for gascraft G2082
- Page 1 2 Burner Wagon Grill BBQ Model No. G2082 FOR OUTDOOR USE ONLY- OPERATES ON NZ LPG Retain these instructions for future use. IMPORTANT: DO NOT LEAVE THIS BBQ UNATTENDED WHEN LIT AND IN USE...
-
Page 2: General Information
GENERAL INFORMATION Gas Installation Code This BBQ is to be used with LPG only. Always ensure the barbecue is kept away from flammable Failure to comply with these instructions could materials and the gas cylinder clear of any heat source. When result in a fire or explosion which could cause changing over from an empty gas cylinder to a full one make serious bodily injury, death or property damage. -
Page 3: Protect Children
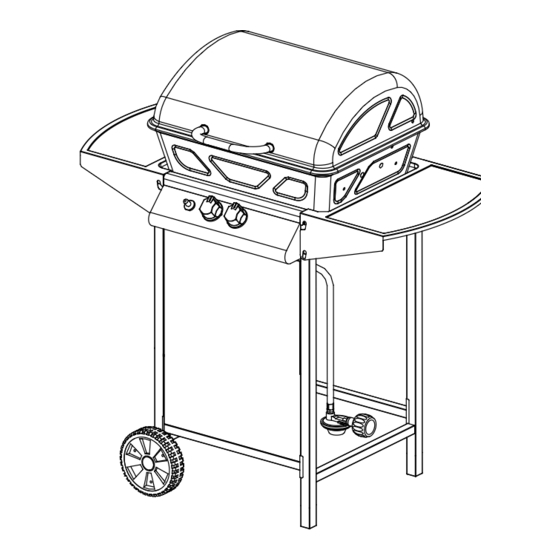
GENERAL INFORMATION Location of your Barbecue Ensure the barbecue is set up on a level and stable DO NOT use your barbecue in garages, porches, sheds, surface. breezeways, or other enclosed areas. Your barbecue is to be used OUTDOORS. The barbecue is not intended to be installed in or on recreational vehicles and/or boats and should not be placed under any surface that will burn. - Page 5 Description Figure Description Figure Q'TY Q'TY Wheel Axle Lid Handle Ignitor Knob Gamel I Cooking grid Right Leg Assembly Cooking Plate Main Burner Valve Flame Tamer Screw Gamel II (M6X12) Burner M6 Alxe Screw Lid Support Axle (M5X30) Screw Body (M5X10) M5Nut Side Shelf...
- Page 6 STEP 1 Front Left Front Right Back Left Back Right M6X12 8Pcs STEP 2 Front Left Back Left Back Right Front Right Clip 2PCS...
- Page 7 STEP 3 M5X10 3Pcs STEP 4 M4X10 4Pcs...
- Page 8 STEP 5 M6 Axle 8Pcs STEP 6 M5X30 4Pcs M5X10 4Pcs M5Nut 8Pcs...
- Page 9 STEP 7 M5X30 4Pcs M5Nut 4Pcs STEP 8 Please insert ignition wire to ignitor as picture show . M5X30 2 Pcs M5 Nut 2 Pcs...
- Page 10 STEP 9 M5X10 6Pcs M5Nut 4Pcs STEP 10 fix the lid with "Hinge Axle and Clip" Clip 2PCS Hinge Axle 2PCS...
- Page 11 STEP 11 STEP 12...
- Page 12 BEFORE USE CHECK FOR LEAKS After the connection is made between hose assembly and BBQ valve, a leak test must be performed before the BBQ can be operated to check the connections are gas-tight. Never check for leaks with a naked flame, always use a soapy water solution TO CHECK FOR LEAKS Make 1 cup of leak detecting solution by mixing one...
-
Page 13: General Assembly
GENERAL ASSEMBLY 1. Prior to opening the gas cylinder valve, make sure all BBQ Connecting & Disconnecting to Gas Source control valves are in the “off “ position. IMPORTANT: Before connecting and disconnecting 2. Next, open the gas cylinder valve, opening the first half-turn barbecue to gas source, make sure burner controls slowly, before opening the gas tap fully as fast as you like. -
Page 14: Operating Procedure
Burner Operation & Ignition System Check Problem Possible Reason Solution Valve on cylinder is closed Open valve on cylinder slowly Burner will not ignite Control knob is closed Turn knob to high when lighting Electronic igniter is faulty Use a long barbecue match Check that the gas bottle is not empty and Burner has gone out re-ignite the burner... - Page 15 Troubleshooting Quick Reference Problem Possible Cause Solution Igniter does not Electrode dirty Wipe the electrode carefully with a clean cloth . spark or your BBQ Degrease with alcohol or a small quantity of lights with a match methylated spirits if needed(NB ensure that but not with the cleaning agents are removed from the area before ignition.
- Page 16 Excess dirt build up Check for cobwebs and dirt build up around the electrodes and burners and clean if necessary. Damaged gas The electrodes on most models are covered by the collector box collector box which protects the electrode and traps gas.If either the electrode or the collector box is corroded lightly sand to restore the surface.
Need help?
Do you have a question about the G2082 and is the answer not in the manual?
Questions and answers