
Related Manuals for enphase C250


Summary of Contents for enphase C250
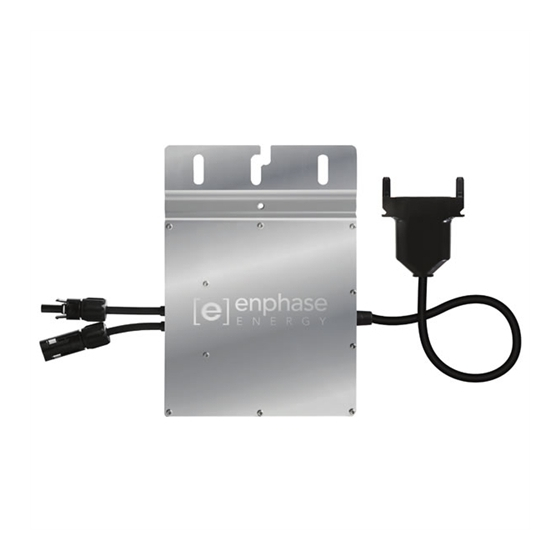
- Page 1 INSTALLATION AND OPERATION MANUAL Enphase C250 Microinverter System 141-00025, Rev 03...
- Page 2 Other Information Product information is subject to change without notice. All trademarks are recognized as the property of their respective owners. User documentation is updated frequently; Check the Enphase website (http://www.enphase.com/support) for the latest information. For warranty text refer to http://www.enphase.com/warranty.
-
Page 3: Table Of Contents
Step 1: Register the System........................... 15 Step 2: Place the Envoy ..........................15 Step 3: Position the Enphase Engage Cable ....................16 Step 4: Terminate the Unused End of the Engage Cable ................17 Step 5: Attach the Microinverters to the PV Racking ..................18 Step 6: Dress the Engage Cable ........................ - Page 4 Technical Data ................................35 Technical Considerations ..........................35 Specifications ..............................35 C250-72-2LN-S2 Microinverter Specifications ................... 35 Engage Cable Specifications ........................37 Enphase Installation Map ..........................38 Sample System Diagram..........................39 2015 Enphase Energy Inc. All rights reserved. 141-00025 Rev 03...
-
Page 5: Important Safety Information
DANGER: Risk of electrical shock. Safety and Advisory Symbols To reduce the risk of electric shock, and to ensure the safe installation and operation of the Enphase® Microinverter, the following safety symbols appear throughout this document to indicate dangerous conditions and important safety instructions. -
Page 6: Microinverter Safety
(return merchandise authorization) number and start the replacement process. Tampering with or opening the Enphase Microinverter will void the warranty. WARNING: Risk of Fire. When pairing with C250, the PV module DC conductors must be labeled “PV Wire” or “PV Cable”. -
Page 7: Engage Cable And Accessory Safety
NOTE: When looping the Engage Cable, do not form loops smaller than 4.75 in. (12 cm) in diameter. NOTE: If you need to remove a sealing cap, you must use the Enphase disconnect tool or a screwdriver. Sealing caps may not be reused. -
Page 8: Envoy Safety
C250 System Installation and Operation Envoy Safety WARNING: Risk of electric shock. Do not attempt to repair the Enphase Envoy Communications Gateway; it contains no user-serviceable parts. If it fails, contact Enphase customer service to obtain an RMA (return merchandise authorization) number and start the replacement process. -
Page 9: The Enphase C250 Microinverter System
C250 System Installation and Operation The Enphase C250 Microinverter System Used with a transformer, the C250 Microinverter System meets the needs of large commercial installations where power distribution is 480Y/277V or medium voltage (MV). With the fourth generation Enphase Microinverters, the DC circuit within the microinverter is isolated and insulated from ground. -
Page 10: How The Microinverter Works
Microinverter systems are inherently more reliable than traditional inverters. The distributed nature of a microinverter system ensures that there is no single point of system failure in the PV system. Enphase Microinverters are designed to operate at full power at ambient temperatures as high as 65 C (150 F). -
Page 11: Planning For System Installation
AC connector attaches directly to the Engage Cable. No additional cabling is needed. The Engage Cable for C250 is available in three connector spacing options to meet varying site requirements. For Engage Cable ordering information, see “Engage Cable Planning and Ordering” on page 32. -
Page 12: Lightning And Surge Suppression
• Install a phase coupler to couple the Enphase power line communication signal between the three phases. You need a phase coupler with each Envoy-C in a C250 system to allow communication with the microinverters on all three phases. •... -
Page 13: Required System Components
• Terminators, as needed (model ET-TERM-10). One needed at the end of each AC branch circuit. • Enphase disconnect tool (model ET-DISC-05). You can substitute numbers 2 and 3 Phillips screwdrivers. • Engage Couplers (splice kits), as needed. (ET-SPLK-05) •... -
Page 14: Enphase System Installation And Commissioning
C250 System Installation and Operation Enphase System Installation and Commissioning Installing the Enphase Microinverter System involves several key steps. Each step listed here is detailed in the following pages. Follow the instructions in this section to install Enphase Microinverters. Step 1: Register the System Step 2: Place the Envoy®... -
Page 15: Step 1: Register The System
Envoy to communicate with all of the microinverters in the system. a. Install a phase coupler, or wire a capacitor into the system. With either solution, install the device on the load side of the over-current protection device. 2015 Enphase Energy Inc. All rights reserved. 141-00025 Rev 03... -
Page 16: Step 3: Position The Enphase Engage Cable
PV module widths vary by manufacturer. On the Engage Cable, connectors are spaced at intervals to allow for the widest PV modules compatible with Enphase Microinverters. If narrower PV modules are used, it may be necessary to account for excess cable by looping the cable at suitable intervals. -
Page 17: Step 4: Terminate The Unused End Of The Engage Cable
Place cap over the wire organizer. h. Hold the cap stationary with an Enphase disconnect tool, or insert a #2 Phillips screwdriver. Use a 22 mm (7/8 inch) wrench to tighten the hex nut until the latching mechanism is screwed all the way to the base. -
Page 18: Step 5: Attach The Microinverters To The Pv Racking
8 mm (5/16”) mounting hardware: 9 N m (80 to 85 in-lbs) NOTE: Using a power screwdriver to tighten the mounting hardware is not recommended due to the risk of thread galling. 2015 Enphase Energy Inc. All rights reserved. 141-00025 Rev 03... -
Page 19: Step 6: Dress The Engage Cable
NOTE: When looping the Engage Cable, do not form loops smaller than 4.75 inches (12 cm) in diameter. WARNING: Tripping Hazard. Loose cables can become a tripping hazard. Dress the Engage Cable to minimize tripping potential. 2015 Enphase Energy Inc. All rights reserved. 141-00025 Rev 03... -
Page 20: Step 7: Connect The Microinverters
Sealing caps may not be reused. NOTE: If you need to remove a sealing cap, you must use the Enphase disconnect tool or a #3 Phillips screwdriver. See “Disconnect a Microinverter” on page 30. Sealing caps may not be reused. -
Page 21: Step 8: Connect To An Ac Branch Circuit Junction Box
Provide an AC connection from the AC junction box back to the electrical utility connection using equipment and practices as required by the NEC and local jurisdictions. 2015 Enphase Energy Inc. All rights reserved. 141-00025 Rev 03... - Page 22 Ground – Green acts as equipment ground (EGC) NOTE: Because the DC circuit is isolated and insulated from ground, the C250 does not require a GEC. Ground fault protection (GFP) is integrated into the microinverter. Balanced 400 Vac (3-phase) is accomplished by alternating phases between microinverters as shown: WARNING: Risk of electric shock.
-
Page 23: Step 9: Complete The Installation Map
The Enphase Installation Map is a diagrammatic representation of the physical location of each microinverter in your PV installation. You will create the virtual array in Enlighten from this map. Use the scanning tool feature from the Enphase Installer Toolkit to easily build and configure a system. Refer to http://enphase.com/installer-toolkit/ for more information. -
Page 24: Step 10: Connect The Pv Modules
WARNING: Electrical shock hazard. The DC conductors of this photovoltaic system are ungrounded and may be energized. WARNING: PV modules paired with the C250 must have DC conductors that are labeled "PV Wire" or "PV Cable” to be compliant with NEC 690.35(D) for Ungrounded PV Power Systems. -
Page 25: Step 12: Connect The Envoy To The Internet
• After the upgrade completes, remove the Ethernet cable from the Envoy. c. Plug the Enphase wireless adapter into the left USB port (looking at Envoy from the front), and wait 10 seconds. d. Press and hold the WPS button on the wireless router for two seconds. On many routers, the WPS button flashes at this point. -
Page 26: Step 13: Use The Envoy To Complete System Setup
PV system. It also shows detailed current and historical performance information. Go to http://www.enphase.com for more information on the Enphase Enlighten web-based monitoring and analysis. To scan and upload the map and build the array: a. Log in to Enlighten. If you do not already have an account, go to http://www.enphase.com... -
Page 27: Troubleshooting
Follow all the safety measures described throughout this manual. Follow the troubleshooting procedures in this section if the PV system does not operate correctly. WARNING: Risk of electric shock. Do not attempt to repair the Enphase Microinverter; it contains no user-serviceable parts. If it fails, contact Enphase customer support to obtain an RMA (return merchandise authorisation) number and start the replacement process. -
Page 28: Dc Resistance Low - Power Off Fault
L1, L2, L3 to neutral limit to 248 VAC 5. Using an Enphase disconnect tool, disconnect the AC cable for the microinverter in question from the Engage Cable. 6. Verify that utility power is present at the microinverter by measuring line to line and line to neutral at the Engage Cable connector. - Page 29 PV module isn’t functioning correctly. If it stays in place, the problem is with the microinverter. Call Enphase Customer Support for help in reading the microinverter data and for help in obtaining a replacement microinverter, if needed.
-
Page 30: Disconnect A Microinverter
NOTE: Take care when measuring DC current as most clamp-on meters must be zeroed first and tend to drift with time. 5. Disconnect the PV module DC wire connectors from the microinverter using the Enphase disconnect tool. 6. If present, loosen the ground cleat screw and remove the grounding electrode conductor. -
Page 31: Install A Replacement Microinverter
If problems remain after troubleshooting, contact Enphase Energy customer support at enphase.com/en- . If Enphase authorizes a replacement (RMA), replace the microinverter as follows: us/support/contact 1. When the replacement microinverter is available, verify that the AC branch circuit breaker is de-energized. -
Page 32: Engage Cable Planning And Ordering
(http://www.enphase.com/support). Connector Spacing Options Engage Cable for C250 is available in three connector spacing options. The gap between connectors on the cable can be either 1.025 meters (40”), 1.7 meters (67”), 0r 2.11 meters (84”). The 1.025 meter spacing is best suited for connecting PV modules installed in portrait orientation, while the 1.7 meter and 2.11 meter spacing allows you to install 60-cell and 72-cell PV modules in landscape orientation. -
Page 33: Cabling Ordering Options
▪ Account for the number of Enphase Microinverters to be installed on the AC branch circuit. Make sure to allocate the correct number of connectors, including extra connectors for gaps and turns. - Page 34 PV modules in portrait orientation. For PV modules placed in landscape orientation, plan for an unused connector between each PV module to accommodate the required additional distance. Cover unused connectors with Enphase watertight sealing caps. 2. Cabling with 1.7-meter or 2.11-meter spacing between connectors results in cleanest install for PV modules in landscape orientation.
-
Page 35: Technical Data
Technical Data Technical Considerations PV modules paired with the C250 must have conductors labeled "PV Wire" or "PV Cable” to be compliant with NEC 690.35(D) for Ungrounded PV Power Systems. Be sure to verify the voltage and current specifications of your PV module match those of the microinverter. - Page 36 NEC 690. The AC connector has been evaluated and approved Integrated AC disconnect for use as the load-break disconnect required by NEC 690. 2015 Enphase Energy Inc. All rights reserved. 141-00025 Rev 03...
-
Page 37: Engage Cable Specifications
11.8 cm x 6.0 cm x 3.2 cm (4.64” x 2.36” x 1.25”) Drop connector dimensions 3.6 cm diameter x 5.1 cm tall (1.4” x 2”) Terminator cap dimensions 2015 Enphase Energy Inc. All rights reserved. 141-00025 Rev 03... -
Page 38: Enphase Installation Map
C250 System Installation and Operation Enphase Installation Map 2015 Enphase Energy Inc. All rights reserved. 141-00025 Rev 03... -
Page 39: Sample System Diagram
C250 System Installation and Operation Sample System Diagram 2015 Enphase Energy Inc. All rights reserved. 141-00025 Rev 03...
Need help?
Do you have a question about the C250 and is the answer not in the manual?
Questions and answers