Table of Contents
Advertisement
Advertisement
Table of Contents

Subscribe to Our Youtube Channel
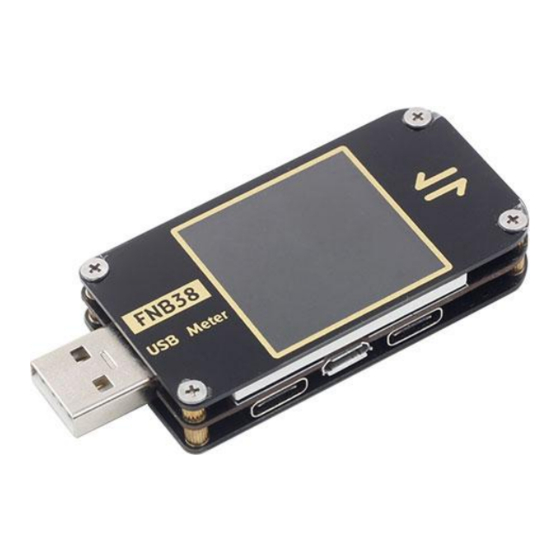
Related Manuals for Fnirsi FNB38


Summary of Contents for Fnirsi FNB38
- Page 1 FNB38 manual (V1.2)
- Page 2 Tips: The FNB38 user manual (V1.2) is applicable to firmware V1.3 and above. Firmware version description 2019.12.24:v1.00 Original firmware. 2020.02.29:v1.10 Fix some known issues. 2020.03.20:v1.20 Fix restart issue when PD protocol is triggered. 2020.05.29:v1.30 1、Add the setting to close the startup screen;...
-
Page 3: Table Of Contents
table of Contents 一、Overview..............................4 二、Pay attention to safety matters.........................4 三、Appearance structure diagram........................4 四、Technical index............................5 五、Function page operation instructions......................6 1、Features page.............................6 2、Capacity / Power consumption observation page..................6 3、Capacity / power consumption list......................8 4、Fast charge identification page........................9 5、Curve display page..........................10 6、Cable measurement page.........................10 7、Fast charge detection and trigger page....................11 7.1 Fast charge protocol detection...................... -
Page 4: 一、Overview
1. Do not connect a power supply exceeding 24V to the tester. 2.The USB-A input port of FNB38 supports high-power input (such as 20V * 5A = 100W). The USB-A output port can withstand 5A current for a short time. The Micro-USB input port does not support large current and high power. -
Page 5: 四、Technical Index
8.OK key, function key 9.HID-USB data transmission figure 1 四、 Technical index Accuracy: ± (a% (‰) reading + word count) index Range Resolution Accuracy Input voltage 4~24V 0.1mV ±(0.2‰+2) Input Current 0~5A 0.1mA ±(0.5‰+2) input power 0~120W 0.1mW ±(0.5‰+2) Load Equivalent 0~9999.9Ω... -
Page 6: 五、Function Page Operation Instructions
(2) OK key Long press: Switch the screen display direction. 2、 Capacity / power consumption observation page (see Figure 3) Figure 3 description FNB38 supports 5 sets of capacity / power consumption records, and offline voltage and current curve records. - Page 7 Run:XXX:XX:XX Represents the tester's startup time, without saving, restarts the timer after restart. Rec:XXX:XX:XX It indicates the valid time of the tester's recording capacity / power consumption. It is saved offline and will not be lost after power failure. Time It shows the voltage and current offline curve recording time.
-
Page 8: 3、Capacity / Power Consumption List
(5) OK key Short press: When set to manual recording, recording can be paused / started, and it is invalid when set to automatic recording; Long press: Clear the current group record data, including capacity, power consumption, and record valid time. 3.Capacity / power consumption list (see Figure 4) Figure 4 description... -
Page 9: 4、Fast Charge Identification Page
(2) Offline record curve page (as shown in Figure 8), click OK, pop-up clear confirmation window, you can clear the offline record curve separately. (3) Select Clear all Records in the settings to clear all records (5 sets of capacity / power consumption / recording time and voltage and current offline recording curves). -
Page 10: 5、Curve Display Page
Figure 6 Figure 7 Figure 8 description Figure 6 is the real-time curve of voltage and current. Figure 7 shows the data D + and D- real-time curves. Figure 8 shows the offline recording curve of voltage and current. Instructions (1) <<... -
Page 11: 7、Fast Charge Detection And Trigger Page
FNB38 uses the voltage drop method to measure the internal resistance of the cable. It needs to be used with a constant current load. Instructions (1) << >>key (2) Short press: page turning; (3) OK key Short press: Record the reference value. Long press: switch display curve. -
Page 12: Qc2.0 Trigger
number of PDOs may be small. Complete PDO please trigger with PD Time shall prevail. If this problem is solved, the firmware will be updated in the future.(For easier operation, DANGEROUS will not be prompted after this version!!!) Note: Do not connect any electrical appliances during the testing process, otherwise the high voltage triggered during the testing process may burn the electrical appliances! Note: Do not connect any electrical appliances during the testing process, otherwise the high voltage triggered during the testing process may burn the electrical appliances! -
Page 13: Qc3.0 Trigger
7.3 QC3.0 trigger Select QC3.0, press OK shortly to enter the QC3.0 trigger page (as shown in Figure 13), Fail Failure will display Trigger Failure! Figure 13 Instructions (1) << >>key Short press: Decrease / increase QC3.0 trigger voltage. (2) OK key Long press: Exit the current page. -
Page 14: Huawei Scp Trigger
(2) OK key Long press: Exit the current page. (Still triggering). 7.5 Huawei SCP trigger Select Huawei SCP and press OK key to enter the Huawei SCP trigger page (as shown in Figure 15). Trigger Failure will display Trigger Failure! Figure 15 Instructions (1) <<... -
Page 15: Pd Protocol Trigger
the voltage will return to 5V) (2) OK key Long press: Exit the current page. (Still triggering). 7.7 PD protocol trigger (requires connection to Type-C interface) Select PD trigger, short press OK to enter the PD protocol trigger page (as shown in Figure 17). -
Page 16: Pd Protocol Monitoring
PD charger-CC line-FNB38-CC line-PD electrical appliances In order to avoid losing data, you can use the HID interface to provide power. When connecting, first connect the charger, FNB38 will automatically judge the communication CC line and switch to the corresponding interface to monitor. -
Page 17: Pd E-Marker
(3) >> key Only valid on the monitoring page 2 (Figure 19), short press: switch to view the detailed information of the message package; long press to hold to quickly browse down the information. (4) OK key Short press: You can switch between page 1 (Figure 18) and page 2 (Figure 19). Long press: exit the current page. -
Page 18: Pd Protocol Conversion
7.10 PD protocol conversion This function can convert QC2.0 charging head to PD2.0 charging head for PD electrical appliances. When entering the page, the system detects whether the charging head supports QC2.0, if it does not support, it cannot enter. This function automatically finds power-using equipment and supports 2-60W broadcasting. -
Page 19: 8、System Information And Settings Page
8.System information and setting page (see Figure 18) Figure 18 description Press and hold << to power on, FNB38 enters the system information and settings page. VX.X Indicates the current firmware version. SN:XXXXXX Indicates the unique serial number of the device. - Page 20 << >> key: short press: when the green dot is at the maximum grid (20Level, not explained later), change the parameter. Standby screen display brightness setting, the range is 0-20 level, when it is 0, the backlight is turned off. OK key: short press: switch green dot position.
- Page 21 dot, which corresponds to which operational block. Long press: Effective when the green dots are NO / YES. << >> key: short press: when the green dot is on the largest grid, change the parameter. Recording time: curve recording time, no recording when NO, range is 0-9 hours, recording time interval is calculated automatically.
- Page 22 Temperature display symbol: ° C / ° F. OK key: short press: switch green dot position. Where is the green dot, which corresponds to which operational block. Long press: Effective when the green dots are NO / YES. << >> key: short press: when the green dot is on the largest grid, change the parameter.
-
Page 23: 六、Upgrade Firmware Instructions
OK key:Short press: switch the green dot position. Where is the green dot, which corresponds to which operable block. Long press: Valid when the green dots are NO/YES. 六、 Upgrade firmware instructions 1、 Open the FNIRSI USB Meter upgrade tool. - Page 24 2. When FNB38 is off, press and hold the OK key to access the HID-USB interface. Shows connected, device model, device firmware version. 3. Click OPEN and select Upgrade Firmware.
- Page 25 4.Click START to start upgrading the firmware. After the upgrade is completed, FNB38 will restart automatically.
- Page 26 Common problem analysis 1. Why can't the power reach the maximum power of the charger? 答:The PD protocol has a feature, if the current needs to exceed 3A. First: The charger needs to support protocols exceeding 3A; Second: The CC line connected to the charger needs to support a current of more than 3A.
- Page 27 For the function of charging the mobile phone, FNB38 has a function called PD protocol conversion, which can convert the QC protocol to the PD protocol to charge the PD device.
- Page 28 CC pull-down, so the PD charger will not supply power. After the power is not supplied, the physical chip of the PD is pulled down by default, and it is powered again, and it does not supply power after it is turned on.
- Page 29 8.Why does the fast charge protocol automatically detect and display all red? Answer: During the test, please do not connect the load. If possible, test several charging heads. If all the charging heads are all red, and confirm that these charging heads support...
Need help?
Do you have a question about the FNB38 and is the answer not in the manual?
Questions and answers