Table of Contents
Advertisement
Advertisement
Table of Contents

Related Manuals for Launch CReader 6011


Summary of Contents for Launch CReader 6011
- Page 1 V1.00.000 2017-07-25...
- Page 2 LAUNCH or its affiliates. In countries where any of the LAUNCH trademarks, service marks, domain names,...
- Page 3 The right is reserved to make change at any time without notice. Neither LAUNCH nor its affiliates shall be liable to the purchaser of this unit or third parties for damages, losses, costs or expenses incurred by purchaser or...
- Page 4 Don’t connect or disconnect any test equipment while the ignition is on or the engine is running. Keep the CReader 6011/7001/7001F/8001/8011/8021/9081 dry, clean, free from oil/water or grease. Use a mild detergent on a clean cloth to clean the outside of the CReader 6011/7001/7001F/8001/8011/8021/9081, when necessary.
-
Page 5: Table Of Contents
2.4 OBD II Readiness Monitors .............. 4 2.5 OBD II Monitor Readiness Status ............5 2.6 OBD II Definitions ................6 3. Product Descriptions ..............8 3.1 Outline of CReader 6011/7001/7001F/8001/8011/8021/9081 ..... 8 3.2 Specifications ................... 9 3.3 Accessories Included................ 9 4. Connection ................10 4.1 Connect CReader 6011/7001/7001F/8001/8011/8021/9081 ..... -
Page 6: Introduction
1. Introduction The CReader 6011/7001/7001F/8001/8011/8021/9081 Series are specially developed by LAUNCH, which support all 10 modes of OBD II test for a complete diagnosis. They all feature the 4.0” color LCD. For CReader 6011, it is a multipurpose CReader with large-size color display. It provides full OBDII/EOBD diagnostic functions, and also ABS and SRS system diagnostic functions. -
Page 7: General Information
CReader 6011/7001/7001F/8001/8011/8021/9081 LAUNCH English User’s Manual 2. General Information 2.1 On-Board Diagnostics (OBD) II The first generation of On-Board Diagnostics (OBD I) was developed by the California Air Resources Board (ARB) and implemented in 1988 to monitor some of the emission control components on vehicles. As technology evolved and the desire to improve the On-Board Diagnostic system increased, a new generation of On-Board Diagnostic system was developed. -
Page 8: Location Of The Data Link Connector (Dlc)
CReader 6011/7001/7001F/8001/8011/8021/9081 LAUNCH English User’s Manual Figure 2-1 2.3 Location of the Data Link Connector (DLC) The DLC (Data Link Connector or Diagnostic Link Connector) is typically a 16-pin connector where diagnostic code readers interface with the vehicle’s on-board computer. The DLC is usually located 12 inches from the center of the instrument panel (dash), under or around the driver’s side for most vehicles. -
Page 9: Obd Ii Readiness Monitors
CReader 6011/7001/7001F/8001/8011/8021/9081 LAUNCH English User’s Manual Figure 2-2 2.4 OBD II Readiness Monitors An important part of a vehicle’s OBD II system is the Readiness Monitors, which are indicators used to find out if all of the emissions components have been evaluated by the OBD II system. -
Page 10: Obd Ii Monitor Readiness Status
CReader 6011/7001/7001F/8001/8011/8021/9081 LAUNCH English User’s Manual engine system components require the vehicle to be operated under specific conditions before the monitor ready. These monitors are termed non-continuous monitors and are listed below: 1) EGR System 2) O Sensors 3) Catalyst... -
Page 11: Obd Ii Definitions
CReader 6011/7001/7001F/8001/8011/8021/9081 LAUNCH English User’s Manual 2.6 OBD II Definitions Powertrain Control Module (PCM) – It is the OBD II terminology for the on-board computer that controls engine and drive train. Malfunction Indicator Light (MIL) -- Malfunction Indicator Light (Service Engine Soon, Check Engine) is a term used for the light on the instrument panel. - Page 12 CReader 6011/7001/7001F/8001/8011/8021/9081 LAUNCH English User’s Manual RPM, vehicle speed, air flow, engine load, fuel pressure, fuel trim value, engine coolant temperature, ignition timing advance, or closed loop status. Fuel Trim (FT) -- Feedback adjustments to the base fuel schedule. Short-term fuel trim refers to dynamic or instantaneous adjustments.
-
Page 13: Product Descriptions
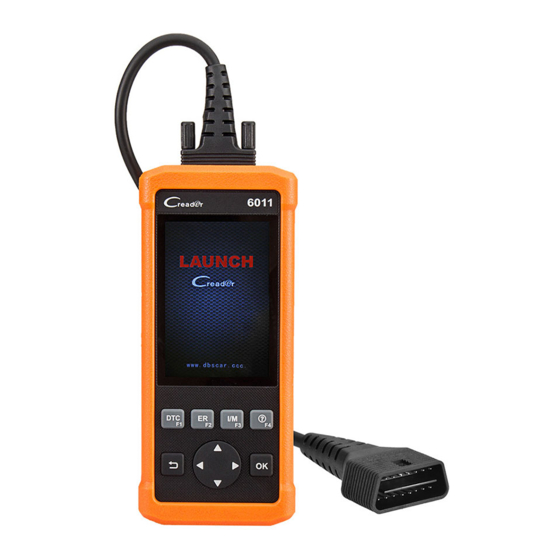
English User’s Manual 3. Product Descriptions 3.1 Outline of CReader 6011/7001/7001F/8001/8011/8021/9081 Figure 3-1 CReader 6011/7001/7001F/8001/8011/8021/9081 Front View Note: CReader 6011/7001/7001F/8001/8011/8021/9081 feature same appearance. Here we only take CReader 7001 as an example. Name Descriptions To connect vehicle's DLC (Data Link Connector) with... -
Page 14: Specifications
Storage temperature: -20 to 70°C (-4 to 158 F°) External Dimension: 195mm(L) x 86mm(W) x 32mm(H) Weight: 460g 3.3 Accessories Included 1. CReader 6011/7001/7001F/8001/8011/8021/9081 handset 2. Diagnostic cable 3. User’s Manual 4. Memory card 5. Memory card reader... -
Page 15: Connection
LAUNCH English User’s Manual 4. Connection 4.1 Connect CReader 6011/7001/7001F/8001/8011/8021/9081 1. Turn the ignition off. 2. Locate vehicle’s DLC socket: It provides standard 16 pins and is generally located on driver’s side, about 12 inches away from the center of dashboard. - Page 16 CReader 6011/7001/7001F/8001/8011/8021/9081 LAUNCH English User’s Manual 1) Language This option enables you to set the user interface language. Note: Due to continuous software upgrade, language interface may differ from different software versions. 2) Unit of Measure This option allows you to set measurement unit.
-
Page 17: Diagnose
CReader 6011/7001/7001F/8001/8011/8021/9081 LAUNCH English User’s Manual 5. Diagnose Select [Diagnose] in Main Menu and press [OK], the screen will display Monitor Status interface as following figure 5-1: Figure 5-1(for CReader 7001) 5.1 OBDII/EOBD Diagnosing This option presents a quick way to check for DTCs, isolate the cause of the... - Page 18 CReader 6011/7001/7001F/8001/8011/8021/9081 LAUNCH English User’s Manual Press [OK], a screen similar to Figure 5-3 will appear: Figure 5-3 It mainly includes the following functions: 1. Read Codes This option is used to identify which section of the emission control system has malfunctioned.
- Page 19 CReader 6011/7001/7001F/8001/8011/8021/9081 LAUNCH English User’s Manual I/M refers to Inspection and Maintenance that is legislated by the Government to meet federal clean-air standards. I/M Readiness indicates whether or not the various emissions-related systems on the vehicle are operating properly and are ready for Inspection and Maintenance testing.
-
Page 20: System Diagnosing
8. EVAP System Test The EVAP test function lets you initiate a leak test for the vehicle’s EVAP system. The CReader 6011/7001/7001F/8001/8011/8021/9081 does not perform the leak test, but signals to vehicle’s on-board computer are to initiate the test. Before using the system test function, refer to the vehicle’s service repair manual to... -
Page 21: Resetting
CReader 6011/7001/7001F/8001/8011/8021/9081 LAUNCH English User’s Manual Figure 5-4 5.3 Resetting There are two methods to reset service lamp: Manual reset or Auto reset. Auto reset follows the principle of sending command from the CReader to vehicle’s ECU to do resetting. While using manual reset, users just follow the on-screen... -
Page 22: Review
CReader 6011/7001/7001F/8001/8011/8021/9081 LAUNCH English User’s Manual Figure 5-5 5.4 Review This function is used to review or delete the recorded DTC, Data Streams and Freeze Frame. -
Page 23: Help
CReader 6011/7001/7001F/8001/8011/8021/9081 LAUNCH English User’s Manual 6. Help This menu enables you to view tool information and OBD introduction. In main menu, select [Help] and press [OK] to enter Figure 6-1. Figure 6-1 6.1 DLC Location Information This option helps you to find the location of the vehicle’s DLC. - Page 24 CReader 6011/7001/7001F/8001/8011/8021/9081 LAUNCH English User’s Manual Press [ ]/[ ] button to move the highlight bar to different position. Press [ ]/[ ] button to alter the value, then press [OK] button, the screen will display definition of the DTC.
-
Page 25: Register & Update
1. A computer that can access the Internet. Follow the steps described as below to perform the registration and update: 1. Go to http://mycar.x431.com and click the CReader 6011 7001 once, then click updating icon. (Figure 7-1) Figure 7-1 (for CReader 6011/7001) 2. - Page 26 CReader 6011/7001/7001F/8001/8011/8021/9081 LAUNCH English User’s Manual 4. After the Serial Number is entered, click [Update] and enter the following information. Click [Submit]. (Figure 7-3) Figure 7-3 (If you need the Register Code, proceed to the steps 5-8) (If you have the Register Code, proceed to step 9 directly) 5.
- Page 27 CReader 6011/7001/7001F/8001/8011/8021/9081 LAUNCH English User’s Manual 7. Select [Tool Information], press [OK]. (Figure 7-5) Figure 7-5 8. This is the Register Code number for inputting into step 4. (Figure 7-6) Figure 7-6 (Return to step 4 and input the code and then proceed) 9.
- Page 28 CReader 6011/7001/7001F/8001/8011/8021/9081 LAUNCH English User’s Manual Figure 7-7 10. Once all steps are completed, power the tool via USB in computer or via OBDII port in vehicle. The tool will prompt you to upgrade, click [OK] to start updating and a progress bar will appear. It may take several minutes to finish the update if your upgrade package file is too large, please wait.
-
Page 29: Faq
CReader 6011/7001/7001F/8001/8011/8021/9081 LAUNCH English User’s Manual 8. FAQ Here we list some frequently asked questions and answers relating to CReader 6011/7001/7001F/8001/8011/8021/9081. Question: System halts when reading data stream. What is the reason? Answer: It may be caused by a slackened connector. Please turn off the CReader 6011/7001/7001F/8001/8011/8021/9081, firmly connect the connector, and switch it on again. - Page 30 The exclusive remedy for any automotive meter found to be defective is repair or replacement, and LAUNCH shall not be liable for any consequential or incidental damages.
- Page 31 LAUNCH English User’s Manual Statement: LAUNCH reserves the rights to make any change to product designs and specifications without notice. The actual object may differ a little from the descriptions in the manual in physical appearance, color and configuration. W e have tried our best to make the descriptions and illustrations in the manual as accurate as possible, and defects are inevitable.
Need help?
Do you have a question about the CReader 6011 and is the answer not in the manual?
Questions and answers