TRENDnet TI-PG541i User Manual
6-port hardened industrial gigabit poe+ layer 2 managed din-rail switch
Hide thumbs
Also See for TI-PG541i:
- User manual (148 pages) ,
- Quick installation manual (14 pages) ,
- Quick installation manual (73 pages)
Table of Contents
Advertisement
Quick Links
Advertisement
Table of Contents

Related Manuals for TRENDnet TI-PG541i


Summary of Contents for TRENDnet TI-PG541i
- Page 1 Cover Page TRENDnet User’s Guide...
-
Page 2: Table Of Contents
Static MAC Settings .................... 14 SNMP Trap ......................60 MAC Table ......................16 Mail Alarm ........................61 Age Time Settings ....................16 Maintenance........................ 63 Port Mirror ........................17 System Log ........................65 Port Settings ........................ 18 © Copyright 2016 TRENDnet. All Rights Reserved. - Page 3 Table of Contents TRENDnet User’s Guide User Account ....................... 66 Technical Specifications..............68 Troubleshooting ................70 Appendix ..................71 © Copyright 2016 TRENDnet. All Rights Reserved.
-
Page 4: Product Overview
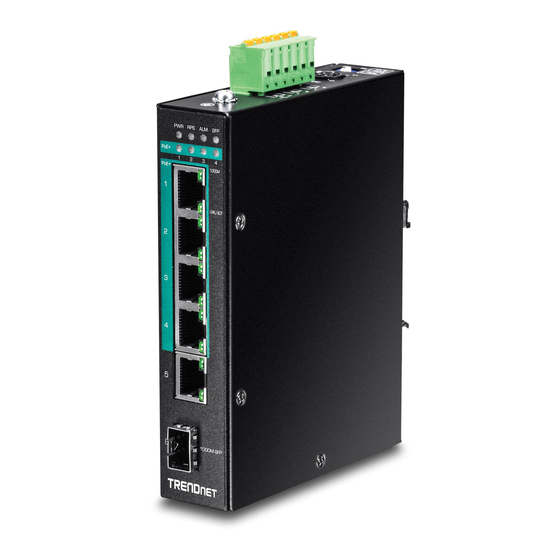
TRENDnet’s 6-Port Hardened Industrial Gigabit PoE+ Layer 2 Managed DIN-Rail Switch, model TI-PG541i, has four Gigabit PoE+ ports, one Gigabit port, one Gigabit SFP slot and a 120W PoE budget. The switch is equipped with an IP30 rated metal enclosure and designed to withstand a high degree of vibration, shock, protection against ESD/EMI/surge, and operate within a wide temperature range (- 40 –... - Page 5 3, 9), SMTP alert, syslog, and port mirroring. Redundant Power Dual redundant power inputs (primary and RPS) with overload current protection Alarm Output Alarm relay output triggered by power failure of primary and/or redundant power (DIP switch) © Copyright 2016 TRENDnet. All Rights Reserved.
-
Page 6: Product Hardware Features
Grounding point/screw – The switch chassis can also be connected to a known ground point for additional safety and protection. (grounding wire not included) Note: For any unused ports or SFP slots, it is recommended to leave the rubber plugs installed during operation. © Copyright 2016 TRENDnet. All Rights Reserved. - Page 7 Primary power input source alarm trigger disabled. Supports an output with current carrying capacity of 1A @ 24V DC. Redundant power input source alarm trigger enabled. Redundant power input source alarm trigger disabled. © Copyright 2016 TRENDnet. All Rights Reserved.
-
Page 8: Sfp Transceiver/Optical Cable Installation
Note: When inserting the cable, be sure the tab on the plug clicks into position to ensure that it is properly seated. © Copyright 2016 TRENDnet. All Rights Reserved. -
Page 9: Switch Installation
Note: The DIN-Rail bracket may already be installed to your switch when received. the bottom of the DIN-Rail and rotate away from DIN-Rail to unmount. The movable clip at the top of the DIN-Rail bracket should be on top. © Copyright 2016 TRENDnet. All Rights Reserved. -
Page 10: Install Power Supply Connections
TRENDnet User’s Guide Install power supply connections Basic IP Configuration Connect the power supply (sold separate, e.g. TRENDnet TI-S24048) to the switch terminal block as shown below. Note: Polarities V+ and V- should match between power supply and connections to switch terminal block. - Page 11 7. Configure the switch IP address settings to be within your network subnet, then click Apply.Note: You may need to modify the static IP address settings of your computer’s network adapter to IP address settings within your subnet in order to regain access to the switch © Copyright 2016 TRENDnet. All Rights Reserved.
-
Page 12: Connect Additional Devices To Your Switch
Note: If you encounter issues connecting to your network, there may be a problem with your computer or device network settings. Please ensure that your computer or device network settings (also called TCP/IP settings) are configured properly within the network subnet your switch is connected. © Copyright 2016 TRENDnet. All Rights Reserved. -
Page 13: Accessing Switch Management Interfaces
3. The terminal emulation window should display a prompt for user name and password. Enter the user name and password. By default: Console User Name: admin Note: User Name and Password are case sensitive. Enable Mode/Privileged Exec User Name: admin Enable Mode/Privileged Exec Password: admin © Copyright 2016 TRENDnet. All Rights Reserved. - Page 14 eth0 Its command prompt is “TI-PG541I(config-if)#”. It means these commands can be executed in this command prompt. In Configure code, executing command “interface eth0” enter the eth0 interface node. TI-PG541I(config)#interface eth0 TI-PG541I(config-if)# © Copyright 2016 TRENDnet. All Rights Reserved.
- Page 15 Password: admin 2. Enter the user name and password. By default: User Name: admin Password: admin Note: User Name and Password are case sensitive. © Copyright 2016 TRENDnet. All Rights Reserved.
- Page 16 Firmware Version This field displays the firmware version. Built Date This field displays the built date of the firmware. This field displays whether the DHCP client is enabled on the DHCP Client Switch. © Copyright 2016 TRENDnet. All Rights Reserved.
- Page 17 If you want to configure a management VLAN, the management VLAN should switch. be created first and the management VLAN should have at least one member port. Enable & Renew: Use DHCP client to get an IP address from DHCP server. © Copyright 2016 TRENDnet. All Rights Reserved.
- Page 18 Enter the IP subnet mask of your Switch in dotted decimal Subnet Mask notation for example 255.255.255.0. Enter the IP address of the default outgoing gateway in dotted Default Gateway decimal notation, for example 192.168.10.1. © Copyright 2016 TRENDnet. All Rights Reserved.
- Page 19 Daylight saving is a period from late spring to early fall when many countries set their clocks ahead of normal local time by one hour to give more daytime light in the evening. Note: © Copyright 2016 TRENDnet. All Rights Reserved.
- Page 20 Daylight Saving Time. third | fourth | last) (Sunday For Example: Last Sunday 10 18 (PM: 6 | Monday | Tuesday | Last Sunday in October) Wednesday | Thursday | Friday | Saturday) MONTH OCLOCK © Copyright 2016 TRENDnet. All Rights Reserved.
- Page 21 Valid value: -1200 to 1200. Example: TI-PG541I(config)#time ntp-server 192.5.41.41 TI-PG541I(config)#time timezone +0800 TI-PG541I(config)#time ntp-server enable TI-PG541I(config)#time daylight-saving-time start-date first Monday 6 0 TI-PG541I(config)#time daylight-saving-time end-date last Saturday 10 0 Parameter Description Current Time and Date Current Time This field displays the time you open / refresh this menu.
- Page 22 2:00 because Germany's time zone CLI Configuration is one hour ahead of GMT or UTC (GMT+1). Node Command Description enable show interface eth0 The command displays the all of the interface eth0 configurations. © Copyright 2016 TRENDnet. All Rights Reserved.
- Page 23 Basic Settings > General Settings > Management Host Parameter Description Management This field configures the management host. Host Apply Click this button to take effect the settings. Refresh Click this button to begin configuring this screen afresh. © Copyright 2016 TRENDnet. All Rights Reserved.
- Page 24 This command displays the current unicast frame. table port PORT_ID address entries learnt by the specific port. configure mac-address-table This command configures a static unicast static MACADDR vlan entry. VLANID port PORT_ID © Copyright 2016 TRENDnet. All Rights Reserved.
- Page 25 Apply Click Apply to take effect the settings. Example: TI-PG541I(config)#mac-address-table static 00:11:22:33:44:55 vlan 1 port 1 Refresh Click Refresh to begin configuring this screen afresh. Static MAC Table Web Configuration Basic Settings > MAC Management > Static MAC Settings...
- Page 26 It displays CPU if it is the entry for the Switch itself. Port The CPU means that it is the Switch’s MAC. Total Counts This field displays the total entries in the MAC table. © Copyright 2016 TRENDnet. All Rights Reserved.
- Page 27 TI-PG541I(config)#mirror destination port 2 4. If a port has been configured as a source port and then user configures the port TI-PG541I(config)#mirror source ports 3-5 mode both as a destination port, the port will be removed from the source ports automatically.
- Page 28 Refresh Click Refresh to begin configuring this screen afresh. device. The effect of a wrap plug is to cause transmitted (output) data to be returned as © Copyright 2016 TRENDnet. All Rights Reserved.
- Page 29 IEEE802.3x flow control is used in full duplex mode to send a pause signal to the sending port, causing it to temporarily stop sending signals when the receiving port memory buffers fill. Back Pressure flow control is typically used in half © Copyright 2016 TRENDnet. All Rights Reserved.
- Page 30 Ethernet cable and shows the broken distance. interface clean cable-test result This command cleans the test result of the Ethernet cable test. interface show cable-test result This command displays the test result of the Ethernet cable test. © Copyright 2016 TRENDnet. All Rights Reserved.
- Page 31 This field displays the link status of the port. If the port is up, it Medium Mode The current working medium mode, copper or fiber, for the port. Link Status displays the port’s speed, duplex and flow control setting. © Copyright 2016 TRENDnet. All Rights Reserved.
- Page 32 Priority : 0 1 2 3 4 5 6 7 Ethernet Packet: Queue : 2 0 1 3 4 5 6 7 42-1496 Type / Length Data © Copyright 2016 TRENDnet. All Rights Reserved.
- Page 33 1 is often reserved for management. Priority Levels Version Type of Service Total Length PCP: Priority Code Point. Identification Flags Fragment Offset Network Priority Traffic Characteristics Time to Live Protocol Header Checksum © Copyright 2016 TRENDnet. All Rights Reserved.
- Page 34 +-----+-----+-----+-----+-----+-----+-----+-----+ Precedence Example: 111 - Network Control IP Header 110 - Internetwork Control 45 C8 . . . DSCP=50 101 - CRITIC/ECP 100 - Flash Override 011 - Flash 010 - Immediate © Copyright 2016 TRENDnet. All Rights Reserved.
- Page 35 PRIO 0 ==> COSQ 2 PRIO 1 ==> COSQ 0 PRIO 2 ==> COSQ 1 PRIO 3 ==> COSQ 3 PRIO 4 ==> COSQ 4 PRIO 5 ==> COSQ 5 PRIO 6 ==> COSQ 6 © Copyright 2016 TRENDnet. All Rights Reserved.
- Page 36 Select a priority for packets received by the port. Only packets enable show diffserv This command displays DiffServ 802.1p Priority without 802.1p priority tagged will be applied the priority you set configurations. here. configure diffserv This command disables / enables the DiffServ © Copyright 2016 TRENDnet. All Rights Reserved.
- Page 37 “Tag Over DSCP” or “DSCP Over Tag”. “Tag Over DSCP” means the 802.1p Mode tag has higher priority than DSCP. Queue ID Select the number of a queue for packets with the priority level. © Copyright 2016 TRENDnet. All Rights Reserved.
- Page 38 Multicast Storm Control : None. This field indicates which Queue (0 to 7) you are configuring. Queue ID DLF Storm Control : 300pps. Queue 0 has the lowest priority and Queue 7 the highest priority. © Copyright 2016 TRENDnet. All Rights Reserved.
- Page 39 Select the port number for which you want to configure storm control Port TI-PG541I#configure terminal settings. TI-PG541I(config)#storm-control rate 1 type broadcast ports 1-6 Select the number of packets (of the type specified in the Type field) per Rate TI-PG541I(config)#storm-control rate 1 type multicast ports 1-6 second the Switch can receive per second.
- Page 40 This command disables the bandwidth limit ingress ports PORTLISTS for incoming packets. Refresh Click Refresh to begin configuring this screen afresh. Example: TI-PG541I#configure terminal TI-PG541I(config)#bandwidth-limit egress 1 ports 1-6 TI-PG541I(config)#bandwidth-limit ingress 1 ports 1-6 © Copyright 2016 TRENDnet. All Rights Reserved.
- Page 41 VLAN. systems multicast group (224.0.0.1), has a Group Address field of 0, and has a Max Immediate Leave is only supported on IGMP Version 2 hosts). Response Time of [Query Response Interval]. © Copyright 2016 TRENDnet. All Rights Reserved.
- Page 42 The default port Immediate Leave state is disabled for all ports. an IGMP multicast router (or server). You The default port Querier Mode state is auto for all ports. must enable IGMP snooping as well. The IGMP snooping Report Suppression is disabled. © Copyright 2016 TRENDnet. All Rights Reserved.
- Page 43 Switch not perform IGMP snooping. Specify the action to perform when the Switch receives an Unknown unknown multicast frame. Select Drop to discard the frame(s). Multicast Packets Select Flooding to send the frame(s) to all ports. © Copyright 2016 TRENDnet. All Rights Reserved.
- Page 44 Switch uses the port as an IGMP query port if the port Querier Mode receives IGMP query packets. Fixed means the Switch always treats the port(s) as IGMP query port(s). This is for when © Copyright 2016 TRENDnet. All Rights Reserved.
- Page 45 The Open Shortest Path First (OSPF) AllSPFRouters address. Used to 224.0.0.5 send Hello packets to all OSPF routers on a network segment The OSPF AllDRouters address. Used to send OSPF routing information 224.0.0.6 to OSPF designated routers on a network segment © Copyright 2016 TRENDnet. All Rights Reserved.
- Page 46 Click Apply to save your changes back to the Switch. Refresh Click Refresh to begin configuring this screen afresh. CLI Configuration Node Command Description enable show mac-address-table This command displays the current multicast static/dynamic multicast address entries. © Copyright 2016 TRENDnet. All Rights Reserved.
- Page 47 ; Allow the port-3 to send its ingress packets to port-1 CLI Configuration Node Command Description Parameter Description enable show port- This command displays the current port isolation isolation configurations. Port Select a port number to configure its port isolation settings. © Copyright 2016 TRENDnet. All Rights Reserved.
- Page 48 The VLANs can be created statically by hand or dynamically through GVRP. should be members of the same VLAN. The network administrator typically performs the The VLAN ID associates a frame with a specific VLAN and provides the information that © Copyright 2016 TRENDnet. All Rights Reserved.
- Page 49 This command assigns ports for untagged enable show vlan VLANID This command displays the VLAN member of the VLAN group. The ports configurations. should be one/some of the permanent members of the vlan. © Copyright 2016 TRENDnet. All Rights Reserved.
- Page 50 Enter a descriptive name for the VLAN for identification purposes. VLAN Name The VLAN name should be the combination of the digit or the © Copyright 2016 TRENDnet. All Rights Reserved.
- Page 51 Refresh Click Refresh to begin configuring this screen afresh. Tag Status VLAN ID This field displays the VLAN ID. Tag Ports This field displays the ports that have been assigned as tag ports. © Copyright 2016 TRENDnet. All Rights Reserved.
- Page 52 This command creates a mac-vlan entry with the vlan VLANID priority leading three or more bytes of mac address and Refresh Click Refresh to begin configuring this screen afresh. <0-7> the VLAN and the priority. © Copyright 2016 TRENDnet. All Rights Reserved.
-
Page 53: Eee (Energy Efficient Ethernet)
EEE provides TI-PG541I(config)#mac-vlan 00:01:02:03:04 vlan 111 priority 1 the protocol needed to transition into and out of LPI mode in a way that is transparent to TI-PG541I(config)#mac-vlan 00:01:02:22:04 vlan 121 priority 1 upper layer protocols and applications. -
Page 54: Link Layer Discovery Protocol (Lldp)
Click this to reset the fields to the last setting. 5 Enable Enable CLI Configuration Node Command Description enable show lldp This command displays the LLDP configurations. enable show lldp neighbor This command displays all of the ports’ neighbor information. © Copyright 2016 TRENDnet. All Rights Reserved. - Page 55 Time To Live The hold time for the Switch’s information. Port The port range which you want to configure. State Enables / disables the LLDP on these ports. LLDP Status Port The Port ID. © Copyright 2016 TRENDnet. All Rights Reserved.
- Page 56 The connected port ID. Chassis ID The neighbor’s chassis ID. System Name The neighbor’s system name. System The neighbor’s system description. Description System The neighbor’s capability. Capabilities Management The neighbor’s management address. Address © Copyright 2016 TRENDnet. All Rights Reserved.
-
Page 57: Poe (Power Over Ethernet)
Mode A, Mode B, Mode A and Mode B modes (midspan) operating simultaneously Property 802.3af (802.3at Type 1) 802.3at Type 2 Power available at 12.95 W 25.50 W per mode Maximum 15.40 W 30.00 W per mode power delivered by © Copyright 2016 TRENDnet. All Rights Reserved. - Page 58 Schedule: The Switch allows user to arrange a week schedule to enable or disable the PoE low : The lowest priority. for the specific ports. Default Settings State : Disabled Total Power(W) Port State Status Priority ---- ----------- ---------- -------- © Copyright 2016 TRENDnet. All Rights Reserved.
- Page 59 ENABLE, the Switch will send power to the port. If the current time is not in the interval Click Apply to take effect the settings. between Start time and End Time, the Switch will not send power to the port. Refresh Click Refresh to begin configuring this screen afresh. Port: © Copyright 2016 TRENDnet. All Rights Reserved.
- Page 60 Check defined time period. start-time VALUE end-time VALUE on a specific day on the specific action (enable|disable) port. Users can enable or disable Time (Hour) the PoE on the time period. © Copyright 2016 TRENDnet. All Rights Reserved.
- Page 61 All: Send an alarm message to inform the administrator and then reboot the PD. Alarm: Just send an alarm message to inform the administrator. None: Keep Ping the remote PD but does nothing further. Reboot: Cut off the power of the PoE port, make PD rebooted. © Copyright 2016 TRENDnet. All Rights Reserved.
- Page 62 Power Delay function for the range of options have Reboot / Alarm / All /None. ports. When PD has been rebooted, the PoE port restored power after Power Off Time the Power Off Time time. © Copyright 2016 TRENDnet. All Rights Reserved.
- Page 63 Enables/Disables the PoE Power Delay for the specific ports. Time The delay time for the specific ports. Apply Click Apply to take effect the settings. Refresh Click Refresh to begin configuring this screen afresh. Power Delay Status © Copyright 2016 TRENDnet. All Rights Reserved.
-
Page 64: Monitor
This command displays alarm information. Example: TI-PG541I#show port-statistics Web Configuration Monitor > Alarm Packets Bytes Errors Drops Port ---- -------- -------- -------- -------- -------- -------- -------- -------- 3 1154 108519 1188 Parameter Description Alarm Information © Copyright 2016 TRENDnet. All Rights Reserved. -
Page 65: Port Utilization
The current port speed. Tx Drops The field displays the transmitted drop count. Utilization The port traffic utilization. Refresh Click this button to refresh the screen quickly. Refresh Click this button to refresh the screen quickly. © Copyright 2016 TRENDnet. All Rights Reserved. -
Page 66: Rmon Statistics
Show Show them. (bcast|mcast|bcast+mcast) the port. bcast – Broadcast packet. Clear Clear the RMON statistics for the port or a range of ports. mcast – Multicast packet. © Copyright 2016 TRENDnet. All Rights Reserved. - Page 67 Enables / disables the recovery function for the traffic monitor Recover State function on these ports. Configures the recovery time for the traffic monitor function on Recovery Time these ports.(Range: 1 – 60 minutes) © Copyright 2016 TRENDnet. All Rights Reserved.
-
Page 68: Management
attention. SNMP is a component of the Internet Protocol Suite as defined by the Internet System Location : TI-PG541I. (Maximum length 64 characters) Engineering Task Force (IETF). It consists of a set of standards for network management, System Contact : None. - Page 69 Type a System Contact for the Switch. TI-PG541I#configure terminal Apply Click Apply to configure the settings. TI-PG541I(config)#snmp enable TI-PG541I(config)#snmp community public rw trusted-host 192.168.200.106/24 Refresh Click this button to reset the fields to the last setting. TI-PG541I(config)#snmp trap-receiver 192.168.200.106 v2c public TI-PG541I(config)#snmp system-contact IT engineer...
-
Page 70: Snmp Trap
Click Delete to remove a specific Community String. IP Address This field displays the IP address of the remote trap station. This field displays the version of Simple Network Management Version Protocol in use. v1 or v2c. © Copyright 2016 TRENDnet. All Rights Reserved. -
Page 71: Mail Alarm
StartTLS Messages) Server Port : 25 Mail From POP3 Server (Incoming pop3.live.com Mail To Messages) Yahoo Mail Server: Authentication: Port: Trap Event Status: SMTP Server (Outgoing smtp.mail.yahoo.com ----------------------------------------------- Messages) System Reboot : Disabled. © Copyright 2016 TRENDnet. All Rights Reserved. - Page 72 IP address and configures 25 as Trap State Enables / disables the mail trap event states. the server’s TCP port. configure mail-alarm trap-event This command disables / enables mail (reboot|link- trap events. change|config.| firmware|login|port- blocked| alarm) (disable|enable) © Copyright 2016 TRENDnet. All Rights Reserved.
- Page 73 This command downloads a new copy of firmware fw <URL PATH> file from TFTP / FTP / HTTP server. Where <URL PATH> can be: ftp://user:pass@192.168.1.1/file http://192.168.1.1/file tftp://192.168.1.1/file Example: TI-PG541I#configure terminal TI-PG541I(config)#interface eth0 TI-PG541I(config-if)#ip address 172.20.1.101/24 © Copyright 2016 TRENDnet. All Rights Reserved.
- Page 74 Click “Upload configuration” in web management or do cli command, “archive download-config xxx”. Select the “Upload configurations file to your Switch”. Select the full path to your configuration file. Click the Upload button to start the process. © Copyright 2016 TRENDnet. All Rights Reserved.
-
Page 75: System Log
Switch. enable show syslog level The command displays the log message with In the Reboot screen, click the Reboot button. The following screen displays. LEVEL the LEVEL recorded in the Switch. © Copyright 2016 TRENDnet. All Rights Reserved. -
Page 76: User Account
The Switch allows users to create up to 6 user account. Log Level choose which log message to want see. The user name and the password should be the combination of the digit or the alphabet. © Copyright 2016 TRENDnet. All Rights Reserved. - Page 77 User This field displays the password. Password User This field displays the associated group. Authority Click the Delete button to remove the user account. Action Note: You cannot delete the last admin accounts. © Copyright 2016 TRENDnet. All Rights Reserved.
-
Page 78: Technical Specifications
MAC-based VLAN MAC address table: 8K entries Port isolation Jumbo frames: 10 KB Up to 256 VLAN groups, ID range 1-4094 Forwarding rate: 8.93 Mpps (64-byte packet size) © Copyright 2016 TRENDnet. All Rights Reserved. - Page 79 Up to 30W per port for PoE+ Mode A: Pins 1, 2 (V+) and pins 3, 6 (V-) PoE enable/disable per port setting, priority, scheduling, power delay, and PD alive check © Copyright 2016 TRENDnet. All Rights Reserved.
-
Page 80: Troubleshooting
Then click Use the following IP address, and make sure to assign your network adapter an IP address in the subnet of 192.168.10.x. Click OK Note: If you are experiencing difficulties, please contact your computer or operating system manufacturer for assistance. © Copyright 2016 TRENDnet. All Rights Reserved. -
Page 81: Appendix
From the Location drop-down list, select Automatic. 2. In the Network Preference window, next to "Show:", select Network Status. You'll see d. Select and view your Ethernet connection. your network status and your IP address settings displayed. © Copyright 2016 TRENDnet. All Rights Reserved. - Page 82 2. Select Ethernet from the list on the left. Example: ping –c 4 192.168.10.100 3. Click the Advanced button. 3. On the Ethernet tab, the Ethernet ID is your MAC Address. © Copyright 2016 TRENDnet. All Rights Reserved.
- Page 83 Country Code selection feature to be disabled for products marketed to the US/CANADA CE Mark Warning This is a Class A product. In a domestic environment, this product may cause radio interference, in which case the user may be required to take adequate measures. © Copyright 2016 TRENDnet. All Rights Reserved.
- Page 84 TI-PG541i TRENDnet User’s Guide reikalavimus ir kitas 2014/30/EU ir 2004/108/EB Direktyvos TRENDnet tímto prohlašuje, že tento TI-PG541I je ve shodě se Česky [Czech] nuostatas. základními požadavky a dalšími příslušnými ustanoveními směrnice 2014/30/EU a 2004/108/ES. Hierbij verklaart TRENDnet dat het toestel TI-PG541I in Nederlands overeenstemming is met de essentiële eisen en de andere...
- Page 85 An RMA number is required in order to initiate warranty service support the event that the RMA unit needs to be replaced, TRENDnet may replace it with a for all TRENDnet products. Products that are sent to TRENDnet for RMA service must refurbished product of the same or comparable model.
- Page 86 OF SUCH DAMAGES, AND LIMITS ITS LIABILITY TO REPAIR, REPLACEMENT, OR REFUND evidence of the original purchaser's date of purchase. Replacement products may be OF THE PURCHASE PRICE PAID, AT TRENDNET'S OPTION. THIS DISCLAIMER OF LIABILITY refurbished or contain refurbished materials. If TRENDnet, by its sole determination, is...
Need help?
Do you have a question about the TI-PG541i and is the answer not in the manual?
Questions and answers