Advertisement
Quick Links
Advertisement

Related Manuals for TRENDnet TI-PG1284i


Summary of Contents for TRENDnet TI-PG1284i
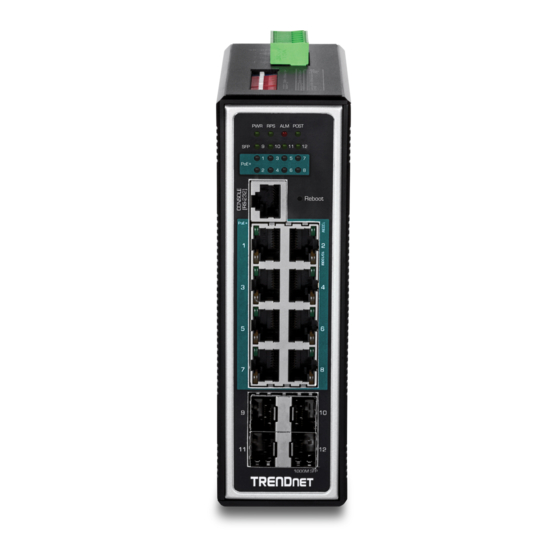
- Page 1 Quick Installation Guide TI-PG1284i...
-
Page 2: Table Of Contents
Table of Content 1 English 1. Before You Start 2. Quick Reference 3. Hardware Installation 4. Hardware Configuration 5. Additional Information... -
Page 3: Before You Start
1. Before You Start Package Contents TI-PG1284i Ÿ Quick Installation Guide Ÿ CD-ROM (User's Guide) Ÿ Console cable Ÿ Minimum Requirements Power supply (ex. model TI-S24048) Ÿ Networked computer Ÿ RJ-45 Network Cable Ÿ Optional Equipment 35 mm DIN-Rail Ÿ... -
Page 4: Hardware Installation
1 will receive the highest priority and port 8 will receive the lowest priority. The ports with lower priority will have its PoE function disabled until more than 7.5 watts of power becomes available. The TI-PG1284i can be placed on a desktop, wall, or mounted to a DIN-Rail. DIN-rail Mounting Instructions 1. - Page 5 3. Rotate the TI-PG1284i downward towards the rail to lock it into place. You will know it is secure when you hear the click. Mounting the unit Releasing the unit 4. To remove the unit, pull down to clear the bottom of the DIN-Rail and rotate away from the rail.
- Page 6 Optional: The switch chassis can also be connected to a known grounding point for additional safety and protection (grounding wire is not included) Safety Note Turn off the power before connecting any module or wire. The correct Ÿ power supply voltage (48 – 57 V DC) is listed on the product label. Check the voltage of your power source to make sure that you are using the correct part.
-
Page 7: Hardware Configuration
4. Hardware Configuration 2. Assign a Static IP address to your computer's network adapter in the subnet of 192.168.10.x (e.g. 192.168.10.25) and a subnet mask of 255.255.255.0. 3. Open your web browser, type the IP address of the switch in the address bar, and then press Enter. - Page 8 5. Click Basic Settings and then click General Settings. Basic Settings General Settings 6. Configure the switch to match the requirements of your network. Then click Apply. Apply 7. Click Save. Save 8. Connect a network source and devices to the switch. Check the LEDs to confirm the connections are established.
-
Page 9: Additional Information
5. Additional Information 1. Redundant power inputs 48-57VDC Terminal Block Redundant Power Input: “Terminal Block (PWR)” as primary power and “Terminal Block (RPS)” for secondary power source, to be a redundant power Input. 2. DIP Switch ON: Primary power alarm enabled OFF: Primary power alarm disabled ON: Redundant power alarm enabled OFF: Redundant power alarm disabled... - Page 10 Note: To download the latest version of the user's guide, please go to http://www.trendnet.com/support and select the TI-PG1284i within the Products Download dropdown list. For detailed information regarding the TI-PG1284i's configuration and advanced settings, please refer to the User's Guide on the provided CD-ROM.
- Page 11 12-Port Hardened Industrial Gigabit PoE+ Layer 2+ Managed DIN-Rail Switch Trade Name: TRENDnet TRENDnet hereby declare that the product is in compliance with the essential requirements and other relevant provisions under our sole responsibility. EN 55011: 2009 + A1: 2010 (Group 1, Class A)
- Page 12 Limited Warranty TRENDnet warrants its products against defects in material and workmanship, under normal use and service. Specific warranty periods are listed on each of the respective product pages on the TRENDnet website. Garantie Limitée TRENDnet garantit ses produits contre les problèmes de matériel ou de fabrication, dans des conditions normales d'utilisation et de service.
- Page 13 Safety notes Before using your TRENDnet device for the first time, it is essential to read and understand all safety and operating instructions. Keep instructions in a safe place for future reference. Some TRENDnet products are rated for outdoor applications and can sustain certain weather conditions.
- Page 14 Technical Support Product Warranty Registration If you have any questions regarding the product Please take a moment to register your product online. Go to TRENDnet’s website at: installation, please contact our Technical Support. Toll free US/Canada: 1-866-845-3673 www.trendnet.com/register Regional phone numbers available at www.trendnet.com/support...
Need help?
Do you have a question about the TI-PG1284i and is the answer not in the manual?
Questions and answers