
Related Manuals for Premier Mounts AM300-B


Summary of Contents for Premier Mounts AM300-B
- Page 1 AM300-B Installation Guide www.mounts.com | North America 800.368.9700 | International +1-714-632-7100 9531-007-001-0X v11.1 2620 Palisades Drive, Corona, CA 92882 USA publ. 12/19/18...
- Page 2 EQUIPMENT AND TOOLS FOR THE ASSEMBLY PROCEDURE TO PREVENT PERSONAL INJURY. PREMIER MOUNTS DOES NOT WARRANT AGAINST DAMAGE CAUSED BY THE USE OF ANY PREMIER MOUNTS PRODUCT FOR PURPOSES OTHER THAN THOSE FOR WHICH IT WAS DESIGNED OR DAMAGE CAUSED BY UNAUTHORIZED ATTACHMENTS OR...
-
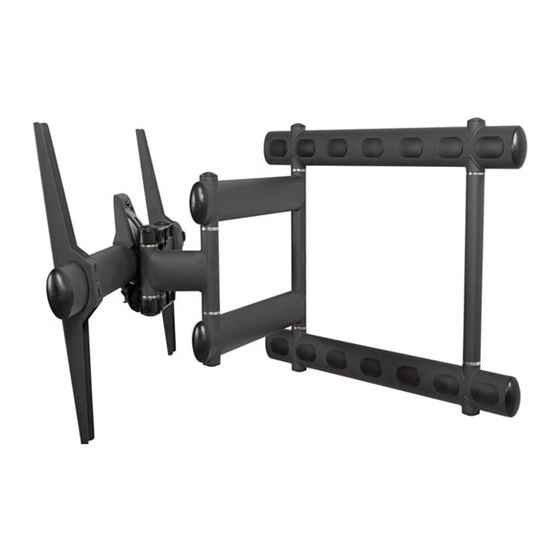
Page 3: Included Components
AM300-B Installation Guide Maximum Flat Panel Weight: Included Components: 300 lb. / 136 kg. x1 Pair Swingout Mount Mounting Universal Bracket Extension M10 x 30mm Bracket Adapter M4 x 16mm M4 x 20mm M4 x 30mm Griplate™ M8 Nylon Nut... -
Page 4: Mount Orientation
AM300-B Installation Guide Mount Orientation Swingout Arm can be oriented to open from either the left-hand or right-hand side. Simply invert and re-orient the Nose Piece. Proceed to the “Nose Piece Orientation” section. Nose Piece Upright Orientation Right-Hand Swingout Arm Orientation... - Page 5 AM300-B Installation Guide Wood Installation Minimum of two (2) 2x4 wood stud to be used Secure the mount to two (2) wall studs with a minimum of four (4) 5/16" x 3" Hex Lag into the studs. Do not overtighten.
- Page 6 AM300-B Installation Guide Place the Mount against the wall and align it with the pilot hole. Insert one (1) 5/16"x 3˝ Hex lag and one (1) 5/16" washer into the upper right pilot hole. Use a socket wrench and a 1/2" socket to tighten the hex lag.
-
Page 7: Concrete Installation
AM300-B Installation Guide Concrete Installation Two people are recommended for this step: one person to level the wall plate and another person to mark the mounting locations. Drill four (4) pilot holes of each mark using a drill and 3/8”... -
Page 8: Selecting The Mounting Hardware
AM300-B Installation Guide Selecting the Mounting Hardware 1) Insert a small straw or toothpick into the threaded inserts found on the back of the flat panel. 2) Use a pencil to mark the depth of the threaded insert on the small straw or toothpick. -
Page 9: Griplate™ Washer Installation
™ Dimple Orientation Bracket Premier Mounts’ Griplate™ washers are designed to accommodate the various M4, M5, M6 and M8 hole sizes required by flat panels. Do not place excessive pressure on the back of the flat panel, as Flat Panel this may damage your flat panel. -
Page 10: Universal Bracket Installation
AM300-B Installation Guide Does the flat panel have a mount pattern for the mount points greater than 506mm high x 876mm wide? If No, proceed to the “Universal Bracket Installation” section. If Yes, proceed to the “Adapter Plate Installation (Optional)” section. -
Page 11: Adapter Plate Installation
AM300-B Installation Guide Set Screws 1) Center the Universal Bracket Bar. 2) Use the 5/32" Allen wrench to tighten the set screws that are located on the back of each Universal Bracket. Do not overtighten the set screws. Adapter Plate Installation Attach the Adapter Plates to the flat panel using Griplates™... - Page 12 AM300-B Installation Guide 1) Place the Universal Bracket assembly on the back of the display, with the threaded mount studs on the Adapter Plates passing through the mount slots on the Universal Brackets. 2) Place one (1) 5/16" washer and one (1) M8 Nylon nut on each threaded mount stud.
- Page 13 AM300-B Installation Guide Attaching the Flat Panel to the Swingout Arm Caution ! The following procedure requires two people. Warning ! The M6 x 12mm screw and lock washer must be installed otherwise the flat panel can be easily dislodged, causing serve personal injury and/or properly damage.
-
Page 14: Cable Management
AM300-B Installation Guide Tilting Positioning Before making any tilt adjustments, loosen both tension bolts nut one-half turn. Adjusting the Tilt Angle 1) Place one hand at the center top edge of the flat panel. 2) Place the other hand on the center bottom edge of the flat panel. - Page 15 This warranty gives you specific legal rights, and you may also have other rights which vary from state to state. Premier Mounts intends to make this manual accurate and complete. However, Premier Mounts makes no claim that the information contained herein covers all details, conditions or variations, nor does it provide for every possible contingency in connection with the installation or use of this product.
Need help?
Do you have a question about the AM300-B and is the answer not in the manual?
Questions and answers