Advertisement
Quick Links
Advertisement

Related Manuals for Whirlpool UltraPure AP33


Summary of Contents for Whirlpool UltraPure AP33
- Page 1 P/N 784003680-00R...
-
Page 2: Air Purifier Safety
Air Purifier Safety Various symbols are used throughout this manual and on the product to alert you to measures for safe use. These symbols are shown below as prohibited or recommended. Please read this section carefully and follow all instructions. Your safety and the safety of others are very important We have shown a number of important safety tips in this manual and on your appliance. - Page 3 In order to prevent damage to property or persons, be sure to observe the following warnings. Actions Recommended Actions prohibited WARNING Unplug before cleaning, inspecting Only qualified personnel are to repair or moving the unit. this machine. Do not use mains voltage other than Do not touch the mains plug or that specified.
- Page 4 WARNING Do not use in wet places such as the Do not operate in the vicinity of bathroom. smoke-producing insecticide machines. This unit cannot eliminate Do not place near fish tanks, carbon monoxide. So if a fire vases or water containers. is lit in the same room, ensure proper ventilation.
- Page 5 WARNING Position at least 2 meters away from The machine must not be allowed to television, radio or similar. ingest dehumidifier steam. To move, unplug the unit, grip it by Keep the remote in a safe place out the handhold on the back or hold of the reach of children.
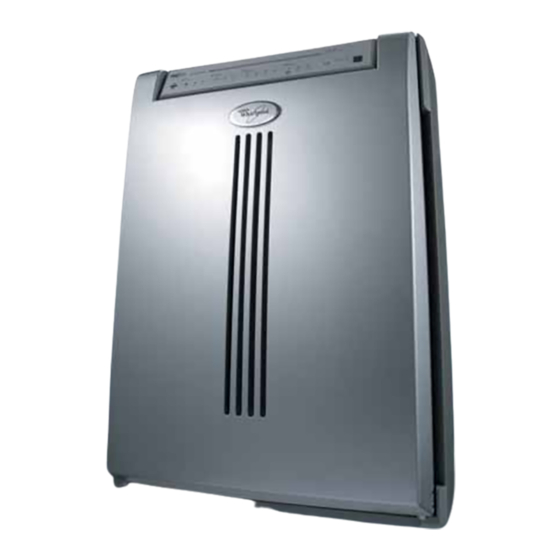
- Page 6 Parts and Terms ■Front ■Back Main Unit Remote control Operation panel Sensor sensibility switch Safety switch Air outlet Gas sensor Remote Cleanness level lamp control Front Cover holder UV light Filter Air Inlet Photocatalyst filter Dust sensor Cord holder Power cord Belt Plug 3-in-1 filter...
-
Page 7: Preparation Before Using
Preparation Before Using Before using be sure to remove the 3-in-1 filter from its bag ※ Unplug the unit before installing the filter 1. Removing the 3-in-1 filter Finger piece *Place the unit in a stable location. 1. To remove front coverDepress the finger pieces at bottom of cover to release it, then pull to remove. - Page 8 Installing remote control battery Remove the transparent sheet protecting battery power. The battery is pre-installed in the remote control. Transparent sheet Replacing battery 1. Remove battery holder from back of remote. 2. Insert new battery correct side up. 3. Replace cover. Battery + pole must align with mark on holder About the battery...
-
Page 9: Installation
Installation Can be put on the floor or the desk. Do not use the remote control in the following places Rooms exposed to Rooms with fluorescent light, especially inverter typeThis direct sunlight.This may cause remote may cause remote failure. Keep away failure. - Page 10 Panel and operation Cleanness light Smells and dirt are shown in 3 levels Power/mode key Clean Green Green To turn on and off, select operating mode and change airflow. Green Remote control receiver Negative ion light Gas sensor Illuminates in ion generation mode. Can only be set with the remote Reset key control.
- Page 11 To Operate Following stable installation, insert the mains plug. Operation by the main unit Press the power/mode key for automatic operation. Sensors take about 30 seconds to start working. Press the key again to change operation as follows: Anti Allergy(AA) Turbo Stop mode: sets airflow according to air quality.
- Page 12 Operation with remote control ON key .Press to start automatic mode. .When first switching on, you will find the cleanness level light flashes for 30 seconds before display appears. .If the main unit is set to manual, press this key to change to automatic. Anti ALLERGY (AA) key ....
-
Page 13: Maintenance
Maintenance Cleaning the unit periodically maintains efficient operation. Proper cleaning function is disrupted by accumulation of dirt, so clean frequently. Unplug before cleaning. Front cover (once a month) 1. Unplug from the mains 2. Clean front cover Clean air inlet with vacuum cleaner. Remove if dirty (see page 5 , 6) and wash in cold water. - Page 14 Dust sensor 2. Carefully use a swab to wipe the shiny 1. Remove sensor cover on right of unit. surface of the lens. 1 Push to release latch 2 Pull in arrow direction 3 Pull forwards Lens 3. Replace sensor cover on unit Sensor may malfunction without cover.
- Page 15 3-in-1 filter 3. Clean the pre-filter Remove pre-filter from unit and clean with vacuum cleaner, or wash in cold water. 4. Clean the 3-in-1 filter Clean with vacuum cleaner without removing from unit. Note Do not apply pressure with vacuum cleaner, and do not damage the filter when washing.
-
Page 16: Filter Replacement
Filter Replacement Filter replacement time When the filter is dirty, the light illuminates. Time until illumination depends on air quality. The state of filter is saved even when unit is unplugged or moved. Conditions leading to shorter replacement period: Soot or the like is ingested. Filter replacement light If used in busy places such as restaurants, games halls and beauty salons. -
Page 17: Troubleshooting
Troubleshooting Warning Do not repair or disassemble without qualified assistance. When this happens check .Is there a power failure (perhaps caused by fuse or circuit The unit does not work breaker)? .Is it plugged in? .Are filter and front cover securely fitted? .Has filter been removed from bag? Unit does not remove .Has 3-in-1 filter been installed backwards? - Page 18 When it happens check When using in a dirty place other than ordinary domestic Cleaning light or situations the light might illuminate early. replacement reminder light Are Turbo and High used frequently? Even if room is clean, illuminates too soon if operated on High or Turbo, light illuminates early Foreign objects have Switch off and seek help from your service agent.
-
Page 19: Specifications
Model: APF003H .AP33 Charcoal Filter please indicate which item you require to Model: APF002C Whirlpool spare parts department. Tel: 24063861/24063862 Correct disposal of this product This symbol indicates this product should not be disposed of with other domestic waste anywhere in the EU. To prevent possible damage to the environment or human health from uncontrolled waste disposal, help by recycling responsibly. - Page 24 零件和各部名稱 ■正面 ■背面 主機 遙控器 控制板 感應器開關 安全開關掣 出風口 氣體感應器 遙控器座 清淨度指示燈 前面板 紫外燈 過濾器 入風口 光觸媒濾網 微塵感應器 電線座 電線 帶子 插頭 3合1濾網 前置濾網 鉤子 指壓位 ■配件 ■濾網 濾網 可清洗前置濾網(無需更換) 3合1濾網 活性碳濾網 光觸媒濾網(無需更換) 隔濾大顆粒物質如頭髮 *去除難聞氣味 利用紫外線抑制細菌、 1 納米銀濾網 及肉眼可見的塵埃 微生物、桿菌及病毒活動。 壓抑細菌活動...
- Page 25 使用前的準備 ※使用前,請確保已除去3合1濾網的包裝袋。 安裝濾網前,請確保已拔掉插頭 1. 移除3合1濾網 指壓位 *把本產品放置在平穩的地方。 1. 移除前面板 按下前面板下方的指壓位,令前面板下方鬆脫, 然後將它拉出。 2. 移除前置濾網 3.移除3合1濾網的包裝袋。 從主機的孔口, 移除濾網兩側的6個 卡爪。 2. 把3合1濾網安回主機 1. 將濾網的正面(FRONT)向外。切勿倒轉安裝或令濾網變形。 2. 安裝前置濾網 把前置濾網兩側的卡爪插入主機的孔中。 3. 安裝前面板 將前面板上方的兩側,鉤上主機的頂部,然後把鉤子繫緊在主機的下方。 *前面板還未裝妥時,本機不能運作。 3. 3合1濾網與活性碳濾網配合使用指引 *使用前請將濾網塑膠 袋拆掉,方可開機。 *閣下可選擇單獨使用 背面 3合1濾網或加活性碳 濾網配合使用。 包裝袋內,放有1個4角貼上單面魔術貼的 活性碳濾網,及4張獨立擺放的單面魔術貼。 背面 背面 正面...
- Page 27 安裝 可以將本產品放置在地上或桌上 請避免在以下地方使用遙控器 受陽光直接照射的房間 裝有螢光燈,尤其是倒吊式照明工具的房間 這些照明產品可能會導致遙控器失效。請讓 陽光照射可能令遙控器 遙控器與照明產品 失效。 保持適當距離,或 嘗試改變方向使用。 安裝貼士 根據空氣污染程度及為了保持空氣清潔而安裝此機 *如果房間有微小灰塵或臭味如煙味等,請安裝在地面1米以上的位置。 *如果房間有較大顆粒的灰塵,如花粉、塵埃或類似灰塵,則安放在房間內接近地面的位置。 與電視或收音機保持1米距離,以避免受電 避免放置在強風直接吹著感應器的地方,因 波干擾。 為可能會引起故障。 1米或以上 避免放置在窗簾或類似物 微塵感應器在主機的 與離牆壁保持10cm距離 件附近,因本產品可能會 右下位置。 避免把 弄髒窗簾或發生故障。 它放置在牆壁或傢 俱附近。與牆壁保 持10厘米距離。 選擇空氣流通良好的地方放置本產品。如果安有冷氣 把此機放置在吸煙區,此機便能快 機,如右圖般放置 速探測到污物。 會令空氣流通效果 更佳,而且會改善 灰塵感應器的探測 效果。空氣循環效 果。 空氣循環效果...
- Page 30 使用遙控器操作 開啟按鈕 . 按下自動啟動模式。 . 如在"關上"狀態按此按鈕,潔淨度指示燈 會閃動30秒,然後再顯示清淨度。 . 如果主機已設在手動運作模式,請按按鈕 切換至自動模式。 抗敏模式 . 在自動或手動模式時,按下本按鈕啟動抗 敏模式。 *按下按鈕,然後放開時本機便會運作。 請按下按鈕及鬆開按鈕。 風速按鈕 . 按下按鈕把風量調節至低、中、高或極強級數。 低( ) 中( ) 高( ) 極強( ) .無論內部潔淨狀態如何,本機都會根據選定的風量運作。 時間掣按鈕 . 在運作期間可設定本機的自動停止運作時間。可以設定1小時、4小時或8小時。 . 每按一下按鈕,設定時間便會隨之改變。 1小時 4小時 8小時 結束 停止按鈕 . 按下按鈕停止運作。 負離子按鈕...
- Page 33 3合1濾網 3. 清洗前置濾網 請把前置濾網從主機中移除, 及使用吸塵機清洗前置濾網。 如前置濾網堆積塵垢,請使用冷水清洗。 4. 清潔3合1濾網 請在3合1濾網並沒從主機移除的情況下, 使用吸塵機清潔濾網。 注意 為防損害濾網,切勿將吸塵機在濾網過份擠壓及以不要用水沖洗濾網。 5.安裝前置濾網 請把前置濾網兩側的卡爪插入主機兩側的孔內。 *請把緊扣在醫療級HEPA濾網的帶子小心地取出,切勿將它弄斷。 6.緊扣前面板 請把前面板的上方與主機的上方緊合,然後按下兩邊直至下方 的掛鉤穩固插入主機。 7. 清洗濾網清潔指示燈 當您把插頭插入電源插座後, 請啟動電源/ 模式按鈕及濾網清潔指示燈,及使用曲別針按下重設按鈕。 取出曲別針時,會發出聲響。 請檢查取出曲別針時,有否發出聲響及濾網 清潔指示燈有否關閉。 * 請勿把按鈕按下5秒或以上的時間 (此做法會重設過濾器更換時間) 濾網重設按鈕 清洗時間會因應房間骯髒情況而有所不同。請定期清理房間。...
- Page 35 疑難排解 警告 切勿自行維修及拆卸本機 疑難 請檢查 .有否停電(保險絲、斷路器有否燒落) ? 本機無法運作 .電源插頭是否鬆脫? .濾網及前面板是否確實安裝妥當? .濾網有否從袋中取出? 難以去除氣味或煙味 .3合1濾網是否反轉安裝? .濾網是否骯髒? .出風口有否堵塞? .房間是否太大?(請進行手動超強操作) .房間是否充斥大量煙味? .本機運作期間,紫外線燈有否正常運作? (如紫外線燈運作失靈,請聯絡本公司) .請在相對清潔的房間,使用本機進行約8小時的運作,以恢 復光觸媒濾網的性能。(當本機吸入大量氣味,氣味分解能 力可能會暫時性減低) .本機是否安放在難以感應香煙等塵埃氣味的位置? 即使用戶正在吸煙, .氣體感應器孔口或微塵感應器孔口有否關閉或堵塞? 本機也不能清除煙味 (請參閱第11及12頁的指引進行清洗) .感應器的感應度是否調至 "低"的位置? .感應器對化妝品、香水、酒精、滅蟲噴霧等物質會產生化 即使空氣清潔,但本機的 學作用。(請更改感應器設定及房間通風系統等) 清淨度仍顯示骯髒 .在剛接通電源後,本機的清潔指示燈會因感應探測而顯示 骯髒。 .當空氣回復潔淨,清潔指示器會會回復清潔水平。 運作聲音太大 .本機是否安裝在不穩定地方? .濾網是否極度骯髒? .電池是否耗盡? 遙控器無法運作...
- Page 37 規格 當插上電源插頭時,電路會自動運作,約耗用2伏特的電量。 電量 220-240V 50Hz 瓦特 (超強/強/標準/低) 100/40/30/20 W 外觀尺寸 410 (闊) x 220 (深) x 550(高) 毫米 產品重量 7.5 Kg 配件 ・AP33: 3合1濾網 型號: APF003H ・AP33 活性炭濾網 型號: APF002C 請在指定的惠而浦零件部購買 電話: 2406 3861 / 2406 3862 本產品的正確棄置方法 在歐盟國家,此標記表示本產品不能與其他家居廢物一同棄置。為防止未經 檢查的廢物有可能對環境或人體健康造成損害,請妥善把本產品循環再用, 以鼓勵原料的持續可用性。如欲回收舊產品,請把產品交回服務代理商。他...
Need help?
Do you have a question about the UltraPure AP33 and is the answer not in the manual?
Questions and answers