Advertisement
Quick Links
※ご使用前にこの説明書を良くお読みになり十分に理解してください。
Before commencing assembly, please read these instructions thoroughly!
THE FINEST RADIO CONTROL MODELS
LENGTH : 930mm
RADIO CONTROLLED ELECTRIC POWERED RACING BOAT
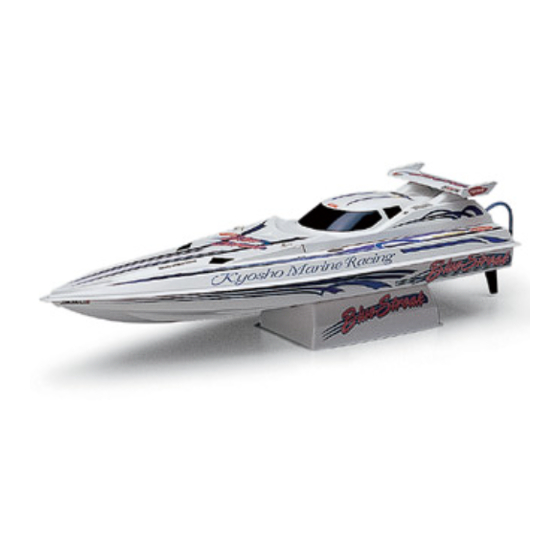
EP BLUESTREAK 800
目 次 INDEX
●キットの他にそろえる物
REQUIRED FOR OPERATION
●組立て前の注意
BEFORE YOU BEGIN
●プロポの準備
RADIO PREPARATION
●本体の組立て
ASSEMBLY
●ニカドバッテリーの取扱いの注意
PRECAUTIONS WHEN USING A NI-CD BATTERY
●電動ボートの取扱い
HOW TO HANDLE ELECTRIC POWERED BOATS
●スペアパーツ・オプションパーツリスト
SPARE PARTS & OPTIONAL PARTS
安全のための注意事項
この無線操縦模型は玩具ではありません!
●この商品は高い性能を発揮するように設計されていますので組立てに不慣
れな方は、模型を良く知っている人にアドバイスを受け確実に組立ててく
ださい。
●組立て作業は、幼児の手のとどかない所で行ってください。
●動かして楽しむ場所は万一の事故を考えて、安全を確認してから責任をも
ってお楽しみください。
●組立てた後も説明書がいつでも見られるように大切に保管してください。
¥不要になったニカド電池は、貴重な資源を守るために廃棄しないでリサイクル協力店へお持ち下さい。
¥The product you have purchased is powered by a rechargeable battery. The battery is recyclable. At the end of its useful life, under
various national / state and local laws, it may be illegal to dispose of this battery into the municipal waste stream. Check with your local
solid waste officials for details in your area for recycling options or proper disposal.
Ni-Cd
※製品改良のため、予告なく仕様を変更する場合があります。 *SPECIFICATIONS ARE SUBJECT TO CHANGE WITHOUT NOTICE.
© 2000 KYOSHO/禁無断転載複製
R
●
●
●
●
INSTRUCTION MANUAL
SAFETY PRECAUTIONS
This radio control model is not a toy.
First-time builders should seek the advice of experienced modellers before commencing
assembly and if they do not fully understand any part of the construction.
Assemble this kit only in places out of children's reach!
Take enough safety precautions prior to operating this model. You are responsible for this
model's assembly and safe operation!
Always keep this instruction manual ready at hand for quick reference, even after
completing the assembly.
EP
ELECTRIC
POWER
VERSION
組立/取扱説明書
EPブルーストリーク800
18〜19
20〜21
No. 40901
2
2〜3
3
4〜16
17
Advertisement

Related Manuals for Kyosho EP BLUESTREAK 800


Summary of Contents for Kyosho EP BLUESTREAK 800
- Page 1 Before commencing assembly, please read these instructions thoroughly! POWER VERSION THE FINEST RADIO CONTROL MODELS 組立/取扱説明書 LENGTH : 930mm INSTRUCTION MANUAL RADIO CONTROLLED ELECTRIC POWERED RACING BOAT EPブルーストリーク800 EP BLUESTREAK 800 目 次 INDEX ●キットの他にそろえる物 REQUIRED FOR OPERATION 2〜3 ●組立て前の注意 BEFORE YOU BEGIN ●プロポの準備 RADIO PREPARATION 4〜16...
-
Page 2: Required For Operation
Read through the manual before you begin, so 当社「ユーザー相談室」までご連絡ください。 you will have an overall idea of what to do. Check all parts. If you find any defective or missing parts, contact your local dealer or our Kyosho Distributor. 説明書に使われているマーク Symbols used throughout the instruction manual, comprise: をカットする。... -
Page 3: Radio Preparation
BEFORE YOU BEGIN (2) 組立て前の注意(2) TPビスは、部品にネジを切りながらしめつけるビス このキットには、形のちがうビスや長さがちがうビス が多く入っています。原寸図で確かめてから組立てて です。しめこみが固い場合がありますが、部品が確実 ください。ビス類は多めに入っているものがあります に固定されるまでしめこんでください。ただし、しめ ので、予備としてお使いください。 すぎるとネジがきかなくなりますので、部品が変形す This kit contains many screws in and other hardware るまでしめないでください。 Self-tapping (TP) screws cut threads into the parts different metric sizes and shapes. For your reference, the figures in the manual show actual sizes. (Some when being tightened. - Page 4 ギヤボックス Gear Box 3x8mm を奥まで入れる。 Make sure the Stopper fits as shown. 4 x 8 x 3mm ステンレスベアリング Stainless Bearing 3x8mm 2 4 x 9 x 4mm カラー Collar 3 2 x 11mm 平行ピン 3 x 8mm TPビス TP Screw ギヤボックス...
- Page 5 ギヤボックス 説明書の端をカット。 Gear Box Cut a slip of paper from a page of this manual. 3 x 6mm ビス Screw 3x6mm 3x6mm 3x6mm ギヤを押しつけながら3x6mmビスを締める。 Insert the paper between the gears and tighten them with the 3x6mm screws. ギヤボックス Gear Box の接着面をサンド...
- Page 6 E3 Eリング ラダー E-ring Rudder Eリング E-ring 26 4 x 8mm メタル Metal Bushing 向きに注意。 Note the direction. 上 E3 Eリング E-ring ラダー Rudder すき間を 3 x 14mm ビス ナット あけない。 Screw Make sure that there is no gap. 3x14mm ラダー...
- Page 7 船体 六角レンチ (2.0mm) Hull Hex Wrench (2.0mm) 4 x 4mm セットビス 4x4mm Set Screw 31 3mm グロメット Grommet ロッドガイド Rod Guide 4x4mm 平らな面にセットビス を固定する。 Firmly tighten the set screw onto the flat spot. 船体 Hull 4 x 4mm セットビス Set Screw パイプジョイント...
- Page 8 ギヤボックス 船体 Gear Box Hull ここでは接着しない。 Don't pour instant glue at here. 4 x 4mm セットビス Set Screw 六角レンチ(2.0mm) Hex Wrench (2.0mm) 平らな面にセットビス を固定する。 Firmly tighten the set screw onto the flat spot. 4x4mm 接着面に油分や汚れをつけない。 Glued surface should be free from any oil residues and dirt.
- Page 9 シリコンチューブ (110mm) シリコンチューブ (5mm) 船体 Silicone Tube (110mm) Silicone Tube (5mm) Hull シリコンチューブ Silicone Tube 110mm 2.6x8mm カットする。 Cut off. 2.6 x 8mm ビス 2.6mm Screw 2.6mm ナット 31 3mm グロメット Grommet 3x12mm パイプジョイント Pipe Joint 2.6mm 3x12mm 軽く動く位置で3x12mmTPビス4本を締める。 Tighten the 3x12 TP Screws and make sure the 12mm easy movement of rudder to the directions as arrows show.
- Page 10 メカボックス スポンジテープ Radio Box Sponge Tape アンテナグロメット すき間が無い様に貼る。 Antenna Grommet Apply sponge tape around the entire rim, leaving no gaps. スポンジテープ Sponge Tape メカボックス Radio Box 3 x 8mm TPビス サーボ付属 TP Screw Supplied with the servo. 3x8mm 3x8mm この穴を使う。 Use this hole.
- Page 11 3x8mm メカボックス Radio Box 3 x 8mm TPビス 3x8mm TP Screw スピードコントロールサーボ Speed control servo. 3x8mm 3x16mm メカボックス Radio Box 3 x 16mm TPビス TP Screw 赤 黒 Black メカボックス ナイロン 受信機 Radio Box ストラップ Receiver Nylon Strap 電池ボックス Battery Box ナイロンストラップ...
- Page 12 メカボックス Radio Box Oリング P2 O-ring P2 Oリング P5 O-ring P5 スイッチ Switch 向きに注意。 < > < > Note the direction. スイッチに付属のビス。 Supplied with the switch. メカボックス スイッチ Radio Box Switch 15mm 電池ボックス Battery Box プロポの説明書を参考に、 コネクターを接続する。 Connect as per radio instruction manual.
- Page 13 船体 位置を合わせて接着。 Hull Make sure the position is correct; then, glue into place. 3 x 3mm セットビス Set Screw メカボックス Radio Box 船底 Bottom 船底と のすき間をあけない。 Make sure that there is no gap. 185mm 同色のコードどうしをつなぐ。 Connect cords of the same color with each other.
- Page 14 船体 Hull 2.6x8mm 7.2Vニカドバッテリー 位置を合わせて固定。 7.2V Ni-Cd Battery Install the battery tray at the position shown. コード、 シリコンチューブを の外に通す。 Leave the cords and silicon tube outside of band 走行時のみコネクター をつなぐ。 Connect the cords only when running the boat. 2.6 x 8mm TPビス...
- Page 15 キャビン Cabin 船体 Hull 船体 Hull ボディピン 曲げる。 Body Pin Bend 船台 Stand 瞬間接着剤で接着する。 をカットする。 Apply instant glue (CA glue, super glue). Cut off shaded portion.
- Page 16 図の位置にデカールをはる。 ナンバーのついていないデカールは好きな位置に貼る。 デカール Apply the decals to the spots indicated. Decals with no number apply any place. Decals カッコの中は反対側用のデカールナンバーです。 The decal numbers between brackets are only for the opposite side. 1 27 3 25 31 9 26 2 24 30 8 44 45 42 43 28 29...
- Page 17 取扱いの注意 OPERATING YOUR MODEL SAFELY 事故やケガ等の危険防止のため、次のことを必ずお守りください。 In order to avoid accidents and personal injury, be sure to observe the following: ●次のような時や、次のような場所では絶対に走航させ ●R/Cボートは、湖や河川などの水辺で楽しむものです。 操縦する方や同行の方が思わぬ事故に合わないように ないでください。思わぬ事故やケガの原因となります。 注意し、必ず安全な場所で走航させてください。 For accident prevention, do not run your model under With R/C boats, discover a new world of pleasure. the following circumstances: Wheth- e r you run your boat on lakes, rivers or else- 人が多い場所。...
- Page 18 走行前のチェック PRE-RUN CHECKLIST Are all screws securely tightened? ゆるんでいるビスはありませんか。 Are the radio batteries fully charged? プロポの電池はありますか。 Is the Ni-Cd battery fully charged? ニカドバッテリーの充電はしていますか。 Does the rudder operate according to your inputs ラダーの動きはプロポの動きとあってますか。 on the transmitter? スピードコントローラーの動きはプロポの動き Does the speed controller operate according to your とあってますか。...
-
Page 19: Troubleshooting
日常の整備 EVERYDAY MAINTENANCE Make sure screws and nuts are securely tightened ねじ、ナットのゆるみ、老化をチェック。 回転部分にはグリスを塗っておく。 and other parts are not worn. コードが可動部分にこすれたりして破損している Grease all rotating parts. ときは修理する。 Repair the wiring should cords be damaged or drag サーボのコードや受信機のアンテナ線が破損して into rotating parts. いるときは、使用しているプロポメーカーに修理を Should servo cords and the receiver antenna be 依頼する。... - Page 20 SPARE PARTS スペアパーツ *FOR JAPANESE MARKET ONLY. 品番 パーツ名 内容(キーNo.と入数) ★定価 ★発送 品番 パーツ名 内容(キーNo.と入数) ★定価 ★発送 Description Description 手数料 手数料 Part Names Part Names (Key No. & Qty.) (Key No. & Qty.) プラパーツ (A) 49 50 56 61 62 63 64 AL-5 A x 1 Plastic Parts (A)
-
Page 21: Optional Parts
OPTIONAL PARTS オプションパーツ *FOR JAPANESE MARKET ONLY. 品番 パーツ名 内容 ★定価 ★発送 品番 パーツ名 内容 ★定価 ★発送 Part Names Description 手数料 Part Names Description 手数料 Kスピード と交換, ベアリング入14ターン モーターブラシクーラー オプションモーターの水冷用 70875 6000 94801 2800 instead of , Ball Bearing. Motor Brush Cooler for water-cooled motor ヘリスペシャルモーター... - Page 22 *発送手数料は2000年 1月 1日現在のものです "Kyosho Direct‑Mail‑Parts‑Order‑System" is available only for Japanese market 京商スペアパーツ・オプションパーツの購入方法 これらの購入方法は日本国内に限らせていただきます 部品を 購入方法による手数料、お届け日数のめやす ●部品をこわしたり、なくしてしまった場合でも こわしちゃった スペアパーツ やオプションパーツを購入し、 購入方法 発送手数料 お届け予定日数 お 元どおりに直す事ができます。 店 お店に在庫がない場合は 不要 3〜4 日 で ●パーツはお店で直接購入していただくか、 パーツ直送便 で お お店に行けない場合は郵便を利用して京商 店 に 現金書留 円 6〜7 日 で 行 から通信販売で購入できます。 け な ●京商では電話での直接のご注文は取り扱って い 場...
- Page 23 The servise mentioned below is available only for Japanese market. 組立や、操作上で不明な点のお問い合わせ方法 これらのサービスは日本国内に限らせて頂きます 組立てたり、操作してみて上手くいかない点などございましたら、ご購入いただいた 販売店または、京商ユーザー相談室へお問い合わせください。 京商ユーザー相談室へお問い合わせの際は、お電話いただくか、下記のお問い合わせ 用紙に必要事項をご記入のうえ、ファックスまたは郵便でお送りください。 京商へのお問い合わせ先 → 「京商ユーザー相談室」 京商にお問い合わせの際は、「京商ユーザー相談室」にご連絡ください。 お問い合わせの際は、お手元に商品や組立/取扱説明書をご用意のうえ、組立/取扱説明書のページ数, 行程番号, 部品番 号(キーNo.)を用いるなど、なるべく具体的にお知らせください。 0 4 6 ‑ 2 2 9 ‑ 4 1 1 5 電話でのお問い合わせは、月曜〜金曜(祝祭日を除く)10:00〜18:00。 電話でのお問い合わせ: 0 4 6 ‑ 2 2 9 ‑ 1 5 0 1 フ ァ ッ ク ス では、24時間お問い合わせの受付をして居ります。回答は、翌営業日 ファックスでのお問い合わせ:...
Need help?
Do you have a question about the EP BLUESTREAK 800 and is the answer not in the manual?
Questions and answers