Sun Microsystems Ultra 60 Product Notes
Hide thumbs
Also See for Ultra 60:
- Service manual (262 pages) ,
- Manual (66 pages) ,
- Upgrade manual (28 pages)

Subscribe to Our Youtube Channel
Related Manuals for Sun Microsystems Ultra 60


Summary of Contents for Sun Microsystems Ultra 60
- Page 1 Sun Ultra 60 Product Note 901 San Antonio Road Palo Alto, , 94303-4900 USA 650 960-1300 Fax 650 969-9131 Part Number 806-1056-11 June 2000, Revision A...
- Page 2 Sun, Sun Microsystems, the Sun logo, AnswerBook2, docs.sun.com, Ultra, and Solaris are trademarks, registered trademarks, or service marks of Sun Microsystems, Inc. in the U.S. and other countries. All SPARC trademarks are used under license and are trademarks or registered trademarks of SPARC International, Inc. in the U.S. and other countries. Products bearing SPARC trademarks are based upon an architecture developed by Sun Microsystems, Inc.
-
Page 3: Table Of Contents
Contents Sun Ultra 60 Product Note 5 Special Considerations for Systems With 450 MHz CPU Modules 5 Energy Star Software Support 6 Removing the DC Switch Assembly 6 Replacing the DC Switch Assembly 19... - Page 4 Sun Ultra 60 Product Note ♦ June 2000, Revision A...
-
Page 5: Sun Ultra 60 Product Note
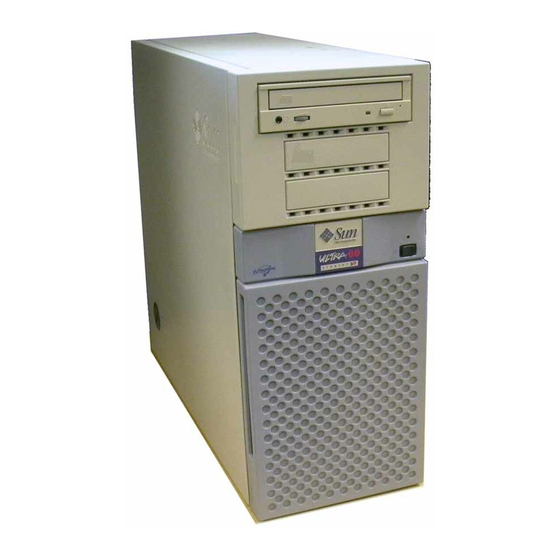
CHAPTER Sun Ultra 60 Product Note This product note contains information about new Sun Ultra 60 systems that became known after the manual set was published. 4 “Special Considerations for Systems With 450 MHz CPU Modules” on page 5 4 “Special Considerations for Systems With 450 MHz CPU Modules” on page 5 4 “Removing the DC Switch Assembly”... -
Page 6: Energy Star Software Support
Energy Star Software Support ® Energy Star power management software is supported on the Ultra 60 system when used with version 2.6 and later of the Solaris operating environment. Removing the DC Switch Assembly This procedure revises the DC switch assembly removal procedure found in the Sun Ultra 60 Service Manual, part number 805-1709. - Page 7 The system fans are not spinning. Caution - Disconnect the AC power cord prior to servicing system components. a. Turn off the power to the monitor. b. Disconnect cables to any peripheral equipment. 2. Disconnect the lock block (Figure 1–2). Sun Ultra 60 Product Note...
- Page 8 Grasp the side panel and pull it toward the back of the system. c. Disengage the side access cover from the chassis hooks. d. Grasping the access cover sides, lift the side access cover upward and remove. Sun Ultra 60 Product Note ♦ June 2000, Revision A...
- Page 9 Peel the liner from the copper foil at the opposite end of the wrist strap. c. Attach the copper end of the wrist strap to the chassis. d. Disconnect the AC power cord. Sun Ultra 60 Product Note...
- Page 10 Grasping the two upper corners of the card, pull the card straight up from the slot. c. Remove the card and place it on an antistatic mat. Sun Ultra 60 Product Note ♦ June 2000, Revision A...
- Page 11 Figure 1–5 Removing and Replacing a PCI Card Sun Ultra 60 Product Note...
- Page 12 Press the locking snap to disengage the locking snap from the chassis. d. Disengage the studs from the chassis slots. e. Remove the PCI fan assembly by moving it toward the chassis back, over, and lifting up. Sun Ultra 60 Product Note ♦ June 2000, Revision A...
- Page 13 Extend the hard drive handle to release the hard drive from the system unit. c. Holding the drive handle, lift the hard drive from the drive bay. d. Place the hard drive on an antistatic mat. Sun Ultra 60 Product Note...
- Page 14 8. Remove the SCSI drive bay (Figure 1–9): a. Disconnect the SCSI cables. Sun Ultra 60 Product Note ♦ June 2000, Revision A...
- Page 15 For better access to the SCSI cable terminator board connector, partially remove the RMA (removal media assembly). To partially remove the RMA, refer to Section 9.2 in the Sun Ultra 60 Service Manual. b. Disconnect the peripheral power cable. c. Remove the peripheral power cable from the cable routing clips.
- Page 16 Figure 1–9 Removing and Replacing the SCSI Drive Bay 9. Disconnect the DC switch assembly power connector from motherboard connector J3504 (Figure 1–10). Sun Ultra 60 Product Note ♦ June 2000, Revision A...
- Page 17 Remove the front panel nameplate and light pipe. c. Using a number 2 Phillips-head screwdriver, remove the four screws securing the front panel to the chassis. d. Remove the front panel from the chassis. Sun Ultra 60 Product Note...
- Page 18 Continue pressing the detent tab on alternate sides and pushing the DC switch assembly toward the front until the DC switch assembly can be removed from the housing. d. Remove the DC switch assembly from the front panel. Sun Ultra 60 Product Note ♦ June 2000, Revision A...
-
Page 19: Replacing The Dc Switch Assembly
Removing and Replacing the Front Panel DC Switch Assembly Replacing the DC Switch Assembly This procedure revises the DC switch assembly replacement procedure found in the Sun Ultra 60 Service Manual, part number 805-1709. Caution - Use proper ESD grounding techniques when handling components. Wear an antistatic wrist strap and use an ESD-protected mat. - Page 20 Note - Hooks at the drive bay base must lock into the bottom slots of the chassis. a. Slide the SCSI drive bay into the chassis. Sun Ultra 60 Product Note ♦ June 2000, Revision A...
- Page 21 Using a number 2 Phillips-head screwdriver, replace the screws securing the SCSI drive bay to the chassis. c. Connect the SCSI cables. d. If necessary, replace the RMA (refer to Section 9.2 in the Sun Ultra 60 Service Manual. e. Feed the peripheral power cable through the chassis opening.
- Page 22 11. Replace the side access cover (Figure 1–13). a. Position the side access cover. b. Engage the side access cover and the chassis hooks. Push the access cover towards the system unit front. Sun Ultra 60 Product Note ♦ June 2000, Revision A...
- Page 23 Set the front panel power switch to the On position (Figure 1–14) or press the Sun Type-5 keyboard power on key (Figure 1–15). c. Verify the following: i. The front panel LED is on. Sun Ultra 60 Product Note...
- Page 24 The system fans are spinning. Figure 1–14 System Unit Power-On (Front Panel) Figure 1–15 Sun Type-5 Keyboard Sun Ultra 60 Product Note ♦ June 2000, Revision A...
Need help?
Do you have a question about the Ultra 60 and is the answer not in the manual?
Questions and answers