Table of Contents
Advertisement
Quick Links
TLP Pro 1225TG and TLP Pro 1525TG • Setup Guide
Overview
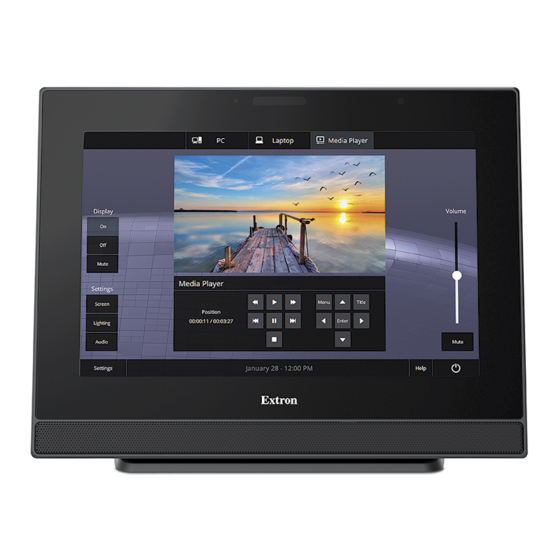
The Extron TLP Pro 1225TG and TLP Pro 1525TG are table-top touchpanels with high resolution capacitive, edge-to-edge glass
touchscreens. The TLP Pro 1225TG has a 12.1 inch screen with a 1280x800 resolution. The TLP Pro 1525TG has a 15.6 inch screen
with a 1366x768 resolution. Both touchpanels are ideal for any AV applications requiring large touchpanels with flexible mounting
options and fully customizable interfaces. This guide provides instructions for experienced installers to mount and install these
touchpanels. For more complete details, see the TLP Pro 1225 and TLP Pro 1525 Series User Guide at www.extron.com.
Setup Overview and Checklist
Get Ready
…
Download and install the latest version of the following software:
GUI Designer — For designing layouts for Extron TouchLink
z
Global Configurator
z
Toolbelt — For device discovery, device information, firmware updates, and configuration of network settings, system
z
utilities, and user management for TouchLink Pro devices.
Global Scripter
z
NOTE:
All four software programs are available from
…
Obtain the following network information from your network administrator:
…
DHCP status (on or off). If DHCP is off, you also require:
IP address
…
…
Username — This can be either admin or user.
Passwords — The factory configured passwords for all accounts on this device have been set to the device serial number.
…
Passwords can be changed during configuration. Passwords are case sensitive.
NOTE:
If the device is reset to default settings, the passwords are reset to the default password, which is extron (for
admin
either
…
Make a note of the touchpanel MAC address.
Mount and Cable All Devices
ATTENTION:
Do not power on the touchpanels or control processors until you have read the Attention in the Power Supply section of
•
the TLP Pro 1225 and TLP Pro 1525 Series User Guide or the IPL Pro User Guide.
Ne branchez pas les écrans tactiles ou les contrôleurs avant d'avoir lu la mise en garde dans la section « sources
•
d'alimentation » du TLP Pro 1225 and TLP Pro 1525 Series User Guide ou du IPL Pro User Guide.
…
Mount the units. There are several mounting options for TouchLink Pro touchpanels (see
…
Connect cables to the touchpanels (see
…
An Extron IP Link
control processor must be connected to the same Ethernet subnetwork as the touchpanel.
®
Set up the Touchpanels for Network Communication
…
Connect the PC that you will use for setup, the control processor, and touchpanel to the same Ethernet subnetwork.
Setup Menu
…
Use the
and related settings for the touchpanel.
Configure the Touchpanels
…
Create a graphical user interface with GUI Designer (see GUI Designer Help File for step-by-step instructions).
…
Associate functions with the graphical user interface features by configuring (see the Global Configurator Help File) or
programming (see the Global Scripter Help File) the system. Global Scripter provides an Extron-exclusive Python library
(ControlScript
) and Global Scripter modules to get you started.
®
Plus and Professional — For setting up and configuring the control processor and touchpanel.
®
®
— Provides an integrated development environment for Extron control systems programming.
Subnet mask
…
user
or
).
Rear Panel Features
(see page 5) or Toolbelt to set the DHCP status and, if necessary, the IP address, subnet mask, gateway,
Pro touchpanels and third party touch interfaces.
®
www.extron.com
.
Gateway
…
on page 4).
Mounting
on page 2).
1
Advertisement
Table of Contents

Related Manuals for Extron electronics TLP Pro 1225TG


Summary of Contents for Extron electronics TLP Pro 1225TG
- Page 1 The Extron TLP Pro 1225TG and TLP Pro 1525TG are table-top touchpanels with high resolution capacitive, edge-to-edge glass touchscreens. The TLP Pro 1225TG has a 12.1 inch screen with a 1280x800 resolution. The TLP Pro 1525TG has a 15.6 inch screen with a 1366x768 resolution.
-
Page 2: Desktop Mounting
(see figure 3, ). The figure shows the rear edge of the TLP Pro 1525TG base, but the base of the TLP Pro 1225TG is very similar. Follow the instructions that are provided by the manufacturer to install 1 1 1 the lock. -
Page 3: Product Category
Product Category Front Panel Features Figure 4 shows the TLP Pro 1225TG front panel diagram. The features of the TLP Pro 1525TG are very similar. TLP Pro 1225TG Front Panel Figure 4. Ambient light sensor — Monitors ambient light level and adjusts screen brightness. -
Page 4: Rear Panel Features
TLP Pro 1225TG and TLP Pro 1525TG • Setup Guide Rear Panel Features Figure 5 shows the TLP Pro 1225TG rear panel diagram (with the base and back cover removed). The features of the TLP Pro 1525TG are very similar. -
Page 5: Connecting Power
Product Category Audio output (see figure 5 on page 4) — For use with headphones or assistive listening devices. Reset LED — Provides feedback about the reset status when the user presses the reset button. Menu button — Activates the setup menu (see Setup Menu on page 6). -
Page 6: Reset Modes: A Brief Summary
TLP Pro 1225TG and TLP Pro 1525TG • Setup Guide Reset Modes: A Brief Summary The TLP Pro 1225TG and TLP Pro 1525TG offer the following reset modes. For full information about the modes, see the TLP Pro 1225 and TLP Pro 1525 Series User Guide.
Need help?
Do you have a question about the TLP Pro 1225TG and is the answer not in the manual?
Questions and answers