Table of Contents
Advertisement
Quick Links
Advertisement
Chapters
Table of Contents

Related Manuals for Beckhoff EJ40 Series


Summary of Contents for Beckhoff EJ40 Series
- Page 1 Documentation EJ40xx Analog Output Modules (12 Bit) Version: Date: 2020-06-22...
-
Page 3: Table Of Contents
Intended use ............................ 8 Signal distribution board ........................ 8 Documentation issue status ...................... 8 Guide through documentation ...................... 8 Marking of EtherCAT plug-in modules.................... 9 1.8.1 Beckhoff Identification Code (BIC)................... 12 1.8.2 Certificates........................ 14 2 System overview ............................. 15 3 Product overview............................. 16 EJ4002, EJ4004, EJ4008 ........................ 16 3.1.1... - Page 4 Table of contents 6 Commissioning............................ 43 Note on documentation for the EL40xx ................... 43 EJ40xx - Object description and parameterization ................ 43 6.2.1 Restore objects........................ 44 6.2.2 Configuration data ...................... 44 6.2.3 Output data ........................ 45 6.2.4 Standard objects...................... 45 7 Appendix .............................. 51 EtherCAT AL Status Codes ...................... 51 EJ40xx - Firmware compatibility ...................... 51 Firmware Update EL/ES/EM/ELM/EPxxxx .................. 52...
-
Page 5: Foreword
The EtherCAT Technology is covered, including but not limited to the following patent applications and patents: EP1590927, EP1789857, EP1456722, EP2137893, DE102015105702 with corresponding applications or registrations in various other countries. ® EtherCAT is registered trademark and patented technology, licensed by Beckhoff Automation GmbH, Germany. EJ40xx Version: 1.2... - Page 6 Foreword Copyright © Beckhoff Automation GmbH & Co. KG, Germany. The reproduction, distribution and utilization of this document as well as the communication of its contents to others without express authorization are prohibited. Offenders will be held liable for the payment of damages. All rights reserved in the event of the grant of a patent, utility model or design.
-
Page 7: Safety Instructions
All the components are supplied in particular hardware and software configurations appropriate for the application. Modifications to hardware or software configurations other than those described in the documentation are not permitted, and nullify the liability of Beckhoff Automation GmbH & Co. KG. Personnel qualification This description is only intended for trained specialists in control, automation and drive engineering who are familiar with the applicable national standards. -
Page 8: Intended Use
Foreword Intended use WARNING Caution - Risk of injury! EJ components may only be used for the purposes described below! Signal distribution board NOTE Signal distribution board Make sure that the EtherCAT plug-in modules are used only on a signal distribution board that has been developed and manufactured in accordance with the Design Guide. -
Page 9: Marking Of Ethercat Plug-In Modules
EJxxxx (s. note on documentation of ELxxxx [} 43]). Marking of EtherCAT plug-in modules Designation A Beckhoff EtherCAT device has a 14-digit technical designation, made up as follows (e.g. EJ1008-0000-0017) • Order identifier ◦ family key: EJ ◦ product designation: The first digit of product designation is used for assignment to a product group (e.g. -
Page 10: Fig. 1 Order Identifier (A), Revision Number (B) And Serial Number (C) Using The Example Of Ej1008
Associated and synonymous with each revision there is usually a description (ESI, EtherCAT Slave Information) in the form of an XML file, which is available for download from the Beckhoff web site. • The product designation, version and revision are read as decimal numbers, even if they are technically saved in hexadecimal. -
Page 11: Fig. 2 Order Identifier (A), Revision Number (B) And Serial Number (C) Using The Example Of Ej1008
Foreword Fig. 2: Order identifier (A), revision number (B) and serial number (C) using the example of EJ1008 Serial number Example serial number: 08 15 08 16 KK - week of production (CW, calendar week) 08 - week of production: 08 YY - year of production 15 - year of production: 2015 FF - firmware version... -
Page 12: Beckhoff Identification Code (Bic)
1.8.1 Beckhoff Identification Code (BIC) The Beckhoff Identification Code (BIC) is increasingly being applied to Beckhoff products to uniquely identify the product. The BIC is represented as a Data Matrix Code (DMC, code scheme ECC200), the content is based on the ANSI standard MH10.8.2-2016. - Page 13 Example of composite information from items 1 - 4 and 6. The data identifiers are marked in red for better display: An important component of the BIC is the Beckhoff Traceability Number (BTN, item no. 2). The BTN is a unique serial number consisting of eight characters that will replace all other serial number systems at Beckhoff in the long term (e.g.
-
Page 14: Certificates
Canadian regulations. • The warning symbol is a request to read the corresponding documentation. The documentations for EtherCAT plug-in modules can be downloaded from the Beckhoff homepage. Fig. 4: Marking for CE and UL using EJ1008 as an example Version: 1.2... -
Page 15: System Overview
Coded components reduce the unit costs and the risk of miswiring. Beckhoff offers development of signal distribution boards as an engineering service. Customers have the option to develop their own signal distribution board, based on the design guide. -
Page 16: Product Overview
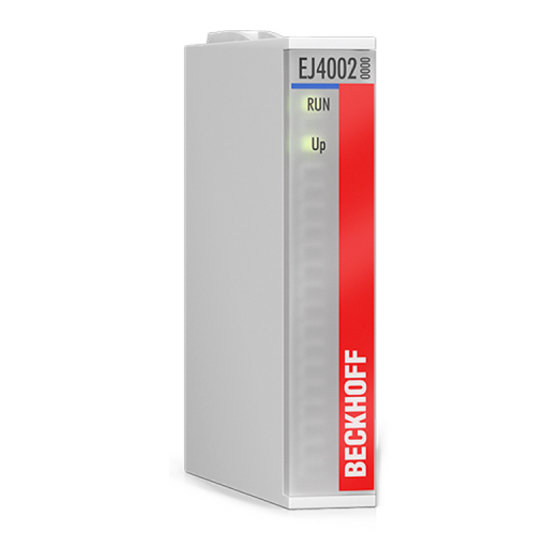
Product overview Product overview EJ4002, EJ4004, EJ4008 3.1.1 EJ4002, EJ4004, EJ4008 - Introduction Fig. 6: EJ4002, EJ4004, EJ4008 2-, 4- and 8-channel analog output module, 0 V..10 V, 12 bit The analog output modules EJ4002, EJ4004 and EJ4008 generate signals in the range of 0 V to 10 V. The voltage is supplied to the process level with a resolution of 12 bits, and is electrically isolated. -
Page 17: Ej4002, Ej4004, Ej4008 - Technical Data
Product overview 3.1.2 EJ4002, EJ4004, EJ4008 - Technical Data Technical data EJ4002 EJ4004 EJ4008 Number of outputs Power supply 24 V via Up contacts Signal voltage 0 V .. 10 V Distributed Clocks Load > 5 kΩ (short-circuit-proof) Measuring error < 0.1 % (at 0°C…+55°C, rel- <... -
Page 18: Ej4002 - Pinout
Product overview 3.1.3 EJ4002 - Pinout Fig. 7: EJ4002 - Pinout The PCB footprint can be downloaded from the Beckhoff homepage. NOTE Damage to devices possible! • The pins named with “NC” must not be connected. • Before installation and commissioning read the chapters Installation of EJ modules [} 27] and Commissioning [} 43]! -
Page 19: Ej4004 - Pinout
Product overview 3.1.4 EJ4004 - Pinout Fig. 8: EJ4004 - Pinout The PCB footprint can be downloaded from the Beckhoff homepage. NOTE Damage to devices possible! • The pins named with “NC” must not be connected. • Before installation and commissioning read the chapters Installation of EJ modules [} 27] and Commissioning [} 43]! -
Page 20: Ej4008 - Pinout
Product overview 3.1.5 EJ4008 - Pinout Fig. 9: EJ4008 - Pinout The PCB footprint can be downloaded from the Beckhoff homepage. NOTE Damage to devices possible! Before installation and commissioning read the chapters Installation of EJ modules [} 27] and Commissioning [} 43]! Version: 1.2... -
Page 21: Ej40Xx - Leds
Product overview 3.1.6 EJ40xx - LEDs Fig. 10: EJ40xx - LEDs Color Display State Description green off Init State of the EtherCAT State Machine: INIT = initialization of the plug-in module flashing Pre-Operational State of the EtherCAT State Machine: PREOP = function for mailbox communication and different default settings set single flash Safe- State of the EtherCAT State Machine: SAFEOP = verification... -
Page 22: Ej4018, Ej4024
Product overview EJ4018, EJ4024 3.2.1 EJ4018, EJ4024 - Introduction Fig. 11: EJ4018, EJ4024 4- and 8-channel analog output module, 0/4 mA .. 20 mA, 12 bit The analog output modules generate signals in the range from 0 mA to 20 mA (EJ4018) and 4 mA to 20 mA (EJ4024). The power is supplied to the process level with a resolution of 12 bits, and is electrically isolated. -
Page 23: Ej4018, Ej4024 - Technical Data
Product overview 3.2.2 EJ4018, EJ4024 - Technical data Technical data EJ4018 EJ4024 Connection technology 2-wire, single-ended Number of outputs Power supply 24 V via Up contacts 24 V via Signal distribution board Signal current 0 mA .. 20 mA 4 mA .. 20 mA Distributed Clocks (DC) Accuracy Distributed Clocks (DC) << 1 µs Load... -
Page 24: Ej4018 - Pinout
Product overview 3.2.3 EJ4018 - Pinout Fig. 12: EJ4018 - Pinout The PCB footprint can be downloaded from the Beckhoff homepage. NOTE Damage to devices possible! Before installation and commissioning read the chapters Installation of EJ modules [} 27] and Commissioning [} 43]! Version: 1.2... -
Page 25: Ej4024 - Pinout
Product overview 3.2.4 EJ4024 - Pinout Fig. 13: EJ4024 - Pinout The PCB footprint can be downloaded from the Beckhoff homepage. NOTE Damage to devices possible! • The pins named with “NC” must not be connected. • Before installation and commissioning read the chapters Installation of EJ modules [} 27] and Commissioning [} 43]! -
Page 26: Ej40Xx - Leds
Product overview 3.2.5 EJ40xx - LEDs Fig. 14: EJ40xx - LEDs Color Display State Description green off Init State of the EtherCAT State Machine: INIT = initialization of the plug-in module flashing Pre-Operational State of the EtherCAT State Machine: PREOP = function for mailbox communication and different default settings set single flash Safe- State of the EtherCAT State Machine: SAFEOP = verification... -
Page 27: Installation Of Ej Modules
Installation of EJ modules Installation of EJ modules Power supply for the EtherCAT plug-in modules WARNING Power supply A SELV/PELV power supply must be used to supply power for the EJ coupler and modules. Couplers and modules have to be connected to SELV/PELV circuits exclusively. The signal distribution board should have a power supply designed for the maximum possible current load of the module string. -
Page 28: Fig. 16 Pcb With Embedded Pc, Ek1110-0043 And Ejxxxx, Rear View Ek1110-0043
Installation of EJ modules E-bus power supply with CXxxxx and EK1110-004x The Embedded PC supplies the attached EtherCAT terminals and the EtherCAT EJ coupler • with a supply voltage of 24 V (-15 %/+20%). This voltage supplies the E-bus and the bus terminal electronics. -
Page 29: Ejxxxx - Dimensions
Installation of EJ modules EJxxxx - dimensions The EJ modules are compact and lightweight thanks to their design. Their volume is approx. 50% smaller than the volume of the EL terminals. A distinction is made between four different module types, depending on the width and the height: Module type Dimensions (W x H x D) -
Page 30: Installation Positions And Minimum Distances
Installation of EJ modules Installation positions and minimum distances 4.3.1 Minimum distances for ensuring installability Note the dimensions shown in the following diagram for the design of the signal distribution board to ensure safe latching and simple assembly / disassembly of the modules. Fig. 19: Mounting distances EJ module - PCB Observing the reaching area A minimum reaching area of 92 mm is required for assembly / disassembly, in order to be able to... -
Page 31: Installation Positions
Installation of EJ modules 4.3.2 Installation positions NOTE Constraints regarding installation position and operating temperature range Please refer to the technical data [} 17] for the installed components to ascertain whether any restrictions regarding the mounting position and/or the operating temperature range have been specified. During instal- lation of modules with increased thermal dissipation, ensure adequate distance above and below the mod- ules to other components in order to ensure adequate ventilation of the modules during operation! The standard installation position is recommended. -
Page 32: Fig. 21 Other Installation Positions
Installation of EJ modules Other installation positions All other installation positions are characterized by a different spatial position of the signal distribution board, see Fig. Other installation positions. The minimum distances to ambient specified above also apply to these installation positions. Fig. 21: Other installation positions Version: 1.2 EJ40xx... -
Page 33: Codings
Installation of EJ modules Codings 4.4.1 Color coding Fig. 22: EJ modules color code; sample: EJ1809 The EJ modules are color-coded for a better overview in the control cabinet (see diagram above). The color code indicates the signal type. The following table provides an overview of the signal types with corresponding color coding. -
Page 34: Mechanical Position Coding
Installation of EJ modules 4.4.2 Mechanical position coding The modules have two signal-specific coding pins on the underside (see Figs. B1 and B2 below). In conjunction with the coding holes in the signal distribution board (see Figs. A1 and A2 below), the coding pins provide an option for mechanical protection against incorrect connection. -
Page 35: Installation On The Signal Distribution Board
Installation of EJ modules Installation on the signal distribution board EJ modules are installed on the signal distribution board. The electrical connections between coupler and EJ modules are realized via the pin contacts and the signal distribution board. The EJ components must be installed in a control cabinet or enclosure which must provide protection against fire hazards, environmental conditions and mechanical impact. - Page 36 Installation of EJ modules NOTE • During installation ensure safe latching of the modules on the signal distribution board! The conse- quences of inadequate contact pressure include: ð loss of quality of the transferred signals, ð increased power dissipation of the contacts, ð...
-
Page 37: Extension Options
Installation of EJ modules Extension options Three options are available for modifications and extensions of the EJ system. • Replacing the placeholder modules with the function modules provided for the respective slot • Assigning function modules specified for the respective slots for the reserve slots at the end of the module string •... -
Page 38: Linking With Ethercat Terminals And Ethercat Box Modules Via An Ethernet/Ethercat Connection
Installation of EJ modules 4.6.2 Linking with EtherCAT Terminals and EtherCAT Box modules via an Ethernet/EtherCAT connection Example of extension via an Ethernet/EtherCAT connection Version: 1.2 EJ40xx... -
Page 39: Ipc Integration
Installation of EJ modules IPC integration Connection of CX and EL terminals via the EK1110-004x EtherCAT EJ Coupler The EK1110-0043 and EK1110-0044 EtherCAT EJ couplers connect the compact DIN-rail PCs of the CX series and attached EtherCAT terminals (ELxxxx) with the EJ modules on the signal distribution board. The EK1110-004x are supplied from the power supply unit of the Embedded PC. -
Page 40: Fig. 28 Example For The Connection Of A C6015 Ipc To An Ej System
Installation of EJ modules Connection of C6015 / C6017 via the EJ110x-00xx EtherCAT Coupler Thanks to their ultra-compact design and versatile mounting options, the C6015 and C6017 IPCs are ideally suited for connection to an EJ system. In combination with the ZS5000-0003 mounting set, it is possible to place the C6015 and C6017 IPCs compactly on the signal distribution board. -
Page 41: Disassembly Of The Signal Distribution Board
Installation of EJ modules Disassembly of the signal distribution board WARNING Risk of injury through electric shock and damage to the device! Bring the module system into a safe, de-energized state before starting installation, disassembly or wiring of the modules. NOTE Risk of damage to components through electrostatic discharge! Observe the regulations for ESD protection. -
Page 42: Ethercat Basics
EtherCAT basics EtherCAT basics Please refer to the EtherCAT System Documentation for the EtherCAT fieldbus basics. Version: 1.2 EJ40xx... -
Page 43: Commissioning
EtherCAT XML Device Description The display matches that of the CoE objects from the EtherCAT XML Device Description. We rec- ommend downloading the latest XML file from the download area of the Beckhoff website and in- stalling it according to installation instructions. -
Page 44: Restore Objects
Commissioning 6.2.1 Restore objects Index 1011 Restore default parameters Index Name Meaning Data type Flags Default (hex) 1011:0 Restore default parameters UINT8 0x01 (1 Restore default parame- ters [} 63] 1011:01 SubIndex 001 If this object is set to “0x64616F6C” in the set value dia- UINT32 0x00000000 (0 log, all backup objects are reset to their delivery state. -
Page 45: Output Data
Commissioning Index 80nE AO internal data Ch.1 (n = 0) - Ch.8 (n = 7) (dependent on the number of channels) Index Name Meaning Data type Flags Default (hex) 80nE:0 AO internal data Ch.1-8 Max. Subindex UINT8 0x01 (1 80nE:01 DAC Raw Value DAC raw value UINT16... - Page 46 Commissioning Index 1018 Identity Index Name Meaning Data type Flags Default (hex) 1018:0 Identity Information for identifying the slave UINT8 0x04 (4 1018:01 Vendor ID Vendor ID of the EtherCAT slave UINT32 0x00000002 (2 1018:02 Product code Product code of the EtherCAT slave UINT32 EJ4002: 0x0FA22852...
- Page 47 Commissioning Index 1603 RxPDO-Map Outputs Ch.4 (EJ40x4 and EJ40x8) Index Name Meaning Data type Flags Default (hex) 1603:0 RxPDO-Map Outputs PDO Mapping RxPDO 4 UINT8 0x01 (1 Ch.4 1603:01 SubIndex 001 1. PDO Mapping entry (object 0x7030 (AO outputs Ch.4), UINT32 0x7030:01, 16 entry 0x01 (Analog output))
- Page 48 Commissioning Index 1C12 RxPDO assign Index Name Meaning Data type Flags Default (hex) 1C12:0 RxPDO assign PDO Assign Outputs UINT8 0x08 (8 1C12:01 SubIndex 001 1. allocated RxPDO (contains the index of the associated UINT16 0x1600 (5632 RxPDO mapping object) 1C12:02 SubIndex 002 2.
- Page 49 Commissioning Index 1C32 SM output parameter Index Name Meaning Data type Flags Default (hex) 1C32:0 SM output parameter Synchronization parameters for the outputs UINT8 0x20 (32 1C32:01 Sync mode Current synchronization mode: UINT16 0x0001 (1 • 0: Free Run • 1: Synchron with SM 2 Event •...
- Page 50 Commissioning Index F008 Code word Index Name Meaning Data type Flags Default (hex) F008:0 Code word reserved UINT32 0x00000000 (0 Index F010 Module list [for {n=1} (1-channel) to {n=1,..,n=8} (8-channel)] Index Name Meaning Data type Flags Default (hex) F010:0 Module list Maximum subindex UINT8 0x04 (n...
-
Page 51: Appendix
Note • It is recommended to use the newest possible firmware for the respective hardware • Beckhoff is not under any obligation to provide customers with free firmware updates for delivered products. NOTE Risk of damage to the device! Pay attention to the instructions for firmware updates on the separate page [} 52]. -
Page 52: Firmware Update El/Es/Em/Elm/Epxxxx
Appendix Firmware Update EL/ES/EM/ELM/EPxxxx This section describes the device update for Beckhoff EtherCAT slaves from the EL/ES, ELM, EM, EK and EP series. A firmware update should only be carried out after consultation with Beckhoff support. Storage locations An EtherCAT slave stores operating data in up to three locations: •... -
Page 53: Device Description Esi File/Xml
The device revision is closely linked to the firmware and hardware used. Incompatible combinations lead to malfunctions or even final shutdown of the device. Corresponding updates should only be carried out in consultation with Beckhoff support. Display of ESI slave identifier... -
Page 54: Fig. 31 Scan The Subordinate Field By Right-Clicking On The Ethercat Device
Appendix Fig. 31: Scan the subordinate field by right-clicking on the EtherCAT device If the found field matches the configured field, the display shows Fig. 32: Configuration is identical otherwise a change dialog appears for entering the actual data in the configuration. Fig. 33: Change dialog In this example in Fig. -
Page 55: Fig. 34 Eeprom Update
Appendix Changing the ESI slave identifier The ESI/EEPROM identifier can be updated as follows under TwinCAT: • Trouble-free EtherCAT communication must be established with the slave. • The state of the slave is irrelevant. • Right-clicking on the slave in the online display opens the EEPROM Update dialog, Fig. EEPROM Update Fig. 34: EEPROM Update The new ESI description is selected in the following dialog, see Fig. -
Page 56: Firmware Explanation
• offline: The EtherCAT Slave Information ESI/XML may contain the default content of the CoE. This CoE directory can only be displayed if it is included in the ESI (e.g. “Beckhoff EL5xxx.xml”). The Advanced button must be used for switching between the two views. -
Page 57: Updating Controller Firmware *.Efw
Switch to the Online tab to update the controller firmware of a slave, see Fig. Firmware Update. Fig. 37: Firmware Update Proceed as follows, unless instructed otherwise by Beckhoff support. Valid for TwinCAT 2 and 3 as EtherCAT master. • Switch TwinCAT system to ConfigMode/FreeRun with cycle time >= 1 ms (default in ConfigMode is 4 ms). -
Page 58: Fpga Firmware *.Rbf
Appendix • Switch EtherCAT Master to PreOP • Switch slave to INIT (A) • Switch slave to BOOTSTRAP • Check the current status (B, C) • Download the new *efw file (wait until it ends). A pass word will not be neccessary usually. •... -
Page 59: Fig. 38 Fpga Firmware Version Definition
Appendix Fig. 38: FPGA firmware version definition If the column Reg:0002 is not displayed, right-click the table header and select Properties in the context menu. Fig. 39: Context menu Properties The Advanced Settings dialog appears where the columns to be displayed can be selected. Under Diagnosis/Online View select the '0002 ETxxxx Build' check box in order to activate the FPGA firmware version display. -
Page 60: Fig. 40 Dialog Advanced Settings
Older firmware versions can only be updated by the manufacturer! Updating an EtherCAT device The following sequence order have to be met if no other specifications are given (e.g. by the Beckhoff support): • Switch TwinCAT system to ConfigMode/FreeRun with cycle time >= 1 ms (default in ConfigMode is 4 ms). - Page 61 Appendix • In the TwinCAT System Manager select the terminal for which the FPGA firmware is to be updated (in the example: Terminal 5: EL5001) and click the Advanced Settings button in the EtherCAT tab: • The Advanced Settings dialog appears. Under ESC Access/E²PROM/FPGA click on Write FPGA button: EJ40xx Version: 1.2...
-
Page 62: Simultaneous Updating Of Several Ethercat Devices
Appendix • Select the file (*.rbf) with the new FPGA firmware, and transfer it to the EtherCAT device: • Wait until download ends • Switch slave current less for a short time (don't pull under voltage!). In order to activate the new FPGA firmware a restart (switching the power supply off and on again) of the EtherCAT device is required. -
Page 63: Restoring The Delivery State
Appendix Restoring the delivery state To restore the delivery state for backup objects in ELxxxx terminals, the CoE object Restore default parameters, SubIndex 001 can be selected in the TwinCAT System Manager (Config mode) (see Fig. Selecting the Restore default parameters PDO) Fig. 42: Selecting the "Restore default parameters"... -
Page 64: Support And Service
Beckhoff's branch offices and representatives Please contact your Beckhoff branch office or representative for local support and service on Beckhoff products! The addresses of Beckhoff's branch offices and representatives round the world can be found on her internet pages: http://www.beckhoff.com You will also find further documentation for Beckhoff components there. - Page 65 List of illustrations List of illustrations Fig. 1 Order identifier (A), Revision number (B) and serial number (C) using the example of EJ1008 . Fig. 2 Order identifier (A), revision number (B) and serial number (C) using the example of EJ1008... Fig.
Need help?
Do you have a question about the EJ40 Series and is the answer not in the manual?
Questions and answers