Fronius Symo Hybrid 3.0-3-S Operating Instructions Manual
Grid-connected inverter, energy package
Hide thumbs
Also See for Symo Hybrid 3.0-3-S:
- Operating instructions manual (196 pages) ,
- Installation manual (60 pages) ,
- Installation instruction (60 pages)
Table of Contents
Advertisement
Quick Links
/ Perfect Charging / Perfect Welding / Solar Energy
LEARN MORE WITH
OUR HOW-TO VIDEOS
www.youtube.com/FroniusSolar
Fronius Energy Package
42,0426,0222,EN 021-16072020
Fronius prints on elemental chlorine free paper (ECF) sourced from certified sustainable forests (FSC).
Operating instructions
Grid-connected inverter
Advertisement
Table of Contents

Related Manuals for Fronius Symo Hybrid 3.0-3-S


Summary of Contents for Fronius Symo Hybrid 3.0-3-S
- Page 1 / Perfect Charging / Perfect Welding / Solar Energy LEARN MORE WITH OUR HOW-TO VIDEOS www.youtube.com/FroniusSolar Operating instructions Fronius Energy Package Grid-connected inverter 42,0426,0222,EN 021-16072020 Fronius prints on elemental chlorine free paper (ECF) sourced from certified sustainable forests (FSC).
-
Page 3: Table Of Contents
Calibration charging for the Fronius Solar Battery Benefits of calibration charging General Conditions for the start of calibration charging (Fronius Solar Battery) Calibration charging procedure (Fronius Solar Battery) Calibration process (Fronius Solar Battery) Duration of calibration charging (Fronius Solar Battery) - Page 4 Operation Data communication Data communication area General Controls, connections and indicators on the system monitoring unit Fronius Hybrid inverter Controls and indicators Display Fronius Solar Battery Battery management module Battery module Display Display types Data converter connections Data converter controls and indicators...
-
Page 5: Status Codes - Class
Connecting to Fronius system monitoring via a web browser General remarks Prerequisites Establishing a connection to Fronius system monitoring via a web browser Connecting to Fronius system monitoring established via the Internet and Fronius Solar.web General remarks Functional description Prerequisites Accessing Fronius system monitoring data via the Internet and Fronius Solar.web... -
Page 6: Status Codes - Class
Settings – System overview System overview Settings - Meter General Fronius Smart Meter Connection of the Fronius Smart Meter to Fronius system monitoring Settings – DNO Editor General DNO Editor – IO control Connection example "PSC editor - AUS - Demand Response Modes (DRM)"... -
Page 7: Safety Rules
Safety rules Explanation of DANGER! safety notices Indicates immediate danger. ▶ If not avoided, death or serious injury will result. WARNING! Indicates a potentially hazardous situation. ▶ If not avoided, death or serious injury may result. CAUTION! Indicates a situation where damage or injury could occur. ▶... -
Page 8: Environmental Conditions
For the location of the safety and danger notices on the device, refer to the section headed "General remarks" in the Operating Instructions for the device. Any equipment malfunctions which might impair safety must be remedied before the device is turned on. This is for your personal safety! Environmental Operation or storage of the device outside the stipulated area will be deemed as not in... -
Page 9: Disposal
Ignoring this European Directive may have potentially adverse effects on the envir- onment and your health! If you need to replace your Fronius Solar Battery at some point, Fronius will take back the old device and arrange for it to be recycled in an appropriate manner. -
Page 11: General Information
General information... -
Page 13: Fronius Symo Hybrid
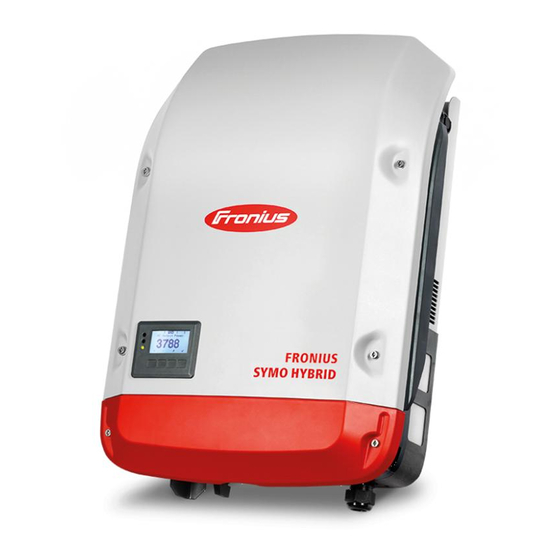
Fronius Symo Hybrid Device concept Device design: Housing lid Inverter Mounting bracket Connection area including DC main switch Data communication area Data communication cover The hybrid inverter converts the direct current generated by the solar modules into alternating current. This alternating current is fed into the public grid synchronously with the grid voltage. -
Page 14: Proper Use
Making any modifications to the inverter that have not been expressly approved by Fronius Installing components that are not distributed or expressly approved by Fronius Operating the device with a battery that has not been approved by Fronius Operating the equipment with an energy meter that has not been approved by Fronius Fronius shall not be liable for any damage resulting from such action. -
Page 15: Product Registration
Where can I find the serial number for my product? The serial number can be found on the rating plate of the Fronius device. For the Solar Battery, only use the serial number shown in the picture. The serial num-... -
Page 17: Fronius Solar Battery
With the market launch of its new Fronius Energy Package, Fronius is introducing an inverter that can be used to store energy. One of the key components is the Fronius Solar Battery, which contains a lithium-ion rechargeable cell. The Fronius Solar Battery supplements the Fronius hybrid inverter by adding storage functionality. -
Page 18: Increase In Storage Capacity
Observe the stipulations of the power supply company concerning energy fed into the grid and the operation of storage systems. Increase in stor- The storage capacity of the Fronius Solar Battery can also be increased after purchase age capacity to a maximum capacity of 9.6 kWh of usable energy. - Page 19 Safety symbols – Text of the warning notices: CAUTION! Incorrect handling or failing to observe these notices and the operating instruc- tions is extremely dangerous. It may give rise to thermal/electrical or fire haz- ards, thereby resulting in serious injuries. Please read the Operating Instructions carefully while also ensuring compli- ance with the safety instructions during use! To avoid electric shocks:...
-
Page 20: The Various Operating Modes
Converts the direct current into alternating current. Cannot, however, be used to charge batteries and is not available to provide emergency power. Grid Operating mode: The Fronius hybrid inverter can be used purely as an inverter without a battery connec- Inverter ted to it. -
Page 21: Operating Mode - Inverter Plus Battery
Operating mode - To ensure fault-free regulation, parallel operation of several batteries is not permitted. Inverter plus bat- tery To optimise self-consumption in your PV system, you can use a battery as a storage sys- tem. The battery is connected to the inverter on the DC side. As a result, there is no need for multiple current conversion processes, which results in greater efficiency. -
Page 22: Operating Mode - Inverter Plus Battery And Multiple Smart Meters
Use any excess energy to charge the battery. Operating mode - IMPORTANT! In a hybrid PV system with Fronius Ohmpilot and all the system features, Inverter plus bat- the Ohmpilot cannot be operated in the event of a power failure for control-related reas- tery, Ohmpilot ons. -
Page 23: Operating Mode - Inverter Plus Battery, Additional Inverter And Emergency Power Function
SOC Service mode value and then kept at this value until service mode is ended manually. The Fronius Symo Hybrid recharges the battery to Forced re-charging counteract self discharge and maintain the set min- imum SOC (protection against deep discharge). - Page 24 Deep discharge protection state of charge. The storage system starts from energy saving mode Start (standby). Only available for the Fronius Solar Battery. Available for the Fronius Solar Battery and BYD Battery-Box Premium only.
-
Page 25: Emergency Power Mode
Correct cabling of the emergency power system in the electrical installation (see document "Fronius Energy Package - Examples of emergency power switchover"). The Fronius Smart Meter must be installed at the feed-in point and configured. Latest firmware on the inverter - if required, perform a firmware update. -
Page 26: Restrictions In Emergency Power Mode
More information on energy saving mode can be found in chapter Energy saving mode on page Fronius Ohmpilot The Fronius Ohmpilot is not suitable for backup power mode. If a Fronius Ohmpilot is and backup used, it should be installed outside of the backup power circuit (see Operating mode -... -
Page 27: Energy Saving Mode
When the battery is in energy saving mode, the display remains dark. In Solar.web, energy saving mode is indicated by an "i" next to the battery symbol. In the energy bal- ance view, the SOC (State of Charge) of the Fronius Solar Battery is not displayed for the duration of energy saving mode. -
Page 28: Fronius Symo Hybrid And Battery Switch-On Conditions
The battery is recharged to restore the minimum state of charge or perform a calib- ration. The Fronius Solar Battery is activated as soon as the Symo Hybrid generates PV power. This guarantees reliable operation of the battery. Special case If the inverter does not operate for 8–12 minutes (e.g.: error), or if there is an interruption... -
Page 29: Calibration Charging For The Fronius Solar Battery
The following description of calibration charging is valid from version 1.4.1-12 of the Fronius system monitoring software. Conditions for One charge and discharge cycle of the Fronius Solar Battery corresponds to an energy the start of calib- throughput of 48 Ah per battery module. Calibration charging occurs cyclically according... -
Page 30: Calibration Process (Fronius Solar Battery)
Display during As soon as calibration charging starts, it becomes visible in Fronius Solar.web (current calibration and energy balance view) or on the web interface of the Fronius Symo Hybrid inverter. charge (Fronius Solar Battery) In Fronius Solar.web or on the web interface of the inverter, the cal- ibration charge information is displayed in the overview. - Page 31 0.3 A, 0 A is shown on the display, even though calibration charging continues. In Fronius Solar.web, the SOC value for the entire battery is displayed. On the battery display, the SOC values of the individual battery modules can be viewed.
-
Page 32: Suitable Third-Party Batteries For Fronius Symo Hybrid
Fronius expressly points out that third-party batteries are not Fronius products and that Fronius is not a trader or distributor of these batteries. This means that Fronius accepts no liability for these batteries and cannot offer any kind of warranty. - Page 33 Obsolete software states may lead to incompatibilities between the inverter and the bat- tery. If a corresponding message is displayed: Update inverter software - see Services – Firmware update on page Update battery software - see the battery documentation The documentation for the BYD Battery-Box Premium is enclosed with the third-party battery, or you can acquire it from the third-party manufacturer.
-
Page 35: Operation
Operation... -
Page 37: Data Communication Area
Use the mating connector supplied with the inverter to connect to the floating switch contact. System monitoring with WLAN antenna General The inverter is fitted with the WLAN-enabled system monitoring and energy management unit (Fronius Datamanager) as standard. Various functions are included with the Fronius system monitoring, such as:... -
Page 38: Controls, Connections And Indicators On The System Monitoring Unit
Ability to control the inverter via Modbus (TCP) Ability to assign control priorities Ability to control the inverter by means of connected meters (Fronius Smart Meter) Ability to control the inverter via a ripple control signal receiver (e.g. by specifying... - Page 39 Lights up green: Fronius Solar.web connection established Lights up red: Fronius Solar.web connection is required but has not been established Not lit: no Fronius Solar.web connection is required or the option for sending data to Fronius Solar.web has been deactivated Supply LED Lights up green: internal communication system is providing an adequate power supply;...
- Page 40 Function Modbus RTU 2-wire (RS485): Modbus data - Modbus data + Int./ext. power supply Internal voltage output 12.8 V input for an external supply voltage >12.8 - 24 V DC (+ 20%) Digital inputs: 0 - 3, 4 - 9 Voltage level: low = min.
-
Page 41: Fronius Hybrid Inverter
Fronius Hybrid inverter Controls and indicators (5) (6) (7) (8) Item Description Display For displaying values, settings and menus Monitoring and status LEDs General status LED Lights up steady: If a status code is being displayed on the monitor (red for error, orange... -
Page 42: Display
The keys operate capacitively. Exposure to water may impair their function. If necessary, wipe the keys dry with a cloth to ensure optimum functionality. Display The display is supplied with power via the AC grid voltage and via the PV and battery side. -
Page 43: Fronius Solar Battery
Fronius Solar Battery Battery manage- ment module LCD display Provides information about the status of a module (charging/discharging, total voltage, total current strength, total remaining capacity, number of connected modules, remaining capacity of each module, voltage/temperature etc. of the cell... -
Page 44: Display Types
Display switching diagram Display overall status of Overall system Connection Display status of indi- vidual modules Modul Nr. 00 Modul .Nr. N Status Status Mode Mode Cell temp. Cell temp Alarm bits Alarm bits Heatsink Press and hold DISP key Press DISP key Nr.N. - Page 45 UNIT Number of connected modules 1 - 16 Version XXXX Status of connected modules In the above example, there are 6 connected modules (no. 00 - no. 05). "Status" display Display Details Display M_NO Number of modules displayed 00 - 15 STAT Module status YX (Y: Current status, X: Previous...
- Page 46 "Cell Temp., Cycle Count" display Display Details Display M_NO Number of modules displayed 00 - 15 CYCL Number of cycles 0000 - 9999 Average temperature of all cells -99.9 °C to +99.9 °C "Alarm bits" display Display Details Display M_NO Number of modules displayed 00 - 15 ALRM...
-
Page 47: Data Converter Connections
Data converter connections Data converter Connection to Fronius Connection to Fronius controls and Solar Battery hybrid inverter indicators Factory settings: S4 = 0x0 (hex) = 0000 (binary) S5 = 0x0 (hex) = 0000 (binary) S6 = 0x1 (hex) = 0001 (binary) - Page 48 Flashing green/red Status OK Lights up red General gateway error (see "Error No." LEDs) Flashing red Data converter is in configuration/test mode "State" LED (Fronius hybrid inverter) Lights up green Initialised and started Flashing green Initialised Flashing green/red Lights up red...
-
Page 49: Navigation At The Menu Level
Navigation at the menu level Activating dis- Press any key play backlighting The display backlighting is activated. There is an option under "Display Settings - Backlighting" in the SETUP menu to set the display backlighting so that it is on all the time or off all the time. Automatic deac- If two minutes pass without any button being pressed, the display backlighting switches tivation of display... -
Page 50: Values Displayed Under The Now Menu Item
Values displayed Output power (W) under the NOW AC reactive power (VAr) menu item Grid voltage (V) Output current (A) Grid frequency (Hz) Solar voltage (V) – Of U PV Solar current (A) – Of I PV Time Date Values displayed Energy fed in (kWh / MWh) under the LOG Energy delivered by the inverter over the period in question... -
Page 51: Menu Items In The Set-Up Menu
Menu items in the Set-up menu Standby Manual activation / deactivation of Standby mode No energy is fed into the grid. The Startup LED will show steady orange. In the display, STANDBY / ENTER are alternately displayed In Standby mode, no other menu item at menu level can be accessed or adjusted. The automatic switchover into the "NOW"... -
Page 52: Relay (Floating Contact Switch)
WiFi Access Point [not available] Displayed if there is no system monitoring present on the inverter. Relay (floating Status codes (state codes), the status of the inverter (e.g. feeding energy into the grid) or contact switch) Energy Manager functions can be displayed using the floating switch contact (relay). Setting range Relay mode / Relay test / Switch-on point* / Switch-off point* * these are only shown if the "E-Manager"... -
Page 53: Energy Manager(Under Relay Menu Item)
Relay test Function test to determine whether the floating switch contact switches Switch-on point (only if "Energy Manager" function is activated) for setting the effective power limit beyond which the floating switch contact is switched Factory setting 1000 W Setting range Set switch-off point up to the maximum nominal output of the inverter (W or kW) Switch-off point (only if "Energy Manager"... -
Page 54: Time / Date
Application example Switch-on point = 2000 W, switch-off point = 1800 W If the inverter is outputting 2000 W or above, then the floating switch contact on the inverter is switched on. If the inverter output falls to below 1800 W, the floating switch contact is switched off. Possible applications: Operating a heat pump or an air-conditioning system using as much self-generated power as possible... -
Page 55: Energy Yield
Setting range German, English, French, Dutch, Italian, Spanish, Czech, Slovak, etc. Contrast Set the contrast on the display Setting range 0 - 10 Factory setting Since the contrast is temperature-dependent, it may be necessary to adjust the setting under the "Contrast" menu item when the environmental conditions change. Illumination Initial setting for display illumination The "Illumination"... -
Page 56: Fan
CO2 factor Setting the CO2 factor of the energy fed into the grid To check that the fan is working correctly Setting range Test fan #1 / Test fan #2 (depending on the device) Use the "Up" and "Down" keys to select the desired fan Testing of the selected fan is initiated by clicking "Enter". -
Page 57: Setup Menu Item
SETUP menu item Initial setting The inverter is pre-configured after commissioning has been completely carried out (e.g. using the Installation Wizard) according to the country setup. The SETUP menu item allows the initial settings of the inverter to be changed easily to bring it in line, as closely as possible, with the preferences and requirements of the user. -
Page 58: Setting Menu Entries, General
The inverter switches from wherever it is on the menu level back to the "NOW" dis- play mode (exception: "Standby" Setup menu item). The display backlighting goes out. The current power of feeding in is displayed. Setting menu Open the desired menu entries, general Use the 'Up' or 'Down' keys to select the desired menu item Press "Enter"... - Page 59 The current time appears. (HH:MM:SS, 24-hour clock), the “tens” digit for the hour will flash. Use the “Up” and “Down” keys to select a value for the “tens” digit of the hour. Press the “Enter” key. The “units” digit for the hour will flash. Repeat steps 5 and 6 to set the “units”...
-
Page 60: The Info Menu Item
The INFO menu item Measured values PV ins. Insulation resistance of the photovoltaic system and the storage system Ext. lim. External power reduction in per cent e.g. specified by grid operator U PV Current PV voltage on the terminals even if the inverter is feeding in no power whatso- ever GVDPR Grid voltage-dependent power reduction... - Page 61 ON / OFF – Voltage-dependent power reduction GVDPRe Threshold at which the voltage-dependent power reduction begins GVDPRv Reduction gradient used to reduce the power, e.g.: 10% per volt above the GVDPRe threshold Message Activates the sending of an info message via Fronius Solar...
-
Page 62: Version
Fault Ride Through: Status – Default setting: OFF If the function is activated, the inverter does not switch off immediately in the event of a short-term AC voltage dip (out- side of the limits specified by the grid supplier), but instead continues to feed in power for a defined period. -
Page 63: Switching The Key Lock On And Off
Switching the key lock on and off General The inverter has a key lock function. When the key lock is active, the Setup menu is not accessible, i.e. the setup data cannot be changed accidentally (or maliciously). The code 12321 has to be entered in order to activate / deactivate the key lock. Switching the key Press the "Menu"... -
Page 64: The Basic Menu
The Basic menu Accessing the Press the "Menu" key Basic menu The menu level appears. Press the unassigned "Menu / Esc" key 5 times "Access Code" is displayed in the "CODE" menu; the first digit starts flashing. Enter the code 22742: Use the "Plus" and "Minus"... - Page 65 Input signal Function of the: Ext Sig. / S0-Meter / OFF Only with the Ext Sig.: function selected: • Triggering method: Warning (warning shown on display) / Ext. Stop (inverter switches off) • Connection type: N/C (normally closed contact) / N/O (normally open contact) SMS / relay Event delay: for entering the time delay after which an SMS is sent or the relay is to switch...
-
Page 67: Fronius System Monitoring
Fronius system monitoring... -
Page 69: General
It can be accessed via a web browser when there is a direct connection or – if configured to support an indirect connection – over the Internet. If the feature is used in conjunction with Fronius Solar.web, current data and archive data can be accessed for a particular photovoltaic system via the Internet or the Fronius Solar.web App without the need for any laborious configuration work. -
Page 70: Calculating Data Volumes
The table below provides an overview of the data volume for various configurations and time settings (INV = Fronius Symo Hybrid, SM = Smart Meter, BAT = battery module of the Fronius Solar Battery) Data volume per day:... - Page 71 13 MB 3 MB A data volume of approx. 500 kB per hour is required to view the system on Fronius Solar.web or the Fronius Solar.web App. A certain data volume is also required to update the Fronius system monitoring firmware.
-
Page 72: General Information For The Network Administrator
The subnet mask must match that of the existing network (e.g. 255.255.255.0). If you want Fronius system monitoring to send service messages or to transmit data to Fronius Solar.web, you must enter a gateway address and a DNS server address. -
Page 73: Using Fronius Solar.web And Sending Service Messages
Using Fronius An Internet connection is required if you want to use Fronius Solar.web or to send ser- Solar.web and vice messages. sending service messages Fronius system monitoring is not capable of connecting to the Internet on its own. In the... -
Page 74: Installing Fronius System Monitoring - Overview
IMPORTANT! Knowledge of networking systems is required in order to install Fronius system monitoring. Starting for the IMPORTANT! Starting up the Fronius system monitoring function for the first time is first time made considerably easier with the Fronius Solar.web app. The Fronius Solar.web app is available in the respective app stores. - Page 75 Search for a network with the name "FRONIUS_239.xxxxx" Establish a connection to this network Enter the password 12345678 Run the Fronius Solar.web app (Alternatively, connect the end device and inverter using an Ether- net cable.) Enter the following in the browser: http://datamanager 192.168.250.181 (IP address for...
-
Page 76: Information To Help You Work Through The Technician Wizard
Once you have worked your way through the technician wizard, an automatic process is triggered to calibrate all the components. This involves charging the Fronius Solar Bat- tery fully. After that, the system automatically starts in the set operating mode. -
Page 77: Testing Backup Power Mode
A battery state of charge of over 30% is recommended when in test mode. A description of how to perform the test operation can be found in the chapter "Backup power checklist" of the document "Fronius Energy Package - Examples of backup power switchover". -
Page 78: Connecting To Fronius System Monitoring Via A Web Browser
General remarks A connection to Fronius system monitoring via a web browser is the ideal choice if there are lots of PC users who need to access the latest system values over the same LAN (e.g. company networks, schools, etc.). -
Page 79: Connecting To Fronius System Monitoring Established Via The Internet And Fronius Solar.web
General remarks Archive and current data for a photovoltaic system can be accessed from anywhere in the world (provided that you have Internet access) by setting up a connection to Fronius system monitoring via the Internet and Fronius Solar.web. With this setup, you can also invite other users to view the photovoltaic system data as guests and you can compare several systems with one another. -
Page 81: Current Data, Services And Settings Offered By Fronius System Monitoring
Current data, services and settings offered by Fronius system monitor-... -
Page 83: The Fronius System Monitoring Web Page
(5) System information, network diagnostics, firmware update (6) The Settings menu The Settings When you click "Settings", the Settings menu appears on the Fronius system monitor- menu ing web page. The "Settings" menu is where you configure Fronius system monitoring. -
Page 84: Additional Setting Options
Additional setting On the Fronius system monitoring web page, the following additional setting options are options available on the top right-hand side: System information: Datalogger ID, software version, hardware version, Fronius Solar.web con- nection Help: Commissioning the LAN Commissioning the WLAN... -
Page 85: Services - System Information
Services – System information System informa- The system information page contains various information about the system. tion Additionally, there are the following buttons: "Datalogger restart" For restarting the Datamanager / system monitoring "Reset to factory settings" button with the selection options: •... -
Page 86: Services - Network Diagnostics
Services – Network diagnostics Network dia- Under Services / Network diagnostics, you will find various functions that are useful for gnostics diagnosing and resolving network problems. You can execute ping and traceroute com- mands. Ping command A ping command allows you to check whether a host can be reached and how long the data transfer process takes. -
Page 87: Services - Firmware Update
Download the latest firmware from the Fronius homepage. Once it has been downloaded, run the update file on the PC/laptop. This starts a web server from where Fronius system monitoring will download the rel- evant files. Use your web browser to open the Fronius system monitoring web page. - Page 88 Select 'Update via LAN' Enter the IP address of the PC/laptop. Click the 'Run update' button. A confirmation prompt for the update is displayed. Click the 'Yes' button The update is performed and progress is indicated in the form of a bar and as a per- centage.
-
Page 89: Services - Starting The Wizard
You can access and run the setup wizard again by selecting "Open wizards". SOLAR WEB WIZARD For connecting the system to Fronius Solar.web and Fronius apps for mobile devices TECHNICIAN WIZARD (for trained personnel or specialists only) For system settings FURTHER SETTINGS (for trained personnel or specialists only) All settings for Fronius system monitoring. -
Page 90: Settings - General
Settings – General General Under "Yield", you can enter the charge rate per kWh ("Feed-in tariff"), the currency and the procurement costs per kWh ("Grid supply tariff") for calculating the yield. The yield figure is displayed in the current general view. Under "System time", you can enter the date, hour and minutes. -
Page 91: Settings - Passwords
Settings – Passwords General remarks Access to Fronius system monitoring is controlled by assigning passwords. There are 3 different types of password available for this purpose: The administrator password The service password The user password Passwords Administrator password User name = admin The administrator password is set during the commissioning process and grants the user read access and the right to change settings. -
Page 92: Settings - Network
Datamanager (system monitoring) can be established using the name instead of the IP address. For example: Host name = sample_system, domain name = fronius.com The Datamanager (system monitoring) can be reached via the address "sample_system.fronius.com". - Page 93 The Datamanager (system monitoring) serves as an access point. A PC or smart device connects directly with the Datamanager (system monitoring). It is not possible to connect to the internet.
-
Page 94: Settings - Fronius Solar.web
Settings – Fronius Solar.web Fronius You can use the Fronius Solar.web menu item to establish a direct connection to Solar.web Fronius Solar.web. The storage system interval selected for the fields "Inverter Query Cycle" and "Fronius Sensor Cards Query Cycle" affects the required storage capacity. -
Page 95: Settings - Io Mapping
Settings – IO mapping General This menu item allows you to configure the properties of the inverter's individual inputs and outputs (I/O). You can only select those settings that are supported by the system concerned (which are determined by the functionality of the system and how it has been configured). - Page 96 IMPORTANT! To control the inverter via DRM, a Fronius DRM interface (item number 4,240,005) is required in the inverter. Installation is described in the Installation Instructions for the Fronius DRM interface. The Installation Instructions for the Fronius DRM interface are available on the Fronius homepage at the following link: http://www.fronius.com/QR-link/4204102292...
-
Page 97: Energy Storage Device
IMPORTANT! If no DRM control (DRED) is connected to the Datamanager and the "AUS - Demand Response Mode (DRM)" function is activated, the inverter switches to standby mode. Energy storage The pin for activating the energy storage device can be selected here. This setting only device needs to be made for certain energy storage devices. -
Page 98: Settings - Load Management
Settings - load management Load manage- Energy management controlling priorities ment If additional components (e.g. battery, Ohmpilot) are available in the system, the priorities can be set here. Devices with a higher priority are activated first, followed by the others if surplus energy is available. -
Page 99: Settings - Push Service
This function allows you to export current and log data to an external server in different formats or using different protocols. For further information about the push service function, please see the following Operat- ing Instructions: http://www.fronius.com/QR-link/4204102152 42,0410,2152 Fronius Push Service... -
Page 100: Settings - Modbus
Settings – Modbus General remarks With a web browser, you can use the Fronius system monitoring web page to make set- tings for the Modbus connection that are not accessible via the Modbus protocol. Further informa- For further information about the Modbus function, please see the following Operating... -
Page 101: Restricting Control
If inverter control is to be limited to one or more devices, use this field to enter the IP addresses of the one(s) that is/are allowed to send commands to the Fronius Datamanager. Use commas to separate multiple entries. -
Page 102: Settings - Energy Manager
Own consumption optimisation ment The Fronius hybrid inverter always controls the system by adjusting it in line with the tar- get value set at the metering point. In "Automatic" operating mode (factory setting), the system is adjusted so that 0 W is achieved at the feed-in point (maximum self-consump- tion). - Page 103 2000 W TARGET: 0W 1500 W 500 W 1500 W Example involving battery system with a second producer within the home PV system to Fronius Symo Hybrid: 1000 W Second producer in home network: 2000 W Household consumption: 500 W...
- Page 104 1500 W 500 W 2500 W Example involving battery system plus a second producer within the home (with AC max. limiting) PV system to Fronius Symo Hybrid: 1000 W Second producer in home network: 2000 W Household consumption: 500 W Target value set at feed-in point: Max.
-
Page 105: Battery Management
"Min SoC" (minimum state of charge) fields. The range of values that can be set dif- fers depending on the battery. Attention: The settings must be agreed with the battery manufacturer! Fronius accepts no liability for damage to third-party batteries. -
Page 106: Permitted Battery Control Parameters
Permitted battery The following battery control parameters are possible control paramet- Maximum charging power Minimum charging power Maximum discharging power Minimum discharging power A parameter always consists of one of the four limitations above and the times during which the limitation applies. At any one time, none, one or a maximum of two limitations that are compatible with one another can be active. - Page 107 Specifying the discharging range It is possible to define a discharging range with a min. and max. discharging limit. In this case, it is not possible for the battery to charge. Discharging Discharge / charge Charging limit limit Max. dischar- Min.
-
Page 108: Pv Power Reduction
1000 W In this case, the inverter would need to reduce the PV power to 0 W, as the output power of the Fronius Symo Hybrid 3.0-S is max. 3,000 W and the device is already fully utilised through the discharging. -
Page 109: Settings - System Overview
Settings – System overview System overview PV generator If there is no solar module connected to the Fronius hybrid inverter, the PV power option must be deactivated. The connected PV power must be entered in the field underneath. Battery If a battery is connected to the Fronius hybrid inverter, it must be activated here. - Page 110 If the function is activated, the inverter remains permanently connected to the grid so that energy can be drawn from other producers at any time. Once the meter is connected, its position must be configured in the Fronius Datamanager. Several Fronius Smart Meters can be installed in the system. A different address needs to be set for each Smart Meter.
-
Page 111: Settings - Meter
A primary meter and several optional secondary meters can be selected. The primary meter needs to be configured first before a secondary meter can be selected. Fronius Smart If the Fronius Smart Meter is selected as the meter, the meter position needs to be con- Meter figured in the "Settings" field. - Page 112 RS 485 DT/PE Symo Hybrid INPUT Rx / Tx GND 9 11 120 Ω LOAD X X X Fronius Smart Meter 50kA-3 Fronius Smart Meter 50kA-3 Fronius Smart Meter 50kA-3 INPUT INPUT 1N1E 3-2E (1-2) CURRENT CURRENT 6A 6A 6A...
-
Page 113: Settings - Dno Editor
"Export" button - Click this to save the rules separately in *.fpc format Connection Ripple control signal receiver with 3 relays, for effective power limiting example Ripple control signal receiver with 3 relays, for power factor limiting Fronius system monitoring I/Os Consumers (e.g. signal lamp, signal relay) -
Page 114: Psc Editor - Aus - Demand Response Modes (Drm)
0,95 0,90 0,85 The ripple control signal receiver and the Fronius system monitoring connector are con- nected to one another by means of a four-pin cable in accordance with the connection diagram. If the distance between the Fronius system monitoring datalogger and the ripple control signal receiver exceeds 10 m, a shielded cable is recommended. -
Page 115: Dno Editor - Control Priorities
With the Fronius Symo Hybrid, any PV power that is not allowed to be fed into the grid is used to charge the battery instead so that it does not go to waste. Dynamic power reduc- tion is only activated if the battery is full or cannot be charged for some other reason. -
Page 116: Dno Editor - Battery Charge
Max. grid power feed: 60% Example 2 If there are two Smart Meters in the feed-in branch, the Datamanager and the Fronius Datamanager (hybrid) in Solar.web cannot be shown combined in one PV system. Two individual PV systems must be created. - Page 117 (inverter 1) > P (hybrid) AC nom AC nom Example: 7 kW > 5 kW AC nom > Two Smart Meters are required for the inverters. These must be installed at the feed-in point. Hybrid system overview (web page): Settings – System overview: Meter must be configured at the feed-in point Datamanager overview (web page): Settings –...
-
Page 118: Settings - Battery
Service mode allows you to replace and extend the battery modules and is also intended for test purposes. When this mode is activated, the Fronius Solar Battery is charged or discharged by means of a 10 A current or with the maximum inverter power, regardless of any other parameter settings. -
Page 119: Troubleshooting And Maintenance
Troubleshooting and maintenance... -
Page 121: Fronius Symo Hybrid
Fronius Symo Hybrid Status code dis- The inverter performs a system self-diagnosis that automatically detects many faults that play may occur and shows them on the display. This means you are promptly made aware of malfunctions in the inverter or the photovoltaic system, or of any installation or operating faults. -
Page 122: Status Codes - Class
Code Description Behaviour Remedy Emergency power overload Emergency power mode is interrupted. The inverter Emergency power short-cir- Check emergency power cir- attempts to start emergency cuit cuit; if this status code keeps power mode three times; if recurring, contact your sys- Status code 143 or 144 has this is unsuccessful status tem fitter... -
Page 123: Status Codes - Class
The inverter repeats its star- sink; **) tup routine. *) If the status code is displayed all the time: Notify a Fronius-trained service technician. **) Fault is rectified automatically. If this status code keeps recurring, contact your system fitter Status codes –... - Page 124 Code Description Behaviour Remedy Functional incompatibility (one or more The inverter will automat- PC boards in the inverter are not com- ically attempt to connect Update inverter firm- patible with each other, e.g. after a PC again and, if possible, will ware;...
- Page 125 *) *) If the status code is displayed all the time: Notify a Fronius-trained service engineer. **) If this status code keeps recurring, contact your system engineer. Status codes – Class 5 status codes do not generally interfere with feeding energy into the grid, but can Class 5 cause restrictions.
-
Page 126: Status Codes - Class
Fault rectified automatically; **) sage is shown on the display. *) If the status code is displayed all the time: notify a Fronius-trained service engineer **) If this status code keeps recurring, contact your system engineer. Status codes – Some of the class 6 status codes necessitate intervention by a Fronius-trained service Class 6 engineer. - Page 127 Press “Enter” key to acknow- available display ledge error; *) Invalid device type 781 - Provides information about Warning message on the the internal processor status display *) If the status code is displayed all the time: Notify a Fronius-trained service engineer.
-
Page 128: Status Codes - Class
Status codes – Class 9 status codes only affect the Fronius Solar Battery. These are only displayed on Class 9 the system monitoring page and are not shown on the inverter display. Code Description Behaviour Remedy Software on device is incon- The inverter is not feeding Update inverter firmware;... -
Page 129: Class 10 - 12 Status Codes
Smart Meter power supply; **) Fronius Smart Meter sible, feed-in resumes *) If the status code is displayed all the time: Notify a Fronius-trained service technician **) If this status code keeps recurring, contact your system engineer Class 10 - 12... -
Page 130: Fronius Solar Battery
Fronius Solar Battery Status code dis- The storage system performs a system self-diagnosis that automatically detects many play faults that may occur. These are indicated on the display or via LEDs. This means you are promptly made aware of malfunctions in the storage system, or of any installation or operating faults. -
Page 131: Undefined Operating Statuses
LED8 LED4 LED2 LED1 Error no. Display or ID Reserved Hardware fault EEROM fault Internal memory error Fieldbus hardware fault Script error Reserved RS transmission buffer overflow RS receiver buffer overflow RS timeout General fieldbus error Parity error or stop bit error (frame check) Reserved Fieldbus configuration error... - Page 132 Check whether battery is switched on – If it is not, switch it on. If it is, there is a communication error – Disconnect the inverter on the DC side and isol- ate it from the grid on the AC side. Wait 5 minutes and then reconnect the inverter on both the DC and AC sides.
-
Page 133: Appendix
Appendix... -
Page 135: Technical Data
Technical data Fronius Symo Hybrid 3.0-3-S 4.0-3-S 5.0-3-S Input data PV input power 5 kW 6.5 kW 8 kW MPP voltage range 190 - 800 V DC 250 - 800 V DC 315 - 800 V DC Max. input voltage 1000 V DC (at 1,000 W/m²... - Page 136 Fronius Symo Hybrid 3.0-3-S 4.0-3-S 5.0-3-S EMC device class Overvoltage category DC / AC 3 / 2 Pollution degree Noise emission 59.5 dB(A) ref. 1pW Protection devices DC insulation measurement Integrated Response to DC overload Operating point shift, power limitation...
-
Page 137: System Monitoring
Fronius Solar Battery Battery 9.0 Battery 10.5 Battery 12.0 Voltage range 240 - 345 V 280 - 400 V 320 - 460 V Nominal charging power 4800 W 5600 W 6400 W Nominal discharge power 4800 W 5600 W 6400 W Max. -
Page 138: Explanation Of Footnotes
Guaranteed by the electrical configuration of the inverter Current peak when switching on the inverter Applicable stand- Fronius hybrid inverter: ards and guidelines CE mark The devices conform to all the requisite and relevant standards and guidelines that form part of the relevant EU directive, and are therefore permitted to display the CE mark. -
Page 139: Warranty Terms And Conditions, And Disposal
To obtain the full warranty period for your newly installed Fronius inverter or storage sys- tem, please register at: www.solarweb.com. Disposal If you need to replace your inverter or your battery at some point, Fronius will take back the old device and arrange for it to be recycled in an appropriate manner. - Page 140 FRONIUS INTERNATIONAL GMBH Froniusstraße 1 A-4643 Pettenbach AUSTRIA contact@fronius.com www.fronius.com Under www.fronius.com/contact you will find the addresses of all Fronius Sales & Service Partners and locations.
Need help?
Do you have a question about the Symo Hybrid 3.0-3-S and is the answer not in the manual?
Questions and answers