Fronius Symo Hybrid 3.0-3-S Operating Instructions Manual
Grid-connected inverter
Hide thumbs
Also See for Symo Hybrid 3.0-3-S:
- Operating instructions manual (196 pages) ,
- Installation manual (60 pages) ,
- Installation instruction (60 pages)

Related Manuals for Fronius Symo Hybrid 3.0-3-S


Summary of Contents for Fronius Symo Hybrid 3.0-3-S
- Page 1 Solar Energy / Perfect Charging / Perfect Welding / Operating Instructions Fronius Energy Package Grid-connected inverter 42,0426,0222,EN 005-22062015...
- Page 3 Thank you for the trust you have placed in our company and congratulations on buying this high-quality Fronius product. These instructions will help you familiarise yourself with the product. Reading the instructions carefully will enable you to learn about the many different features it has to offer.
-
Page 5: Table Of Contents
Qualified service engineers........................Noise emission values .......................... EMC measures ............................. Disposal ..............................Copyright............................... Data protection............................General information Fronius Symo Hybrid ..........................Device concept ............................. Proper use ............................Warning notices on the device......................Fronius Solar Battery ..........................Device concept ............................. Proper use ............................ - Page 6 Connecting to Fronius system monitoring via a web browser..............General remarks ........................... Prerequisites ............................Establishing a connection to Fronius system monitoring via a web browser ........Connecting to Fronius system monitoring established via the Internet and Fronius Solar.web....General remarks ...........................
- Page 7 Settings – Network............................. General remarks ........................... Network..............................Settings – Fronius Solar.web ........................Fronius Solar.web ..........................Settings – Service messages........................General remarks ........................... Service messages..........................Settings – IO mapping ..........................General remarks ........................... Settings – Energy Manager ........................General remarks ...........................
- Page 8 Explanation of footnotes ........................123 Applicable standards and guidelines ....................124 Warranty terms and conditions, and disposal .................... 125 Fronius manufacturer's warranty ......................125 Disposal ..............................125...
-
Page 9: Safety Rules
Safety rules General The device is manufactured using state-of-the-art technology and according to recognised safety standards. If used incorrectly or misused, however, it can cause: injury or death to the operator or a third party, damage to the device and other material assets belonging to the operator, inefficient operation of the device. -
Page 10: Qualified Service Engineers
European Directive may be harmful to the environment and your own health! If you need to replace your battery at some point, Fronius will take back the old device and arrange for it to be recycled in an appropriate manner. -
Page 11: Copyright
Copyright Copyright of these operating instructions remains with the manufacturer. The text and illustrations are all technically correct at the time of printing. We reserve the right to make changes. The contents of the operating instructions shall not provide the basis for any claims whatsoever on the part of the pur- chaser. -
Page 13: General Information
General information... -
Page 15: Fronius Symo Hybrid
Reasons for the inverter becoming too hot include the ambient temperature being too high or inadequate heat dissipation (e.g. if it is installed in a switch cabinet without suitable heat dissipation). IMPORTANT! The Fronius Solar Battery is only to be switched on when the inverter is in Standby mode. -
Page 16: Proper Use
Proper use The solar inverter is exclusively intended for charging a Fronius Solar Battery with direct current from solar modules or for converting this direct current into alternating current and feeding it into the public grid. The following actions constitute improper use:... -
Page 17: Fronius Solar Battery
With the market launch of its new Fronius Energy Package, Fronius is introducing an in- verter that can be used to store energy. One of the key components is the Fronius Solar Battery, which contains a lithium-ion rechargeable cell. The Fronius Solar Battery supple- ments the Fronius Symo Hybrid by adding storage functionality as well. -
Page 18: Warning Notices On The Device
Warning notices Warning notices and safety symbols are affixed to the battery. These warning notices and on the device safety symbols must not be removed or painted over. They warn against operating the de- vice incorrectly, as this may result in serious injury and damage. Safety symbols –... - Page 19 Flooding: Switch off main switch Open residual current-operated circuit breaker Protect system from water, pump water away Undefined operating status (see also section titled “Undefined operating statuses” on page External Link: “Page”): Ensure adequate ventilation. Switch off main switch Open residual current-operated circuit breaker...
-
Page 20: The Various Operating Modes
In “Emergency power” mode, the PV system op- erates as a stand-alone island. The PV system can also be disconnected from the grid manually. Grid Operating mode: The Fronius Symo Hybrid can be used purely as an inverter without a battery connected Inverter to it. -
Page 21: Operating Mode: Inverter Plus Battery
To maximise self-consumption of the energy provided by your PV system, you can use a Inverter plus bat- Fronius Solar Battery to act as a storage system. The Fronius Solar Battery is connected tery to the inverter on the DC side. As a result, there is no need for multiple current conversion processes, leading to greater efficiency. - Page 22 Energy flow directions in the hybrid PV system Solar module - inverter - grid Solar module - inverter - battery Battery - inverter - grid Grid - inverter - battery...
-
Page 23: Operation
Operation... -
Page 25: Data Communication
Ability to control the inverter via Modbus (TCP) Ability to assign control priorities Ability to control the inverter by means of connected meters (Fronius Smart Meter) Ability to control the inverter via a ripple control signal receiver (e.g. by specifying the... -
Page 26: Controls, Connections And Indicators On The System Monitoring Unit
Controls, connec- tions and indica- tors on the system monitor- ing unit No. Function IP switch For switching the IP address: Switch position A Default IP address with opening of the WLAN access point System monitoring uses the set IP address 169.254.0.180 to establish a direct connection to a PC via LAN. - Page 27 Steady green: Fronius Solar.web connection established Steady red: Fronius Solar.web connection is required but has not been estab- lished Not lit: No Fronius Solar.web connection is required or the option for sending data to Fronius Solar.web has been deactivated Supply LED Steady green: Internal communication system is providing an adequate power supply;...
-
Page 28: Schematic Connection Diagrams For I/Os
No. Function Digital outputs: 0 - 3 Switching capacity when power is supplied by the system monitoring plug-in card: 3.2 W in total for all 4 digital outputs Switching capacity when power is supplied by an external power supply delivering min. - Page 29 12,8 - 24 V DC External power supply Load Switch NOTE! If an external power supply is used, it must be electrically isolated.
-
Page 30: Fronius Symo Hybrid
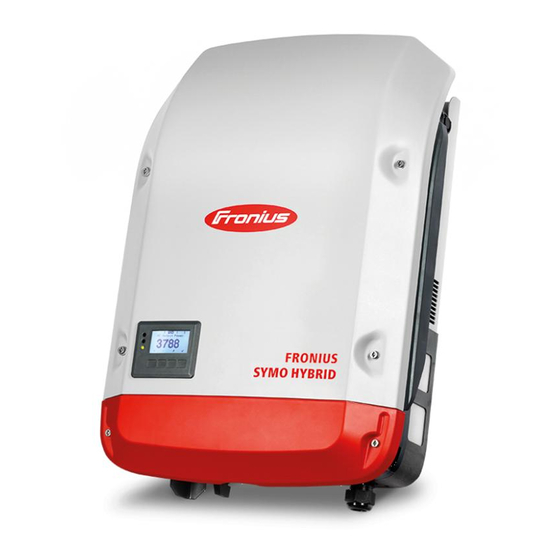
Fronius Symo Hybrid Controls and indi- cators (5) (6) (7) (8) Item Description Display For displaying values, settings and menus Monitoring and status LEDs General status LED Lights up steady: If a status code is being displayed on the monitor (red for error, orange for... -
Page 31: Display
Display The display is supplied with power via the AC grid voltage and via the PV and battery side. Depending on the setting selected in the Setup menu, the display can be kept on all day. IMPORTANT! The display on the inverter is not a calibrated measuring device. A slight in- accuracy in comparison with the energy meter used by the utility company is intrinsic to the system. -
Page 32: Fronius Solar Battery
Fronius Solar Battery Battery manage- ment module LCD display Provides information about the status of a module (charging/discharging, total volt- age, total current strength, total remaining capacity, number of connected mod- ules, remaining capacity of each module, voltage/temperature etc. of the cell block) -
Page 33: Display Types
Display overall status of Overall system Display status of individual Connection modules Modul Nr. 00 Modul .Nr. N Status Status Mode Mode Cell temp. Cell temp Alarm bits Alarm bits Heatsink Press and hold DISP key Press DISP key Nr.N. Means the nth storage module Tips: Hold down DISP key for longer than 3 seconds... - Page 34 Status of connected modules In the above example, there are 6 connected modules (no. 00 - no. 05). “Status” display Indicator Details Display M_NO Number of modules displayed 00 - 15 STAT Module status YX (Y: Current status, X: Previous status) 1X [Pre Charge]: Pre-charging 2X [Initial]: Status at beginning...
- Page 35 M_NO Number of modules displayed 00 - 15 CYCL Number of cycles 0000 - 9999 Average temperature of all cells -99.9 °C to +99.9 °C “Alarm bits” display Indicator Details Display M_NO Number of modules displayed 00 - 15 ALRM Module status 8000 [Over Volt]: Overvoltage 4000 [Terminate]: End charging...
-
Page 36: Data Converter Connections
Data converter connections Data converter Connection to Fronius Connection to Fronius controls and indi- Solar Battery Symo Hybrid cators Factory settings: S4 = 0x0 (hex) = 0000 (binary) S5 = 0x0 (hex) = 0000 (binary) S6 = 0x1 (hex) = 0001 (binary) - Page 37 Power LED Green Inverter supply voltage “Power” LED (Fronius Solar Battery) This LED is connected directly to the supply voltage of the 1st serial interface (electrical isolation is optionally available for this supply). “1/2/4/8 (Error No / Selected ID)” LED If these 4 LEDs and the “State”...
-
Page 38: Navigation At The Menu Level
Navigation at the menu level Activate display Press any key backlighting The display backlighting is activated. There is an option under 'Display Settings' in the SETUP menu to set the display back- lighting so that it is on all the time or off all the time. Automatic deacti- If no key is pressed for 2 minutes, vation of display... -
Page 39: Values Displayed Under The Log Menu Item
Values displayed Energy fed in (kWh / MWh) under the LOG Energy delivered by the inverter over the period in question menu item There may be discrepancies compared with values displayed on other measuring instru- ments because of differences in measuring methods. As far as the billing of the energy fed in is concerned, the only binding display values are those produced by the calibrated measuring instrument provided by the utility company. -
Page 40: Menu Items In The Set-Up Menu
Menu items in the Set-up menu Standby Manual activation / deactivation of Standby mode No energy is fed into the grid. The Startup LED will show steady orange. In Standby mode, no other menu item at menu level can be accessed or adjusted. The automatic switchover into the 'NOW' display mode after 2 minutes of keyboard in- activity does not occur. -
Page 41: Energy Manager(Under Relay Menu Item)
The floating NO contact is on all the time the inverter is in operation (as long as the display is not dark and is displaying something). OFF: The floating NO contact is off. Energy-Manager: E-Manager: Further details on the 'Energy-Manager' function may be found in the "Energy-Manager"... -
Page 42: Time / Date
When choosing the switch-on point, the weather conditions and anticipated insolation should also be taken into account. Application example Switch-on point = 2000 W, switch-off point = 1800 W If the inverter is outputting 2000 W or above, then the floating switch contact on the inverter is switched on. - Page 43 DATCOM will not run at night, the inverter will not need any AC current in order to supply power to the internal communication system. The display is switched off during the night and the Fronius system monitor- ing datalogger is not available.
-
Page 44: Energy Yield
Energy yield Setting of an OFFSET value for the total energy display of a measuring offset factor for the day, year and total energy display of the currency of the feed-in tariff Setting range Meter deviation / Meter calibration / Currency / Feed-in tariff Meter deviation Input of a value for the fed-in energy that will be added to the energy currently fed in (e.g. -
Page 45: Setup Menu Item
SETUP menu item Initial setting The inverter is pre-configured and ready to use. There is no need to enter any initial set- tings before using it to feed energy into the grid, as this is a fully-automated process. The SETUP menu item allows the initial settings of the inverter to be changed easily to bring it in line, as closely as possible, with the preferences and requirements of the user. -
Page 46: Setting Entries On The Setup Menu, General
Wird 2 Minuten keine Taste gedrückt, wechselt der Wechselrichter von jeder beliebigen Position innerhalb der Menüebene in den Menüpunkt ‘NOW’ (Ausnahme: Setup-Menüeintrag ‘Standby’), erlischt die Display-Beleuchtung. Die aktuell eingespeiste Leistung wird angezeigt. Setting entries on Enter the SETUP menu item the Setup menu, Use the 'Up' or 'Down' keys to select the desired menu item general... - Page 47 An overview of the values that can be changed is displayed. Use the “Up” or “Down” keys to select “Set time”. Press the “Enter” key. The current time appears. (HH:MM:SS, 24-hour clock), the “tens” digit for the hour will flash. Use the “Up”...
-
Page 48: The Info Menu Item
The INFO menu item Measured values PV ins. Insulation resistance of the photovoltaic system and the storage system Ext. lim. External power reduction in per cent e.g. specified by grid operator U PV Current PV voltage on the terminals even if the inverter is feeding in no power whatsoever GVDPR Grid voltage-dependent power reduction Fan #1... -
Page 49: Version
Reduction gradient used to reduce the power, e.g.: 10% per volt above the GVDPRe threshold Message Activates the sending of an info message via Fronius Solar Net Fault Ride Through: Status – default setting: OFF If the function is activated, the inverter does not switch off im-... - Page 50 Display area Display / Display Software / Integrity Checksum / Memory Card / Memory Card #1 / Power Stage / Power Stage Software / EMI Filter / Power Stage #3 / Power Stage #4...
-
Page 51: Switching The Key Lock On And Off
Switching the key lock on and off General The inverter has a key lock function. When the key lock is active, the Setup menu is not accessible, i.e. the setup data cannot be changed accidentally (or maliciously). The code 12321 has to be entered in order to activate / deactivate the key lock. Switching the key Press the 'Menu' key lock on and off... -
Page 52: The Basic Menu
The Basic menu Access the Basic Press the "Menu" key menu The menu level appears. Press the unassigned 'Menu / Esc' 5 times 'Access Code' is displayed in the 'CODE' menu; the first digit starts flashing. Enter the code 22742: Use the 'Up' and 'Down' keys to select a value for the first digit of the code Press 'Enter'... - Page 53 10 - 255 Isolationseinstellung Isolationswarnung: ON / OFF Schwellwert Warnung: zum Eingeben eines Schwellwertes, der zur Warnung führt Die Überwachung erfolgt sowohl für PV als auch für Fronius Solar Battery Temperaturwarnung zur Aktivierung / Deaktivierung der Übertemperatur-Warnung pro Event ON / OFF TOTAL Reset setzt im Menüpunkt LOG die max.
-
Page 55: Fronius System Monitoring
Fronius system monitoring... -
Page 57: General
The Fronius system monitoring feature is a networked datalogger that manages to com- bine the functions of the Fronius Com Card, the Fronius Datalogger Web, the Fronius Pow- er Control Card and the Fronius Modbus Card on a single plug-in card. -
Page 58: General Information For The Network Administrator
The subnet mask must match that of the existing network (e.g. 255.255.255.0). If you want Fronius system monitoring to send service messages or to transmit data to Fro- nius Solar.web, you must enter a gateway address and a DNS server address. Fronius system monitoring uses the gateway address for the purpose of establishing an Internet connection. -
Page 59: Using Fronius Solar.web And Sending Service Messages
Using Fronius So- An Internet connection is required if you want to use Fronius Solar.web or to send service lar.web and send- messages. ing service messages Fronius system monitoring is not capable of connecting to the Internet on its own. In the... -
Page 60: Installing Fronius System Monitoring - Overview
NOTE! Knowledge of networking systems is required in order to install Fronius system monitoring. Using for the first NOTE! The Fronius Solar.web App makes it much easier to set up Fronius sys- time tem monitoring when using it for the first time. - Page 61 “EVU Editor” [UC Editor] menus as well as for advanced battery settings. If the technician wizard is not run, no specifications regarding power reduction are set and hybrid mode is not possible (charging and discharging of the Fronius Solar Battery). Run the technician wizard and follow the instructions.
-
Page 62: Information To Help You Work Through The Solar Web Wizard
The connected PV power must be entered in the field underneath. Battery: If a Fronius Solar Battery is connected to the Fronius Symo Hybrid, it must be ac- tivated here. This setting can only be made when there is an active connection to the Fronius Solar Battery. - Page 63 Fronius Symo Hybrid, you must ac- tivate this setting. This means that energy can be drawn from the home network and fed into the Fronius Solar Battery via the Fronius Symo Hybrid for the purpose of charging it.
-
Page 64: Connecting To Fronius System Monitoring Via A Web Browser
General remarks A connection to Fronius system monitoring via a web browser is the ideal choice if there are lots of PC users who need to access the latest system values over the same LAN (e.g. company networks, schools, etc.). -
Page 65: Connecting To Fronius System Monitoring Established Via The Internet And Fronius Solar.web
General remarks Archive and current data for a photovoltaic system can be accessed from anywhere in the world (provided that you have Internet access) by setting up a connection to Fronius sys- tem monitoring via the Internet and Fronius Solar.web. -
Page 67: Current Data, Services And Settings Offered By Fronius System Monitoring
Current data, services and settings offered by Fronius system monitor-... -
Page 69: The Fronius System Monitoring Web Page
(4) Overview of recent status codes (5) System information, network diagnostics, firmware update (6) The Settings menu The Settings When you click “Settings”, the Settings menu appears on the Fronius system monitoring menu web page. The “Settings” menu is where you configure Fronius system monitoring. -
Page 70: Additional Setting Options
These menu items are protected by the service pass- word. Settings within these menus may affect the func- tionality of the inverter. Additional setting On the Fronius system monitoring web page, the following additional setting options are options available on the top right-hand side: System information: Datalogger ID, software version, hardware version, Fronius Solar.web con-... -
Page 71: Services - System Information
All the items protected by the service user (EVU Editor, meter settings and the ser- vice password) are retained. IMPORTANT! If Fronius system monitoring is reset to the factory settings, it is essential to check the time and date settings. -
Page 72: Services - Network Diagnostics
Services – Network diagnostics Network diagnos- Under Services / Network diagnostics, you will find various functions that are useful for di- tics agnosing and resolving network problems. You can execute ping and traceroute com- mands. Ping command A ping command allows you to check whether a host can be reached and how long the data transfer process takes. -
Page 73: Services - Firmware Update
Services – Firmware update General remarks The firmware of the Fronius system monitoring datalogger can be updated under Services / Firmware update. A firmware update can be performed via a LAN or over the Web. Automatic update search “check now” button (search manually for updates) -
Page 74: Searching For Updates Manually
Download the latest firmware from the Fronius homepage. Once it has been downloaded, run the update file on the PC/laptop. This starts a web server so that Fronius system monitoring can download the neces- sary files from it. Use your web browser to open the Fronius system monitoring web page. - Page 75 Click the “Run update” button. A confirmation prompt for the update is displayed. Click the “Yes” button. The update is performed and progress is indicated in the form of a bar and as a percent- age. Once the update has been successfully completed, click the “Apply/Save” button. The “Supply LED”...
-
Page 76: Services - Starting The Wizard
Services – Starting the wizard Starting the wiz- You can access and run the wizard again by selecting “Start assistant”. -
Page 77: Settings - General
Click the “synchronisation” button (8) to align the time that is displayed in the input fields of the Fronius system monitoring web page with the time of the computer operating system. To apply the time, click the “Apply/Save” button (11). -
Page 78: Settings - Passwords
“System overview”, “EVU Editor” and “Advanced battery settings”. If an administrator password has been set, the user must enter the user name and password for Fronius system monitoring in order to open the Settings menu. Service password, user name = service... - Page 79 The user is not able to open the “Settings” menu. If a user password is assigned, the user is required to enter the user name and password whenever they want to establish a connection to Fronius system moni- toring.
-
Page 80: Settings - Network
Internet connection via LAN Internet connection via WLAN Obtain IP address statically The user enters a fixed IP address for Fronius system monitoring and also defines the subnet mask, the gateway address and the DNS server address (from the pro- vider) manually. - Page 81 If the DHCP server supports the DNS dynamic updates function, a name can be assigned to Fronius system monitoring in the “Host name” field. As a result, the connection to Fronius system monitoring can be established using the name in- stead of the IP address.
- Page 82 (16a) (16b) (16c) (16d) (16e) (16f) (16g) (16a) Name of the selected WLAN network (16b) Signal strength of the selected WLAN network (16c) Encryption method used for the selected WLAN network (16d) Field for entering the password for the WLAN network (16e) Selection box for specifying whether the password should be displayed (16f)
-
Page 83: Settings - Fronius Solar.web
Settings – Fronius Solar.web Fronius So- You can use the Fronius Solar.web menu item to establish a direct connection between lar.web Fronius system monitoring and Fronius Solar.web. (10) Datalogging settings Select the query cycle for the inverter: Data can be queried every 5 / 10 / 15 / 20 / 30 minutes. - Page 84 When you check this selection box, the associated setting options are displayed: (7a) Fields for selecting the time (hour) “register at Solar.web” button Clicking this button opens the Fronius Solar.web homepage and any data of rele- vance to Fronius Solar.web is sent automatically at the same time. “Apply/Save” button (10)
-
Page 85: Settings - Service Messages
Settings – Service messages General remarks Service messages or inverter errors are sent to Fronius system monitoring and saved. Use the “Service messages” option to define what method of external communication should be used for service messages. Communication can take place via: E-mail It is also possible to evaluate the service messages using Fronius Solar.web as well. - Page 86 (11) “Schaltfläche Test-SMS” [Send test SMS] button It can take several minutes to send a test SMS. (12) Box for selecting the language in which the service message is to be sent (13) “Apply/Save” button (14) “Cancel/Discard entry” button...
-
Page 87: Settings - Io Mapping
Settings – IO mapping General remarks This menu allows you to configure the properties of the inverter's individual inputs and out- puts (I/O). You can only select those settings that are supported by the system concerned (which are determined by the functionality of the system and how it has been configured). -
Page 88: Settings - Energy Manager
Settings – Energy Manager General remarks The Fronius Symo Hybrid always controls the system by adjusting it in line with the target value set at the metering point. In “Automatic” operating mode (factory setting), the system is adjusted so that 0 W is achieved at the feed-in point (maximum self-consumption). -
Page 89: Load Management
Example involving Fronius Energy Package without photovoltaics but with a sec- ond producer within the home Second producer on home network: 2000 W Household consumption: 500 W Target value set at feed-in point: Energy fed into Fronius Solar Battery: 1500 W... - Page 90 - off: For entering an effective power limit as of which output I/O 1 is to be deacti- vated. Duration - Field for activating the minimum running time per switch-on operation - Field for specifying the minimum amount of time that output I/O 1 should remain activated for per switch-on operation.
-
Page 91: Settings - Push Service
Settings – Push Service Push Service This function allows you to export current and log data to an external server in different for- mats or using different protocols. “Apply/Save” button “Cancel/Discard entry” button “Add” button Click this button to add a new push service job. The new job is saved by clicking the “Apply/Save”... -
Page 92: Further Information About The Push Service Function
Password “Delete” button Click this button to delete the selected push service job. Further informa- For further information about the push service function, please see the following operating tion about the instructions: push service function http://www.fronius.com/QR-link/4204102152 42,0410,2152 Fronius Push Service... -
Page 93: Settings - Modbus
Settings – Modbus General remarks With a web browser, you can use the Fronius system monitoring web page to make set- tings for the Modbus connection that are not accessible via the Modbus protocol. Further informa- For further information about the Modbus function, please see the following operating in-... -
Page 94: Restricting Control
Here you can activate the Modbus service and select the transmission protocol. If the Modbus service is activated, additional input fields are made available. The Modbus RTU transmission protocol is only available with Fronius system monitoring. No data exported via Modbus... -
Page 95: Saving Or Discarding Changes
If inverter control is to be limited to one or more devices, use this field to enter the IP addresses of the one(s) that is/are allowed to send commands to Fronius sys- tem monitoring. Use commas to separate multiple entries. -
Page 96: Settings - Battery Management
Fronius Symo Hybrid, you must activate this setting. This means that energy can be drawn from the home network and fed into the Fronius So- lar Battery for charging purposes via the Fronius Symo Hybrid. - Page 97 Once calibration is complete, the system automatically reverts to the operating mode that was set originally. This calibration charging process is also performed automatically during actual operation after a number of charging and discharging cycles. If the “battery charging from UC grid” setting is deactivated, this calibration charging pro- cess relies exclusively on energy from the photovoltaic system.
-
Page 98: Settings - System Overview
The connected PV power must be entered in the field underneath. Battery: If a Fronius Solar Battery is connected to the Fronius Symo Hybrid, it must be ac- tivated here. This setting can only be made when there is an active connection to the Fronius Solar Battery. -
Page 99: Fronius Smart Meter
Fronius Symo Hybrid, you must ac- tivate this setting. This means that energy can be drawn from the home network and fed into the Fronius Solar Battery via the Fronius Symo Hybrid for the purpose of charging it. - Page 100 Fronius Fronius Smart Meter OUTPUT RS 485 Hybridmanager DT/PE INPUT Rx / Tx GND 9 11 120 Ω LOAD X X X...
-
Page 101: Settings - Evu Editor
Settings – EVU Editor General remarks Use the “EVU Editor” menu item to make the settings that are of relevance to a utility com- pany. You can set an effective power limit in % and/or a power factor limit. IMPORTANT! Settings under the “EVU Editor” menu item are only to be made by trained and qualified personnel! The service password must be entered in order to access the “EVU Editor”... -
Page 102: Connection Example
(e.g. in the form of a commissioning record). Connection ex- Ripple control signal receiver with 3 relays, for effective power limiting ample Ripple control signal receiver with 3 relays, for power factor limiting Fronius system monitoring I/Os Consumers (e.g. signal lamp, signal relay) -
Page 103: Evu Editor - Dynamic Power Reduction
With the Fronius Symo Hybrid, any PV power that is not allowed to be fed into the grid is used to charge the Fronius Solar Battery instead so that it does not go to waste. Dynamic power reduction is only activated if the battery is full or cannot be charged for some other reason. - Page 104 If no meter has been selected under the “Meter” menu item: Max. power produced by the entire system If “Fronius Smart Meter” has been selected under the “Meter” menu item: Max. grid power feed Box for selecting % or W “Apply/Save”...
-
Page 105: Evu Editor - Control Priorities
“Cancel/Discard entry” button EVU Editor – Bat- If you want the Fronius Solar Battery to be charged from the public grid, you can activate terie Ladung [Bat- this here. Depending on what is required by standards or the feed-in tariff rules, it may be tery charging] necessary to deactivate the setting. -
Page 106: Settings - Battery
Maximaler Ladezustand (SOC) der Fronius Solar Battery der während des nor- malen Betriebes erreicht werden darf. Ab dem eingestellten Wert wird keine Energie mehr durch den Fronius Symo Hy- brid in die Fronius Solar Battery geladen. Unabhängig von dieser Einstellung führt der Fronius Symo Hybrid automatisch in regelmäßigen Abständen eine Vollladung der Fronius Solar Battery (100 % SOC) -
Page 107: Batterie Lizenzierung
Batterie Lizenzi- Falls einzelne Batteriemodule getauscht oder erweitert werden, beachten Sie die dem Pro- erung dukt beiliegende Installationsanleitung. Module overview: Die bereits eingetragenen Batteriemodule und deren Status werden angezeigt. Enter activation key: Hier kann der Aktivierungsschlüssel von neuen Batteriemodulen hinzugefügt werden. -
Page 109: Troubleshooting And Maintenance
Troubleshooting and maintenance... -
Page 111: Fronius Symo Hybrid
Fronius Symo Hybrid Displaying status The inverter performs a system self diagnosis that automatically detects many faults that codes may occur and shows them on the display. This means you are promptly made aware of malfunctions in the inverter and the photovoltaic system, or of any installation or operating faults. -
Page 112: Status Codes - Class 4
The inverter repeats its startup ings and heat sink; **) routine. *) If the status code is displayed all the time: Notify a Fronius-trained service engineer. **) Fault is rectified automatically. If this status code keeps recurring, contact your system engineer. - Page 113 Code Description Behaviour Remedy Unable to communicate with the power stage set The inverter will automati- DC module temperature sensor faulty cally attempt to connect (PV) again and, if possible, will resume feeding energy into AC module temperature sensor faulty the grid.
-
Page 114: Status Codes - Class 5
*) *) If the status code is displayed all the time: Notify a Fronius-trained service engineer. **) If this status code keeps recurring, contact your system engineer. Status codes – Class 5 status codes do not generally interfere with feeding energy into the grid, but can Class 5 cause restrictions. - Page 115 Power derating caused by ex- When power derating cessively low temperatures occurs, a warning mes- Fault rectified automatically; **) sage is shown on the display. *) If the status code is displayed all the time: Notify a Fronius-trained service engineer.
-
Page 116: Status Codes - Class 6
*) board has been replaced) *) If the status code is displayed all the time: Notify a Fronius-trained service engineer. **) Fault is rectified automatically. If this status code keeps recurring, contact your system engineer. -
Page 117: Status Codes - Class 9
Warning message on the internal processor status display *) If the status code is displayed all the time: Notify a Fronius-trained service engineer. Status codes – Class 9 status codes are only displayed on the system monitoring page and are not shown Class 9 on the inverter display. -
Page 118: Class 10 - 12 Status Codes
Smart Meter power supply; **) nius Smart Meter ble, feed-in resumes *) If the status code is displayed all the time: Notify a Fronius-trained service engineer. **) If this status code keeps recurring, contact your system engineer. Class 10 - 12 sta-... -
Page 119: Fronius Solar Battery
Fronius Solar Battery Status code dis- The storage system performs a system self-diagnosis that automatically detects many play faults that may occur. These are indicated on the display or via LEDs. This means you are promptly made aware of malfunctions in the storage system, or of any installation or oper- ating faults. -
Page 120: Undefined Operating Statuses
Internal memory error Fieldbus hardware fault Script error Reserved RS transmission buffer overflow RS receiver buffer overflow RS timeout General fieldbus error Parity error or stop bit error (frame check) Reserved Fieldbus configuration error Fieldbus data buffer overflow Reserved Undefined operat- Battery switches off during start-up procedure: ing statuses Keep the battery switched off for at least 120 minutes and then switch it on again. -
Page 121: Appendix
Appendix... -
Page 123: Technical Data
SC PV Number of MPP trackers Number of DC connections Battery input Max. output power to battery Dependent on connected Fronius Solar Battery Max. input power from battery Dependent on connected Fronius Solar Battery Output data Nominal output power (P... - Page 124 Fronius Symo Hybrid 3.0-3-S 4.0-3-S 5.0-3-S DC disconnector Integrated RCMU Integrated Fronius Solar Battery Battery 4.5 Battery 6.0 Battery 7.5 Electrical parameters Nominal capacity 4.5 kWh 6 kWh 7.5 kWh Usable capacity 3.6 kWh 4.8 kWh 6 kWh Cycle stability...
-
Page 125: System Monitoring
Fronius Solar Battery Battery 9.0 Battery 10.5 Battery 12.0 Interfaces Connection to inverter Modbus RTU (RS485) System monitor- Supply voltage 12 V DC Energy consumption < 2 W Dimensions 132 x 103 x 22 mm 5.2 x 4.1 x 0.9 in. -
Page 126: Applicable Standards And Guidelines
Applicable stand- Fronius Symo Hybrid: ards and guide- lines CE mark The devices conform to all the requisite and relevant standards and guidelines that form part of the relevant EU directive, and are therefore permitted to display the CE mark. -
Page 127: Warranty Terms And Conditions, And Disposal
To obtain the full warranty period for your newly installed Fronius inverter or storage sys- tem, please register at: www.solarweb.com. Disposal If you need to replace your inverter or your battery at some point, Fronius will take back the old device and arrange for it to be recycled in an appropriate manner. - Page 128 Fronius International GmbH Fronius USA LLC Solar Electronics Division 4600 Wels, Froniusplatz 1, Austria 6797 Fronius Drive, Portage, IN 46368 E-Mail: pv-sales@fronius.com E-Mail: pv-us@fronius.com http://www.fronius.com http://www.fronius-usa.com Under http://www.fronius.com/addresses you will find all addresses of our sales branches and partner firms!
Need help?
Do you have a question about the Symo Hybrid 3.0-3-S and is the answer not in the manual?
Questions and answers