Table of Contents
Advertisement
/ Perfect Charging / Perfect Welding /
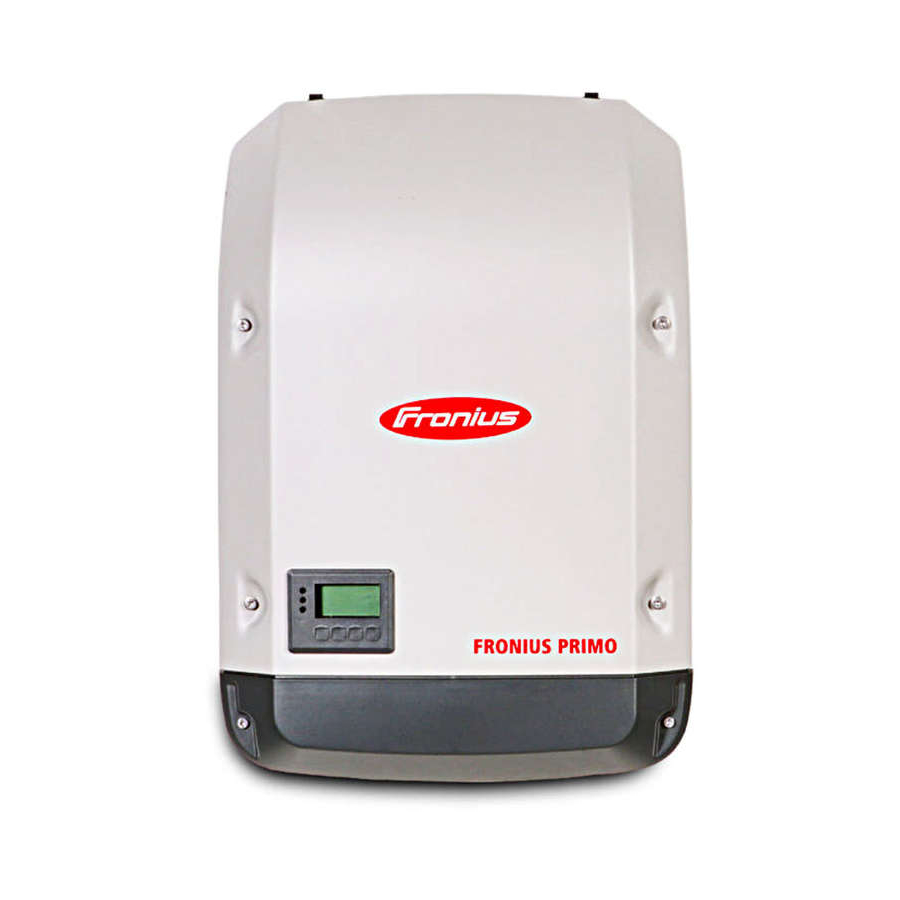
Fronius Primo 208-240
3.8-1 / 5.0-1 / 6.0-1
7.6-1 / 8.2-1
10.0-1 / 11.4-1
12.5-1 / 15.0-1
42,0410,2116
Solar Energy
014-15122015
Operating Instructions
Inverter for grid-connected photo-
voltaic systems
Instructions de service
Onduleur pour installations photo-
voltaïques connectées au réseau
Manual de instrucciones
Inversores para instalaciones foto-
voltaicas acopladas a la red
Advertisement
Table of Contents

Related Manuals for Fronius Primo Series


Summary of Contents for Fronius Primo Series
- Page 1 / Perfect Charging / Perfect Welding / Solar Energy Operating Instructions Fronius Primo 208-240 3.8-1 / 5.0-1 / 6.0-1 Inverter for grid-connected photo- voltaic systems 7.6-1 / 8.2-1 Instructions de service 10.0-1 / 11.4-1 12.5-1 / 15.0-1 Onduleur pour installations photo- voltaïques connectées au réseau...
- Page 3 Thank you for the trust you have placed in our company and congratulations on buying this high-quality Fronius product. These instructions will help you familiarize yourself with the product. Reading the instructions carefully will enable you to learn about the many different features it has to offer.
-
Page 5: Table Of Contents
Fronius Solar Net and Data Interface ....................Installing Option Cards in Inverters....................... System monitoring ............................. General ..............................Starting for the First Time via the Fronius Solar.web App ..............More Detailed Information on Fronius Datamanager 2.0..............Keys and symbols............................Keys and Symbols .......................... - Page 6 Class 5 Status Codes ........................... Class 7 Status Codes ........................... Customer Service ..........................Operation in dusty environments ......................Technical Data ............................Relevant standards and directives......................Terms and conditions of warranty and disposal..................Fronius Manufacturer's Warranty......................Disclaimer ............................. Disposal ..............................CoC................................180...
-
Page 7: Safety Rules
Safety rules General The device has been manufactured using state-of-the-art technology and ac- cording to recognized safety standards. If used incorrectly or misused, howev- er, it can cause injury or death to the operator or a third party damage to the device and other material assets belonging to the operat- ing company inefficient operation of the equipment All persons involved in start-up operation, maintenance and servicing for the... -
Page 8: Qualified Service Engineers
Qualified Service The servicing information contained in these operating instructions is intended Engineers only for the use of qualified service engineers. An electric shock can be fatal. Do not perform any actions other than those described in the documentation. This also applies to those who may be qualified. All cables and leads must be secured, undamaged, insulated and adequately dimensioned. -
Page 9: Backup
Backup The user is responsible for backing up any changes made to the factory set- tings. The manufacturer accepts no liability for any deleted personal settings. Copyright Copyright of these operating instructions remains with the manufacturer. Text and illustrations are technically correct at the time of going to print. The right to make modifications is reserved. -
Page 10: General
The following are deemed not to be in conformity with its intended purpose: utilization for any other purpose, or in any other manner alterations to the inverter that are not expressly recommended by Fronius installation of components that are not expressly recommended or sold by Fronius. -
Page 11: Information On "Field Adjustable Trip Points" And "Advanced Grid Features
Utility company regulations regarding grid power feed must be followed. Information on The inverter is equipped with field adjustable trip points and advanced grid features. For "Field Adjustable further information, please contact Fronius technical support at the following e-mail ad- Trip Points" and dress: pv-us-support@fronius.com. "Advanced Grid Features"... -
Page 12: Insulation Monitoring
/ interrupter. When using such components, it is the responsibility of the system installer to en- sure that the arc detector / interrupter functions correctly. Contact Fronius Tech- nical Support for further information. Warning Notices The inverter contains and displays warning notices and safety symbols. -
Page 13: String Fuses
Ungrounded System: The DC lines of this PV system are not grounded and may be en- ergized. String Fuses You can give solar modules extra protection by using string fuses in the Fronius Primo 10- 15 kW. Crucial for the fuse protection of the solar modules is the maximum short circuit current I of the relevant solar module. - Page 14 Nominal current of the fuse Short circuit current for standard test conditions (STC) according to solar module data sheet Nominal voltage of the fuse NOTE! The nominal current value of the fuse must not exceed the maximum fuse protection value specified in the solar module manufacturer's data sheet. If a max- imum fuse protection value is not specified, please request it from the solar mod- ule manufacturer.
-
Page 15: Rgm - Optional Revenue Grade Meter
Fronius Solar.web As soon as an inverter with the RGM option is connected to Fronius Solar.web, the TOTAL energy value displayed in the CURRENT data view will match the valid RGM energy value. This value can only be used for calculations if the RGM option is available on the inverter. -
Page 16: Data Communication And Solar Net
Fronius developed Solar Net to make these system add-ons flexible and capable of being and Data Inter- used in a wide variety of different applications. Fronius Solar Net is a data network that face enables several inverters to be linked to the system add-ons. -
Page 17: System Monitoring
Controlling the inverter via a ripple control signal receiver (eg reactive power setting or power setting) dynamic power reduction considering the own consumption Further information about the Fronius Data Manager 2.0 can be found online in the Fronius Data Manager 2.0 operating instructions. Starting for the NOTE! The Fronius Solar.web App makes starting Fronius Datamanager 2.0 for... - Page 18 Set the Fronius Solar Net master/slave switch on the Fronius Datamanager 2.0 plug- in card as required One inverter with Fronius Datamanager 2.0 = master All other inverters with Fronius Datamanager 2.0 = slave (the LEDs on the Fro- nius Datamanager 2.0 plug-in cards are off) Switch the device to service mode Inverter with Fronius Datamanager 2.0 plug-in card:...
-
Page 19: More Detailed Information On Fronius Datamanager
Run the Solar Web Wizard and follow the instructions The Fronius Solar.web start page appears. The Fronius Datamanager 2.0 website opens. More Detailed In- More detailed information on Fronius Datamanager 2.0 and other start-up options can be formation on Fro- found at: nius Datamanager 2.0... -
Page 20: Keys And Symbols
Keys and symbols Keys and Sym- bols Item Description Display for displaying values, settings, and menus Control and Status LEDs General Status LED (red) indicates when a status code is shown on the display interruption of grid power feed operation during troubleshooting (the inverter is waiting to be reset or for an error to be corrected). -
Page 21: Display
The keys are capacitive keys; if they become wet their function may be compromised. Wipe the keys dry with a cloth if necessary to ensure optimal function. Display Power for the display comes from the AC grid voltage. The display can be available all day long depending on the setting in the Setup menu. -
Page 22: Menu Level
Menu level Activating Dis- Press any key. play Illumination The display illumination is activated. The SETUP menu item offers the choice between a permanently lit or permanently dark display under "Display Settings." Automatic Deacti- If no key is pressed for 2 minutes: vation of Display the display illumination turns off automatically and the inverter switches to the "NOW"... -
Page 23: Menu Items Now, Log, And Graph
PV Array Current (A) Time / Date Time and date on the inverter or Fronius Solar Net ring Data displayed in menu item LOG: (for the current day, the current calendar year, and since using the inverter for the first time) - Page 24 Earnings amount of money earned during the monitored period (currency can be selected in the Setup menu) As was the case for the output energy, readings may differ from those of other instru- ments. "The Setup Menu" section describes how to set the currency and rate for the energy sup- plied.
-
Page 25: The Setup Menu Item
The SETUP menu item Presetting Following commissioning, the inverter is preconfigured according to the country setup. The SETUP menu item enables you to easily customize the inverter’s preset parameters to your needs. SETUP SETUP G R A P H (Setup menu) NOTE! Because of software updates, certain functions may be available for your device but not described in these operating instructions or vice versa. -
Page 26: General Setup Menu Item Settings
To exit a menu item, press the "Back" G R A P H The menu level is displayed If no key is pressed for 2 minutes the inverter switches to the "NOW" menu item from anywhere within the menu level (exception: Setup menu item "Standby") the display illumination turns off the current power of feeding in is displayed. -
Page 27: Application Example: Setting The Feed-In Tariff
Application Ex- Select the Setup menu item "Energy ample: Setting yield" the Feed-In Tariff Press the "Enter" key The overview of values that can be select- ed is displayed. Use the "Up" or "Down" keys to select "Energy yield" Press the "Enter" key The feed-in tariff is displayed. -
Page 28: The Setup Menu Item
The Setup menu item Standby Manual activation/deactivation of the standby mode No power is fed into the grid. The Startup LED lights up orange. In standby mode, no other menu item can be accessed or set in the menu level. The automatic switching to the "NOW"... -
Page 29: Datcom
"Data Transfer" LED is no longer flashing or illuminated Software update For updating inverter software using a USB stick. IMPORTANT! Firmware may only be updated by Fronius Service Technicians or Fronius Service Partners. Procedure: Download the "froxxxxx.upd" update file (e.g., at http://www.fronius-usa.com;... - Page 30 IMPORTANT! To ensure problem-free updates of inverter software, the USB stick should have no hidden partitions and no encryption (see section "Suitable USB Sticks). Save the update file to the highest data level of the USB stick Open the data communication area Insert the USB stick with the update file into the USB socket in the data communica- tion area In the Setup menu, select the menu item "USB"...
-
Page 31: Relay
Relay Activate Relay, Relay Settings, Relay Test Setting range Relay Mode / Relay Test / Switch on Point* / Switch off Point* * only shown if the 'E-manager' function has been activated under "Relay Mode." Relay Mode For selection of the various functions of the potential-free switching contact in the data communications area: Alarm function Active output... -
Page 32: Display Settings
Activating/deactivating the automatic adjustment for daylight saving time IMPORTANT! Only use the function for automatic daylight savings adjustment when there are no LAN or WLAN-compatible system components in a Fronius Solar Net Ring (e.g., Fronius Datalogger Web, Fronius Datamanager or Fronius Hybridmanager). -
Page 33: Energy Yield
Solar Net components are connected. OFF: No DATCOM operation at night, the inverter requires no AC power to supply Solar Net. The display is deactivated at night; the Fronius Datamanager is not avail- able. Contrast set contrast on the display Setting range 0–10... -
Page 34: Fan
for checking the fan functionality Setting range Test fan #1 / Test fan #2 Use the "Up" and "Down" keys to select Test fan #1 Press the "Enter" key to start testing of the fans The fans run until the menu is exited by pressing the "Esc" key Arc Detection for checking arc detection/interruption Setting range... -
Page 35: The Info Menu Item
The INFO menu item INFO INFO (information on device and software) Measured values Measured values Display range: PV Iso. / Ext. Lim. / U PV1 / U PV2 / GVD- LT status PR / Fan #1 Grid status PV Iso. Insulation resistance of the PV system (for ungrounded solar modules and for solar modules grounded at the negative pole) - Page 36 Display range General/Country Setup/MPP Tracker/AC Monitoring/AC Volt- age Limits/AC Frequency Limits/Q-Mode/AC Power Limits/AC Voltage Derating / Fault Ride Through General: Device type Fam. Country Setup: Setup Country setup used Version Country setup version Group Inverter software update group MPP Tracker: Tracker 1 (status, voltage) Tracker 2 (status, voltage) AC Monitoring:...
-
Page 37: Version
Reduction gradient used to reduce the power. Example: 10% per volt exceeding the GVDPRe threshold. Message Allows info messages to be sent via Fronius Solar Net Fault Ride Through: Status – default setting: OFF If the function is activated, the inverter does not switch off im- mediately when a short-term interruption to the AC voltage oc- curs (outside of the limits set by the grid supplier);... -
Page 38: Switching The Key Lock On And Off
Switching the key lock on and off General The inverter comes equipped with a ‘Key lock’ function. When the ‘Keylock’ function is active, the Setup menu cannot be accessed, e.g., to protect against setup data being changed by accident. You must enter code 12321 to activate / deactivate the ‘Key lock’ function. Switching the Key Press the "Menu"... -
Page 39: Usb Stick As A Data Logger And For Updating Inverter Software
FAT16 FAT32 Fronius recommends that the USB stick only be used for recording logging data or for up- dating the inverter software. USB sticks should not contain any other data. USB symbol on the inverter display, e.g., in the "NOW" display mode:... -
Page 40: Usb Stick For Updating Inverter Software
NOTE! Please be aware that in outdoor applications the USB stick may only func- tion in a limited temperature range. Make sure, for example, that the USB stick will also function at low temperatures for outdoor applications. USB Stick for Up- The USB stick can be used to help end customers update inverter software via the USB dating Inverter menu item in the SETUP menu item: the update file is first saved on the USB stick and then... -
Page 41: The Basic Menu
The Basic menu General The following important parameters are set in the Basic menu for the installation and op- eration of the inverter: DC operating mode Insulation settings Fixed voltage TOTAL reset MPPT1 / MPPT2 initial voltage Event meter USB logbook Accessing the Press the "Menu"... -
Page 42: Items In The Basic Menu
Items in the Basic The Basic menu contains the following items: Menu MPP Tracker 1 DC Tracking Mode: MPP AUTO MPP USER Dyn. Peak Manager: ON / OFF Fix PV Voltage: For entering the fixed voltage, 150 - 800 V MPPT1 Start Voltage: For entering the MPPT1 initial voltage, 150 - 800 V MPP Tracker 2... - Page 43 Insulation settings Insulation warning: to activate and deactivate the insulation monitoring with dis- play of a warning without interrupting feed-in in the event of an insulation error ON / OFF (depends on the country setup) Threshold warning: to set an insulation threshold below which the inverter displays a warning (without interrupting feed-in) depends on the country setup set Threshold error:...
-
Page 44: Status Diagnosis And Troubleshooting
Status Diagnosis and Troubleshooting Displaying Sta- Your inverter is equipped with a self diagnostic system that automatically identifies a large tus Codes number of possible operation issues by itself and displays them on the screen. This en- ables you to know immediately if there are any malfunctions in the inverter, the photovoltaic system or any installation or operating errors. -
Page 45: Class 3 Status Codes
The test is repeated. The inverter disconnects from Arc detector self test failed If the status code persists: the grid. contact a Fronius-trained ser- vice technician. Arc detector current sensor de- If status code persists: contact The inverter disconnects from... -
Page 46: Class 4 Status Codes
Fronius-trained service tech- Startup phase. nician. DC input voltage for MPPT 2 too high Class 4 Status Class 4 status codes may require the intervention of a trained Fronius service technician. Codes Code Description Details Rectification No internal communication with power stage set. - Page 47 Inverter does not feed energy on); update inverter firmware; Software problem into the grid. If status code persists: contact a Fronius-trained service tech- nician. Function incompatibility (one or more PC boards in the in- The inverter will automatically Update inverter firmware;...
-
Page 48: Class 5 Status Codes
Inverter does not feed energy If status code persists: DCfix is outside of valid range into the grid. contact a Fronius-trained ser- vice technician. Carry out AC reset (switch au- tomatic circuit breaker off and Inverter does not feed energy on);... -
Page 49: Class 7 Status Codes
Acknowledge status code. EEPROM was reinitialized or Warning message is shown on If status code persists: contact EEPROM is defective the display. a Fronius-trained service tech- nician. Initialization error – USB stick Check or replace the USB is not supported stick. -
Page 50: Customer Service
(max. 750 W) display Customer Service IMPORTANT! Please contact your Fronius dealer or a Fronius-trained service technician if an error appears frequently or for a long period of time an error appears that is not listed in the tables... -
Page 51: Operation In Dusty Environments
Operation in When operating the inverter in extremely dusty environments: dusty environ- when necessary, clean the cooling elements and fan on the back of the inverter and the ments supply air openings in the wall bracket using clean compressed air. -
Page 52: Technical Data
Technical Data Fronius Primo 3.8-1 208-240 5.0-1 208-240 6.0-1 208-240 Input Data MPP voltage range 200–800 V 240–800 V 240–800 V Start voltage 80 V Max. input voltage 1000 V at 1000 W/m²/57.2°F (14°C) in an open circuit Nominal input voltage... - Page 53 Fronius Primo 3.8-1 208-240 5.0-1 208-240 6.0-1 208-240 Grid frequency setting range 45.0–55.0 Hz / 50.0–65.0 Hz Frequency trip limit accuracy 0.05 Hz Frequency clearing time setting range 0.016–600 s Harmonic distortion < 5% Power factor (cos phi) 0.85 – 1 ind./cap.
- Page 54 Fronius Primo 7.6-1 208-240 8.2-1 208-240 10.0-1 208-240 Input data MPP voltage range 250 - 800 V 270 - 800 V 220 - 800 V Initial voltage 80 V Max. input voltage 1000 V at 1000 W/m² / 57.2°F (14 °C) in an open circuit...
- Page 55 Fronius Primo 7.6-1 208-240 8.2-1 208-240 10.0-1 208-240 Output frequency range Setups: 50Hz, 60Hz 48.0 - 50.5 Hz / 59.3 - 60.5 Hz Setup: HI1 - / 57.0 - 63.0 Hz Setting range for grid frequency 45.0 - 55.0 Hz / 50.0 - 65.0 Hz Frequency limit accuracy 0.05 Hz...
- Page 56 Fronius Primo 11.4-1 208-240 12.5-1 208-240 15.0-1 208-240 Input Data MPP voltage range 240 - 800 V 260 - 800 V 320 - 800 V Start voltage 80 V Max. input voltage 1000 V at 1000 W/m²/57.2°F (14°C) in an open circuit...
-
Page 57: Relevant Standards And Directives
Fronius Primo 11.4-1 208-240 12.5-1 208-240 15.0-1 208-240 Output frequency range Setups: 50 Hz, 60 Hz 48.0 - 50.5 Hz / 59.3 - 60.5 Hz Setup: HI1 - / 57.0 - 63.0 Hz Grid frequency setting range 45.0 - 55.0 Hz / 50.0 - 65.0 Hz Frequency trip limit accuracy 0.05 Hz... -
Page 58: Terms And Conditions Of Warranty And Disposal
Damages claims against Fronius are excluded unless they are based on gross negligence or willful intent on the part of Fronius. The installer and the operator shall comply with the safety rules given by Fronius and re- gional applicable guidelines, standards, and regulations in connection with work on photo- voltaic systems.
Need help?
Do you have a question about the Primo Series and is the answer not in the manual?
Questions and answers
I can not see what the soler is doing. We have lost blue tooth and can't get it back. We have 22 panels on the roof and our electric bill is very high. the screen today is showing 4.2 with a green light on the screen
A display of "4.2" and a green light on the Fronius inverter indicates normal operation and firmware version 4.2. There is no fault with the inverter itself.
If Bluetooth connectivity is not working, it may be due to outdated firmware or incompatible settings. To restore Bluetooth connectivity:
1. Use a suitable USB stick to update the inverter firmware via the USB port.
2. Ensure that Bluetooth is enabled in the inverter settings.
3. Restart the inverter by switching the AC circuit breaker off and on.
If the issue persists, check for hardware compatibility or contact a qualified service technician.
This answer is automatically generated