
Subscribe to Our Youtube Channel
Related Manuals for Trimline Fires 83 Room Divider DB


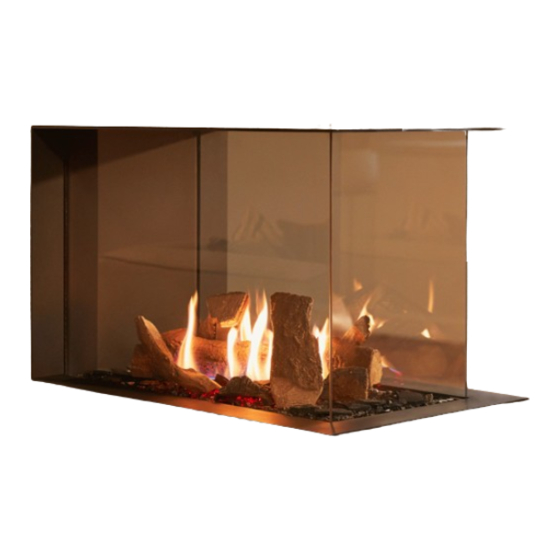
Summary of Contents for Trimline Fires 83 Room Divider DB
- Page 1 trimline Trimline 83 Room Divider DB 1184 Trimline 83 Tunnel DB 1185 INSTALLATION INSTRUCTIONS...
-
Page 2: Table Of Contents
CONTENTS INSTALLATION INSTRUCTIONS ........................3 General instructions ..........................3 PLACING THE APPLIANCE ..........................3 Connection the gas lines ........................3 Preparation and installation ........................3 Installing gas control GV60 ........................4 Installation methods ..........................5 INSTALLATION OF THE OPTIONAL HIGH-GLOSS BLACK GLASS OR GROOVED WALLSET ... 6 Installation instructions for optional high-gloss black glass ............ -
Page 3: Installation Instructions
INSTALLATION INSTRUCTIONS NOTICE NOTICE The installation should be performed only by an authorized Cleaning AR glass see chapter 12 cleaning and maintenace. gasfitter Distance to flammable materials 1.1 General instructions With respect to the front, side and top of the unit, a distance •... -
Page 4: Installing Gas Control Gv60
2.3 Installing gas control GV60 First check everything is undamaged and complete before removing the unit from the packaging. If there are defects, appendix 5 please report this to your purchase address in advance. The complete gas control is mounted under the gas fireplace. After reading and understanding the installation manual, In a protective bracket that can be removed for insertion into you can start the installation. -
Page 5: Installation Methods
NOTICE • And the construction will come under load, which could If something is not right, check the restrictions and baffle cause damage. together with the chimney lay-out and the gas pressures. • After finishing (eg ornamental plaster or glass fiber Ensure the pipes, ignition cable and thermocouple are fitted wallpaper) of the surround, the trims can be put back again. -
Page 6: Installation Of The Optional High-Gloss Black Glass Or Grooved Wallset
INSTALLATION OF THE OPTIONAL HIGH-GLOSS BLACK GLASS OR GROOVED WALLSET NOTICE If you have opted for a high-gloss black glass, grooved pattern, you must first assemble it before you put the wood set in place. 3.1 Installation instructions for optional high-gloss black glass appendix 9 ... -
Page 7: Placing The Optional Led Glowbed Unit
PLACING THE OPTIONAL LED GLOWBED UNIT Installation instructions optional LED glowbed unit appendix 6 . • Place the glass pane belonging to the LED module with the smooth gloss side up on top of the gasket and check The LED Glowbed unit consists of: for good seals. -
Page 8: Placement Of The Ceramic Log Set
PLACEMENT OF THE CERAMIC LOG SET Placement of the ceramic log set appendix 7 . NOTICE Make sure the pilot light remains unobstructed from • Standard all burners are mounted and the perforated any material. decoration plate is placed. • For the easier removal of the decoration plate there are •... - Page 9 • Slide the glass pane up using the supplied suction cup, and pull the bottom towards you to slowly remove the glass pane. • The glass pane can be replaced in reverse order. • Remember to put the springs that push on the back of the glass under tension so that there is less chance of the glass creeping.
-
Page 10: Technical Details Gv60
TECHNICAL DETAILS GV60 Gas valve type Mertik GV60 Burner control B6R R8U (WiFi-Ready) Ignition Remote control operation and piezo ignition Gas connection Pilot flame pipe Multi-cable Thermocouple Ignition cable connection point Gas inlet 3/8” externally Double burner connector Rear burner/outer burner gas outlet Burner control Front/centre burner gas outlet Unit category... - Page 11 Adjustment screw burner pilot light Adjustment screw burner pressure Main adjustment Main gas control knob Piezo connection Pilot light Gas inlet front connection Thermocouple connection Gas outlet front burner Gas inlet rear Inlet pressure Built-in Gas outlet Outlet rear burner Door cassette pressure...
-
Page 12: Instructions For Mertik Maxitrol Gv60 Gascontrol
INSTRUCTIONS FOR MERTIK MAXITROL GV60 GASCONTROL WARNING NOTICE It is forbidden to start up the unit if window(s) is not present • Do not tighten the contact breaker and the thermocouple or broken! connection too tightly on the gas control block or to Ensure that the fuel supplied to the unit is clean and free each other. -
Page 13: Gas Technical Data
GAS TECHNICAL DATA Type of indication(s) 1184 Room Divider - 1185 Tunnel CC Appliance C11, C31, C91 Holetherm CC 130-200 Concentric flues system Gastype G25.3 G20/25 G20D25 20/25 Prepressure in mBar Country AT/CH/CZ/DE/DK/EE/ES/ BE/FR FI/GB/GR/HR/IE/IT/LT/LU/ LV/NO/PL/PT/RO/SE/SI/ SK/TR H/-/I Category (43,46-45,3 MJ/m Primary air per burner 3x(2xØ4) - Page 14 Type of indication(s) 1184 Room Divider - 1185 Tunnel CC Appliance C11, C31, C91 C11, C31, C91 Concentric flues system Holetherm CC 130 - 200 Gastype G30/G31 (28-30)-37 30/50 Prepressure in mBar Country BE/CH/CY/CZ/ES/FR/GB/GR/IE/IT/LT/PT/ AT/CH/CY/CZ/DE/DK/EE/FI/GR/HR/HU/IT/ SI/TR LT/NL/NO/PL/PT/RO/SE/SI/TR/ Category I3B/P Primary air per burner L=4xØ10, M=4xØ12, R=4xØ10 L=4xØ10, M=4xØ12, R=4xØ10 Pre pressure...
-
Page 15: Concentric Chimney Lay Out
CONCENTRIC CHIMNEY LAY OUT Table of concentric chimney lay out Lay out Illustration X total in meter Y total in meter Restriction X = vertical and Y = horizontal min* max* min* max* 1180 - 1183 Indirect exterior wall outlet G20/G25/G25.3 See restriction conditions Indirect exterior wall outlet G30/G31 See restriction conditions... -
Page 16: Concentric Flue System
10 CONCENTRIC FLUE SYSTEM The concentric flue system is composed of an inner- and sealed sufficiently against the wall on the outside, to avoid an outer tube. These tubes are concentrically arranged; moisture and/or flue gas leaks into the living space. through the inner tube, the combustion gases are evacuated •... -
Page 17: Parts
10.4 Parts Check all parts for damage before commencing the instal lation. You will require the following parts for converting a brickwork duct to a balanced flue concentric duct. (see Appendix 3 Installation examples regarding flues) NOTE The renovation kit consists of parts: 4 Interior mounting plate 5 Sliding element 8 Chimney mounting plate... -
Page 18: Terminal Positions And Correct Functioning
11 TERMINAL POSITIONS AND CORRECT FUNCTIONING Roof pass-through External extension pipe Plot boundary Dimensions Outlet positions Distance mm Distance to ventilation openings Room* Distance to ventilation openings Room* Distance to ventilation openings Room* Gutter channel base pipes or outlet pipes below here Under the eaves Under a carport, roof or balcony, inside and outside corners From vertical ground pipes or drain pipes... -
Page 19: Cleaning And Maintenace
12 CLEANING AND MAINTENACE Anti Reflective glass; AR glass cleaning This appliance should be inspected and serviced once a year instructions by a qualified, competent and registered person. The inspection appendix 4 and maintenance must at least ensure that the appliance is General working correctly and safely. -
Page 20: Quick Reference Guide For Faultssearch For Enclosed Gas Fires Using Mertik Gv60 Gascontrol
13 QUICK REFERENCE GUIDE FOR FAULTSSEARCH FOR ENCLOSED GAS FIRES USING MERTIK GV60 GASCONTROL Function Possible cause Solution 1. Acoustic signals 1 long beep reset switch OFF (0) Set switch to (I) 1 long beep connections not complete Check connections in thermocouple circuit 1 long beep ... - Page 21 Function Possible cause Solution 8. Pilot light/main flame off Gas pre-pressure has dropped Check correct dimensions of gas pipe or blockage, correct Main burner ignition, 3 beeps, low Check batteries or 6-VDC adapter power supply voltage Too much/little transport in unit/outlet Check restriction/baffle situation in accordance with instructions.
-
Page 22: Appendix 1 Dimensional Drawings
Appendix 1 DIMENSIONAL DRAWINGS Trimline 83 Room Divider DB Measurements in mm 1076 1081 1021 Trimline 83 Tunnel DB 1086 Installation instruction Trimline 83 Room Divider/Tunnel... - Page 23 Built-in cassette 160,0 130,0 SECTION C-C SCALE 1 : 3 255,0 SECTION D-D SCALE 1 : 3 Convection grilles SECTION A-A SCALE 1 : 3 Installation instruction Trimline 83 Room Divider/Tunnel...
-
Page 24: Appendix 2 Built-In Examples
Appendix 2 BUILT-IN EXAMPLES 166.6 Installation instruction Trimline 83 Room Divider/Tunnel... - Page 25 Appendix 2 CONTINUED Trimline 83 Room Divider DB Trimline 83 Tunnel DB Installation instruction Trimline 83 Room Divider/Tunnel...
- Page 26 Appendix 2 CONTINUED Trimline 83 Room Divider DB A = 420 mm A = 420mm B = 856 mm B = 856mm From this point Trimline 83 RD Vanaf dit punt A (mm) B (mm) Size always to be checked on appliance!
- Page 27 Appendix 2 CONTINUED Trimline 83 Panoramic/Corner plateau levelled built in ‘direct’ against glass windows Installation instruction Trimline 83 Room Divider/Tunnel...
-
Page 28: Appendix 3 Installation Examples Regarding Flues
Appendix 3 INSTALLATION EXAMPLES REGARDING FLUES Material: Stainless steel AISI 316 L - Allow number 1.4404 For diameter see chapters 8 and 9 Application: for the discharge of flue gases and the supply of combustion air from gas-fired fireplaces or stoves with a closed combustion system Roof pass-through Roof pass-through... -
Page 29: Appendix 4 Preparation And Installation
Appendix 4 PREPARATION AND INSTALLATION Intake restriction (See chapter 9 Concentric Chimney Remove the baffle plate Lay-out for application) Loosen two parkers Push the baffle plate from the rear wall towards the glass Tilt to take out the baffle plate The baffle plate is located under the lip due to transport and danger of tipping over. -
Page 30: Appendix 5 Preparing Gas Cassette Gv60 For Installation
Appendix 5 PREPARING GAS CASSETTE GV60 FOR INSTALLATION STEP 1 Cut the ties to release all lines. 1 Gas valve STEP 2 Remove the protection bracket with gas control block and receiver. 2 STEP 3 2 3 4 Place the gas control block and receiver in the gas cassette. Gas cassette Installation instruction Trimline 83 Room Divider/Tunnel... - Page 31 Appendix 5 CONTINUED STEP 4 5 6 7 Slide the bracket with the gas control block and receiver into place 1. Fix the wing nuts in place. 2 Example of installing an accessible tap. 3 The holder with receiver can now be disconnected.
-
Page 32: Appendix 6 Placing The Optional Led Glowbed Unit
Appendix 6 PLACING THE OPTIONAL LED GLOWBED UNIT WARNING The LED module cable must NOT TOUCH the ignition cable. Beware of this during installation and after maintenance. Ignition Ignition Ignition cable module cable module cable cable module cable cable Installation instruction Trimline 83 Room Divider/Tunnel... - Page 33 Appendix 6 CONTINUED Installation instruction Trimline 83 Room Divider/Tunnel...
- Page 34 Appendix 6 CONTINUED NOTICE Gloss side must face up Glossy side Matte side Installation instruction Trimline 83 Room Divider/Tunnel...
-
Page 35: Appendix 7 Fitting Log Set
Appendix 7 FITTING LOG SET Disassemble one of the standing burners to install block A. Push block A against the stop towards the pilot flame. Divide glass. Make sure the pilot flame remains free. Installation instruction Trimline 83 Room Divider/Tunnel... - Page 36 Appendix 7 CONTINUED Plaats de overige blokken. After putting the blocks in place, distribute the other glow materials over the grille. Installation instruction Trimline 83 Room Divider/Tunnel...
-
Page 37: Appendix 8 Figures Placing Or Removing Glass Panes
Appendix 8 FIGURES PLACING OR REMOVING GLASS PANES Trimline 83 Room Divider DB Release the transport lock Remove the wide frames BRACKET Slide the top glazing bar out of the lock and then slide it down Disassemble Magnet the glazing bars Use the suction cup to take out the glass pane. - Page 38 Appendix 8 CONTINUED Trimline 83 Tunnel DB Remove the wide frames Disassemble the glazing bars: • Remove the side glazing bars by sliding the quick release. • The top and bottom glazing bars can be removed in the same way as the Room Divider. •...
-
Page 39: Appendix 9 Exploded View And Spare Parts
Appendix 9 EXPLODED VIEW AND SPARE PARTS Trimline 83 Room Divider DB Detail B Detail A Installation instruction Trimline 83 Room Divider/Tunnel... - Page 40 Appendix 9 CONTINUED Trimline 83 Room Divider Log burner standup TL 8360 Art. Number Qty. Log burner standup TL 8360 Art. Number Qty. Verbrandingskamer TL 8360 RD 531184000000 Log burner standup TL 8360 531181007000 Keerplaat TL 8360 RD 531184041000 Beluchtingsbeugel 2x5 TL 8360 531181048000 Restrictie plaat 90 mm TL 8360 RD 531184051000...
- Page 41 Appendix 9 CONTINUED Trimline 83 Tunnel DB Detail C Detail D Installation instruction Trimline 83 Room Divider/Tunnel...
- Page 42 Appendix 9 CONTINUED Trimline 83 Tunnel DB Log burner standup TL 8360 Art. Number Qty. Log burner standup TL 8360 Art. Number Qty. Verbrandingskamer TL 8360 RD 531185000000 Main injector See gas sets Keerplaat TL 8360 RD 531184041000 Pilot burner 64200432 Restrictie plaat 90 mm TL 8360 RD 531184051000...
Need help?
Do you have a question about the 83 Room Divider DB and is the answer not in the manual?
Questions and answers