Advertisement
SSV WORKS, 201 N. Rice Ave Unit A, Oxnard, CA 93030
www.SSVworks.com | Phone: 818-991-1778 | Fax: 866-293-6751
WARRANTY INFORMATION:
All SSV Works enclosures are covered by a limited lifetime warranty against defects in material
or workmanship. All SSV Works Electronics are covered by a limited 1 year warranty against
defects in material or workmanship. All SSV Works Speakers are covered by a limited 1 year
warranty against defects in material or workmanship. Labor for replacement of defective
components is not covered. Contact SSV Works for further warranty information.
TOOLS NEEDED FOR INSTALLATION
PARTS LIST IMAGES
1. RG4-US10 Enclosures
A. Align bracket A's holes with the dimples/recess' circled in pink on the
bottom of the enclosure. Using four (4) flathead 4mm screws, mount
the A bracket to the bottom of the enclosure. After the bracket is secure,
cover the screw heads with the (4) foam circles.
C. Using a panel removal tool, extract the (8) push pins to
remove the center driveline center column cover.
- T-30 & T-40 Torx Driver - 4mm Allen Key
2. Enclosure Bracket A
2. Enclosure Bracket B
C
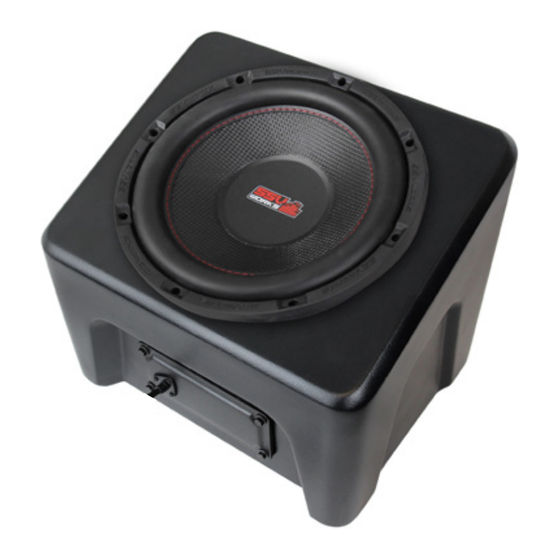
Underseat 10" Subwoofer Enclosure
4. M6 Flathead 4mm
Hex Screws x4
A
B. Flip up passenger seat and remove center tray to access
battery. Disconnect the negative battery cable from the battery.
D. Located on the floorboard to the right of the battery
compartment, remove the (3) T40 torx screws circled in pink.
RG4-US10
Polaris Ranger
Please read and understand these
!
instructions completely before
installation to avoid possible injury, or
damage to the accessory or vehicle.
- Panel Removal Tool
- Drill - 13/64" Drill Bit
5. M6 Allen Torx
Screws x5
5. Foam Circles
x4
B
D
Advertisement
Table of Contents

Related Manuals for SSV Works RG4-US10


Summary of Contents for SSV Works RG4-US10
- Page 1 All SSV Works Electronics are covered by a limited 1 year warranty against installation to avoid possible injury, or defects in material or workmanship. All SSV Works Speakers are covered by a limited 1 year damage to the accessory or vehicle.
- Page 2 Connect to the amplifier. “-“from the speaker wire to the amplifier. If using with an SSV Works complete system refer to the amplifier wiring instructions for more detailed wiring information. © 2018 SSV Works, Oxnard, CA 93030...
Need help?
Do you have a question about the RG4-US10 and is the answer not in the manual?
Questions and answers