
Subscribe to Our Youtube Channel
Related Manuals for Pilot Communications Viper Jet 78


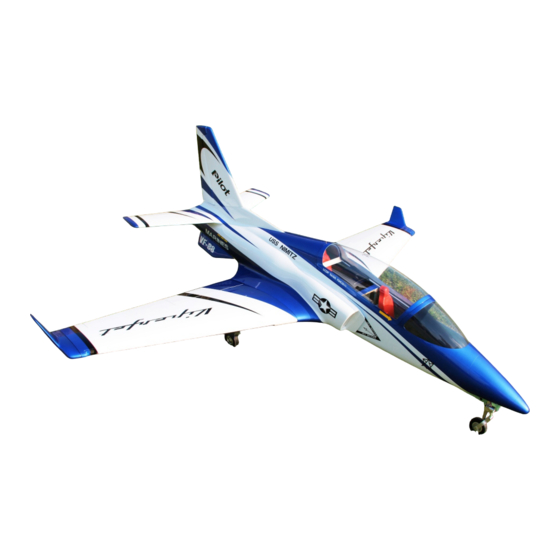
Summary of Contents for Pilot Communications Viper Jet 78
- Page 1 Viper Jet 78” USER MANUAL WINGSPAN:2200mm LENGTH:2000mm Turbine: 80-140N Weight: 23.7lbs (10.8kg)
- Page 2 Introduction ! Thank you for purchasing our Viper Jet plane. we strive to achieve a good quality quick build ARF aircraft . It requires the least amount of assembly of any ARF kit to obtain the maximum performance. ! Both the design and manufacturing have been undertaken to the highest standards, using best quality hardware, covering, wood &...
- Page 3 Install kit contents Install kit contents: (Some contents like fuel tank etc… has already installed in fuselage) Carbon tube: Landing gear module(optional): Landing gear Pilot landing gear controller...
- Page 4 Install kit contents Accessories pack: Accessories pack includes: Hexagon screws in metric system(SHCS) Tapping screws Metric Allen Wrench Push rot wrench V teeth steel wire Push rot Wring clamp Gasket Battery bandage Oil nipple suit Extension cord Crowbar (Some of accessories like screw/cord etc… isn’t in this accessories pack)
- Page 5 Install kit contents Servo module(optional): Servo: PW-20AH PY-12AH Servo arm: Pilot Futaba aluminum alloy 0.8” Pilot Futaba aluminum alloy 1.2” Other Accessories Need To Complete: Epoxy Adhesives Cyanocrylate adhesives X-Acto and Saw knives Sandpaper Thread lock Aircraft stand or support...
- Page 6 Landing gear assembly Landing gear assembly: Retract Landing Gear Installation, Viper Jet come with electric-landing gear and brakes.
-
Page 7: Landing Gear Assembly
Landing gear assembly 1: Install the servo to the nose landing gear. Install the servo arm and the push rod. Adjust it to make sure the plane can go straight approx. You still can adjust by radio after install it. - Page 8 Landing gear assembly - nose Carefully arrange the nose gear retract After the installation wire lead and the steering wire as well ... Install the nose retract gear to the fuselage.
- Page 9 Landing gear assembly - main 1.Connect all servo / Navigation lights/ landing gear retraction,/brake...
- Page 10 Installation of wing tip navigation lights...
-
Page 11: Installation Completed
Installation of ventral fins 1. Before installation 2.Installation completed... - Page 12 Wing Servo/Flaps Assembly Flaperon steering gear cover plate 2. Place the servo over the servo plate 3.Drill out the four holes in the plate, making sure that the arm moves freely then securely screw the servo to the within the provided slot, and mark out inside of the plate using the metal the placement of the four screw holes screws provided...
- Page 13 Elevator/ Rudder Servo Assembly Rudder servo assembly 1.Insert the servo into the precut servo mount , Screw the servo in place, and then install the servo arm on to the servo, making sure that this is centred.
- Page 14 Elevator/ Rudder Servo Assembly Next is the elevators 2.Screw the servo in place, and then 1.Put in the servo to the precut slot in install the servo arm on to the servo, the elevator. making sure that this is centred. 3: The other side of the servo connector glue at the side of the fuselage, just a drop of CA or 5 min epoxy to glue it.
- Page 15 Servo Wire Arrangements 1.Install the tail nozzle and fix the steering gear line with flat tail and vertical tail You can fix the lead to the side wall 2.Fixing of Main Oil Tank...
- Page 16 Fixing of Main Controller Each controller is fixed on the equipment board...
- Page 17 Flying Setting Aileron: 20mm Rudder: 25mm Elevator: 20mm Flaps: 35mm for take off 65mm for landing. CG: The CG is 160-177mm from the front leading edge on the root of the wing. ...
- Page 18 Packing bag 1.Fuselage+ vertical fin +horizontal tail packaging 2.Wing packaging...
-
Page 19: Flight Preparation
Flight Preparation ■ Make sure you have the right model programmed into your transmitter ■ Check the direction of each surface not and also right before you take off . ■ Remember nothing wrong on the ground ever improves in the air ■... - Page 20 Zhongshan Pilot Model Aircraft Product Ltd Address: No.34, Chengnan Er Road, Zhongshan city, 528455, Guangdong Province, China Web: www.pilot-rc.com Email: pilot-rc@139.com, info@pilot-rc.com Tel: +86-760-88781293 FAX: +86-760-88780293...
Need help?
Do you have a question about the Viper Jet 78 and is the answer not in the manual?
Questions and answers