
Related Manuals for INOXPA INNOVA P Series


Summary of Contents for INOXPA INNOVA P Series
- Page 1 INSTALLATION, SERVICE AND MAINTENANCE INSTRUCTIONS DOUBLE SEAT VALVE INNOVA P Original manual 10.250.30.02EN (0) 2019/09...
- Page 2 Regulation (EC) nº 1935/2004 In compliance with on materials and articles intended to come into contact with food. The technical file has been prepared by the signer of this document in INOXPA S.A.U. David Reyero Brunet Technical Office Manager Banyoles, September 30, 2019...
-
Page 3: Table Of Contents
9.4. Sizes available ............................20 9.5. Weights of the INNOVA P valve ......................... 21 9.6. Dimensions of the INNOVA P valve......................21 9.7. Exploded drawing and parts list of the INNOVA P valve ................22 INOXPA S.A.U. 10.250.30.02EN · (0) 2019/09... -
Page 4: Generalities
risk to the environment due to the type of substances released. 2.3. WARRANTY Any warranty will be void immediately and lawfully and, additionally, INOXPA will be compensated for any civil liability claims submitted by third parties, in the following cases: ... -
Page 5: Safety
Electric hazard ATTENTION Important instruction to prevent damage to the equipment and its function 3.2. GENERAL SAFETY INSTRUCTIONS Read the instruction manual carefully before installing and starting the valve. Contact INOXPA in case of doubt. 3.2.1. During installation Technical specifications chapter 9 should always be observed. -
Page 6: General Information
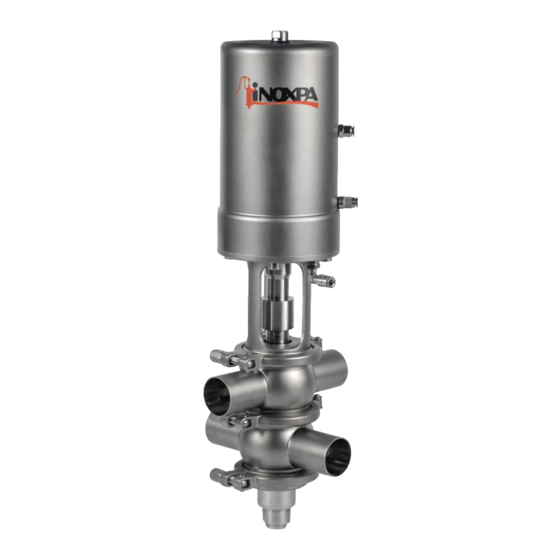
CIP (cleaning product). The leak detection chamber is cleaned by the independent actuation of the seats during the CIP stage of the facility. Actuator Lantern Bodies INOXPA S.A.U. 10.250.30.02EN · (0) 2019/09... -
Page 7: Installation
5. Installation 5.1. RECEPTION OF THE VALVE INOXPA is not liable for any deterioration of the material caused by its transport or unpacking. Visually check that the packaging has not been damaged. When receipt the valve, check to see whether all the parts listed on the delivery slip are present: ... - Page 8 Material AISI 316L Connection Welded Standard pipe Body configuration A, B, C, D 2 bodies J, P, R, S, V, W, X, Z 3 bodies Types Mixproof valve (seat lift) Product family INNOVA valve INOXPA S.A.U. 10.250.30.02EN · (0) 2019/09...
-
Page 9: Location
open and close the valve, applying compressed air to the actuator, several times to make sure it operates correctly and to make sure that the shaft joint is coupled smoothly to the valve body. INOXPA S.A.U. 10.250.30.02EN · (0) 2019/09... -
Page 10: Welding
Never disassemble the valve clamps directly without Reading the instructions carefully, since the actuator contain a spring inside it with and applied load. Valve and/or actuator assembly and disassembly should only be done by qualified persons. INOXPA S.A.U. 10.250.30.02EN · (0) 2019/09... -
Page 11: Actuator Air Connection
Connect and check the compressed air connections. INOXPA valves are supplied with connections for Ø6 pipe, and with a silencer on S/E actuators. Consider the quality of the compressed air, according to the specifications described in chapter Technical specifications. -
Page 12: Start-Up
ATTENTION Do not modify the operating parameters for which the valve has been designed without prior written authorisation from INOXPA. Do not touch the moving parts of the coupling between the actuator and the valve when the actuator is connected to the compressed air supply. -
Page 13: Operating Problems
Excessive product pressure in upper body Tighten loose parts • Loss of seal (vibrations) Adjust cleaning time in control system • • Insufficient time for impulses • Increase the compressed air pressure Insufficient air pressure INOXPA S.A.U. 10.250.30.02EN · (0) 2019/09... -
Page 14: Maintenance
PARALIQ GTE 703 The period between each preventive maintenance service will vary depending on the working conditions to which the valve is subject: temperature, pressure, number of operations per day, type of cleaning solutions used, etc. INOXPA S.A.U. 10.250.30.02EN · (0) 2019/09... -
Page 15: Cleaning
To remove any traces of cleaning products, ALWAYS perform a final rinse with clean water at the end of the cleaning process. Before starting disassembly and assembly tasks, clean the entire interior and exterior of the valve. INOXPA S.A.U. 10.250.30.02EN · (0) 2019/09... -
Page 16: Assembly And Disassembly Of The Innova P Single Seat Valve
15. Remove the three seat seals from the top and bottom shafts (05C, 05D, 05E) follow the steps specified in section 8.6. Replacing the seat seal. 16. Remove the lower clamp (34) located on one end of the valve bodies. INOXPA S.A.U. 10.250.30.02EN · (0) 2019/09... - Page 17 See section 9.7. Exploded drawing and parts list of the INNOVA P valve for a reference to the parts described. INOXPA S.A.U. 10.250.30.02EN · (0) 2019/09...
-
Page 18: Replacing The Seat Seal
a crescent spanner 13 mm for remove the clamps, appropriate tool (not piercing) to mount the seat seals, a crescent spanner as per the table: Zone DN 40/50/65/80 DN 100 Lantern 13 mm 19 mm INOXPA S.A.U. 10.250.30.02EN · (0) 2019/09... -
Page 19: Disassembly And Assembly Of The Actuator
10. Reduce the force applied slowly until the tool no longer touches the cover. 11. Install the air fitting (18 and 18A). 12. Apply compressed air to check the proper operation of the actuator. INOXPA S.A.U. 10.250.30.02EN · (0) 2019/09... -
Page 20: Technical Specifications
Outer surface finish Matt 9.4. SIZES AVAILABLE DN 40 – DN 100 DIN EN 10357 series A (formerly DIN 11850 series 2) OD 1 ½’’ – OD 4’’ ASTM A269/270 (correspond to OD tube) Connections Welded INOXPA S.A.U. 10.250.30.02EN · (0) 2019/09... -
Page 21: Weights Of The Innova P Valve
Technical Specifications 9.5. WEIGHTS OF THE INNOVA P VALVE Weight (kg) 1 ½’’ 2’’ 2 ½’’ 3’’ 4’’ 9.6. DIMENSIONS OF THE INNOVA P VALVE Dimensions (mm) ØF 1 ½’’ 2’’ 2 ½’’ 3’’ 4’’ INOXPA S.A.U. 10.250.30.02EN · (0) 2019/09... -
Page 22: Exploded Drawing And Parts List Of The Innova P Valve
20A / 20B EPDM / FPM / HNBR O-ring Lantern AISI 304 Hexagonal screw Threaded bolt Clamp AISI 304 Shaft fixing sleeve AISI 304 Shaft fixing core AISI 304 Scraper recommended spare parts INOXPA S.A.U. 10.250.30.02EN · (0) 2019/09... - Page 23 NOTES ________________________________________________________________________________ ________________________________________________________________________________ ________________________________________________________________________________ ________________________________________________________________________________ ________________________________________________________________________________ ________________________________________________________________________________ ________________________________________________________________________________ ________________________________________________________________________________ ________________________________________________________________________________ ________________________________________________________________________________ ________________________________________________________________________________ ________________________________________________________________________________ ________________________________________________________________________________ ________________________________________________________________________________ ________________________________________________________________________________ ________________________________________________________________________________ ________________________________________________________________________________ ________________________________________________________________________________ ________________________________________________________________________________ ________________________________________________________________________________ ________________________________________________________________________________ ________________________________________________________________________________ ________________________________________________________________________________ ________________________________________________________________________________ ________________________________________________________________________________ ________________________________________________________________________________ ________________________________________________________________________________ ________________________________________________________________________________ ________________________________________________________________________________...
- Page 24 How to contact INOXPA S.A.U.: Contact details for all countries are Continually updated on our website. Please visit www.inoxpa.com to access the information. INOXPA S.A.U. Telers, 60 – 17820 – Banyoles – Spain Tel.: +34 972 575 200 – Fax: +34 972 575 502...
Need help?
Do you have a question about the INNOVA P Series and is the answer not in the manual?
Questions and answers