
Related Manuals for Prem-I-Air EH1614/EU


Summary of Contents for Prem-I-Air EH1614/EU
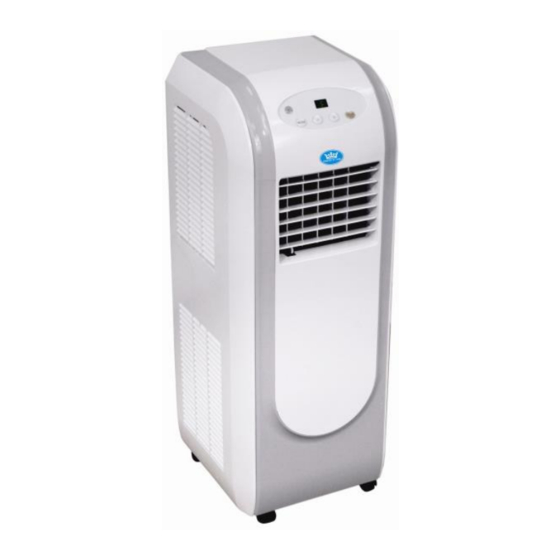
- Page 1 EH1614 / EU 2.3kW (8000 BTU/hour) Portable Air Conditioner Climatiseur Local Page 1...
-
Page 2: Before Use
IMPORTANT Installer and Users please note: These instructions should be read carefully and left with the user of the product for future reference. BEFORE USE Inspect the product including its cable and plug for any signs of damage. If the product is damaged, DO NOT use it, and contact your supplier immediately. - Page 3 Drain Pipe Clip Screw Drain Port Attach the drain pipe clip to rear panel of the air conditioner using the screw provided. Rubber Plug Spring Clip Dran Pipe Clip Dran Pipe Drain Port Firmly attach the drainage pipe to the drain port and secure using the pipe hoop spring clip provided.
- Page 4 Installing Exhaust Hose In normal use the EH1614 will produce hot air from the rear exhaust port, this air can be vented through an open window or wall vent. Connect the exhaust hose as follows: expand a small section of the end, and screw into the indoor adaptor (Joint clockwise direction, the side marked...
- Page 5 Keep the hose as straight as possible, avoid dips where the moisture from the exhaust air can condense and fill the tube with water. Do not allow the hose to be crushed The hose can be expanded up to 1.5m long, but the shorter it is the more efficiently the E1614 will operate.
-
Page 6: General Safety Requirements
Remote Control Fit 2 x AAA batteries in to the remote control, observing the correct polarity. Do not attempt to recharge the batteries. Do not dispose any of the batteries in a fire, as they may explode. Do not use any other type of battery. GENERAL SAFETY REQUIREMENTS Domestic wiring must be tested periodically by a qualified electrician at least once every 10 years or at every change of occupancy. -
Page 7: Pat Testing
Do not cover. Do not obstruct the air intakes and exhausts. For indoor use only Not suitable for use in boats, caravans or similar locations. Do not use in bathrooms, or in wet locations. Do not place the mains lead beneath a carpet or rug. ... - Page 8 Conensate Tank Full Digital Display Fan Mode indicator Indicator Remote Receiving Dehumidifier Mode Cool Mode point Indicator Indicator MODE Button +/- Buttons ON/OFF Button Leave the appliance in an upright position for 3 hours before first use. Plug the mains lead into a 13 Amp mains socket (unless permanently installed) If connecting via an extension lead, make sure that the lead is rated at 13 Amps or more, and that it is fully unwound.
-
Page 9: Remote Control
REMOTE CONTROL When the power is connected to the unit all the functions plus some additional operations can be completed from the remote control. ON/OFF, When the unit is connected to the mains supply this button will turn the item on or off. MODE, This will allow the unit to cycle through the 3 operating modes in order. -
Page 10: Trouble Shooting Remote Control
Within 5s press the + or – button to increase or decrease the time by 0.5h. Hold the + or – buttons for greater than 2s to increase the speed of change. When the desired time is reached press the timer button to confirm, the T-OFF and H icons will stop flashing. - Page 11 CLEANING The unit should be cleaned regularly to maintain the best possible operating efficiency and performance. Before any maintenance should be performed turn off the unit and once the fans and compressors have stopped unplug the unit from the mains supply and leave for 3 minutes.
-
Page 12: Troubleshooting
TROUBLESHOOTING If you have any trouble operating this unit please see the table below for simple instructions on how to solve many common problems. Never attempt to open or service the unit and refer all servicing to qualified personnel. Trouble Cause Remedy Connect the unit to a live socket... - Page 13 FAULT CONDITIONS Meaning Solution Error Code Disconnect power, wait 10min then turn the unit on. If E5 still Overcurrent Protection displays contact an authorised repair agent Empty condensate Tank. See Condensate Tank is Full Page 3, Ambient Temperature Sensor Contact an authorised repair Fault agent Evaporator Temperature...
-
Page 14: Maintenance
MAINTENANCE If the mains lead is damaged, it must be replaced by the manufacturer or an authorised service centre. If the mains plug needs to be replaced, proceed as follows: Connect the brown wire to the terminal labelled "L". Connect the blue wire to the terminal labelled "N"... -
Page 15: Technical Specification
TECHNICAL SPECIFICATION Unit 8000 Btu/h Cooling capacity 2345 230~ Power Supply Rated Input (Cooling) Rated Current (Cooling) EER for Cooling(R410A) Moisture Removal 0.75 Air Circulation m³/h High dB(A) Noise Middle dB(A) dB(A) Product W×H×D 300×800×355 Size Packing W×H×D 355×850×565 Size Refrigerant Type/Charge R410a/460g...
Need help?
Do you have a question about the EH1614/EU and is the answer not in the manual?
Questions and answers