
Subscribe to Our Youtube Channel
Related Manuals for Prem-I-Air EH1910


Summary of Contents for Prem-I-Air EH1910
- Page 1 Caution, Risk of fire R290 EH1910 12,000BTU Mobile Portable Local Air Conditioner with Remote Control, Timer and Wi-Fi Please Retain for Future Reference...
-
Page 2: Before Use
IMPORTANT Installer and Users please note: These instructions should be read carefully and left with the user of the product for future reference. BEFORE USE Inspect the product (including its cable and plug) for any signs of damage; If the product is damaged in anyway do not use it and contact your supplier immediately. -
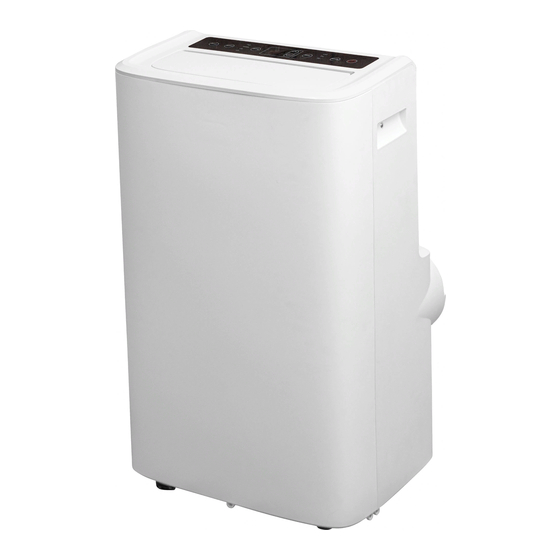
Page 3: Product Diagram
SYMBOLS FROM THE UNIT AND USER MANUAL This unit uses a flammable refrigerant. If refrigerant leaks and comes in contact with fire or heating part, there is risk of fire. warning Read the USER MANUAL carefully before operation. Further information is available in the USER MANUAL, SERVICE MANUAL, and the like. Service personnel are required to carefully read the USER MANUAL and SERVICE MANUAL before operation. - Page 4 ACCESSORIES Exhaust Hose Hose Connector Window Kit Adaptor Remote Control Window Kit FITTING THE EXHAUST HOSE 1. Connect the hose connector to one end of the exhaust hose 2. Connect the windows adaptor kit to the other end of the exhaust hose...
- Page 5 3. Extend the adjustable window kit the length of the window 4. Close your window to secure the kit in place. It needs to hold the window kit firmly in place. 5. Attach the hose connector to the exhaust air outlet of the unit.
-
Page 6: Control Panel And Display
CONTROL PANEL AND DISPLAY Press to switch the machine on or Power off. Mode button. Press to switch the Mode operation mode between cool, fan, auto and dry. LED for 4 operation modes. Select by Indicators pressing mode button. Increasing the desired temperature (16℃~32℃) or timer setting. -
Page 7: Operation
OPERATION The unit has 4 operating modes: Cool, Fan, Dry, Sleep Start up and Shutdown 1.1. Press POWER to turn the unit on (the unit runs in FAN mode as default) 1.2. Press MODE button to select the desired operating mode 1.3. - Page 8 WI-FI SETUP – “SMART LIFE-SMART LIVING” APP INFORMATION The “Smart Life-Smart Living” app is available for android and iOS. Scan the QR code below to access the app. This appliance allows you to operate the appliance via your home network. A prerequisite is a permanent Wi-Fi connection to your router and the free app “Smart Life-Smart Living”.
-
Page 9: Automatic Defrost
AUTOMATIC DEFROST At low room temperatures, frost may build up at the evaporator during operation. The unit will automatically start defrosting and the POWER LED will blink. The defrost control sequence is as follows: When the unit is operating in cooling or drying mode, and the evaporator coil temperature is below -1°C, the compressor will stop operating for 10 minutes until the coil temperature is up to 7°C –... - Page 10 CLEANING AND CARE Cleaning the Air Filter Dust collects on the air filter and restricts the airflow. The restricted airflow reduces the efficiency of the system and if it becomes blocked it can cause damage to the unit. The air filter requires regular cleaning. The air filter is removable for easy cleaning. DO NOT OPERATE the unit without the air filter or the evaporator may become contaminated.
-
Page 11: Troubleshooting
TROUBLESHOOTING Symptom Inspection Solution Insert the power cord securely into the wall Check the power connection in securely. Outlet. Check if the water level indicator Empty the drain pan by remove the rubber The unit is not operating. lights up? plug. -
Page 12: General Safety Requirements
GENERAL SAFETY REQUIREMENTS Domestic wiring must be tested periodically by a qualified electrician at least once every 10 years or at every change of occupancy. For office and retail premises, and buildings such as village halls, the wiring must be inspected at least once every 5 years. -
Page 13: Technical Specification
Do not contact Prem-i-air, only your retailer can arrange a replacement. If your product fails within the guarantee period, firstly read the “fault finding”...
Need help?
Do you have a question about the EH1910 and is the answer not in the manual?
Questions and answers