Sign In
Upload
Download
Table of Contents
Contents
Add to my manuals
Delete from my manuals
Share
URL of this page:
HTML Link:
Bookmark this page
Add
Manual will be automatically added to "My Manuals"
Print this page
×
Bookmark added
×
Added to my manuals
Manuals
Brands
Dormakaba Manuals
Door locks
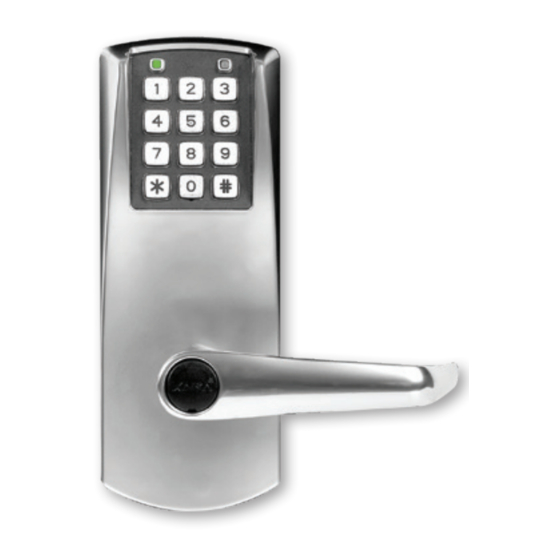
630 Series
Installation instructions manual
Dormakaba 630 Series Installation Instructions Manual
Exit device operators
Hide thumbs
1
Table Of Contents
2
3
4
5
6
7
8
9
10
11
12
13
14
15
16
17
18
19
20
21
22
page
of
22
Go
/
22
Contents
Table of Contents
Bookmarks
Table of Contents
Table of Contents
A- Checklist and Exploded Views
B Introduction and Disclaimers
C Prepare the Door for the Appropriate Exit Device
D Install the Lock and the Exit Device
Install the Mortise
E Test the Operation of the E-730/750/79E Lock
F- Program the E-730 / 750 / 79E Lock
G Operating the Emergency Override
H Test the Operation of the 630 Lock
J- Installing the Mechanical Override
Parts and Tools List
Upon Unpacking the Lock
Preparing the Outside Housing for the Installation of the Lever
Preparing the Lever Handle and Cylinder for Installation
Steps to Attach the Lever Handle to the Lock Housing
Attaching the Lever Handle to the Lock
Verify the Attachment of the Lever Handle
Test the Movement of the Lever Handle
Test the Mechnical Override Function
How to Change Lock Cylinders
Advertisement
Quick Links
1
D Install the Lock and the Exit Device
2
F- Program the E-730 / 750 / 79E Lock
Download this manual
630 Series
750 Series
79E/RT/E7900 Series
E-730 Series
Exit Device Operators
630/750/79E/RT/E7900 Series/
Generation E-730
Installation instructions
PK3677-T - 2018 - 09
EN
Table of
Contents
Previous
Page
Next
Page
1
2
3
4
5
Advertisement
Table of Contents
Need help?
Do you have a question about the 630 Series and is the answer not in the manual?
Ask a question
Questions and answers
Related Manuals for Dormakaba 630 Series
Door locks Dormakaba E7900 Series Installation Instructions Manual
(52 pages)
Door locks Dormakaba 79 Series Installation Instructions Manual
Asm, esm, asm auto deadbolt mortises & cylindrical, models 2 3/8" and 2 3/4" backset (40 pages)
Door locks Dormakaba E-Plex 2000 Series Installation Instructions Manual
(46 pages)
Door locks Dormakaba c-lever pro Technical Manual
Option: touchgo (74 pages)
Door locks dormakaba Saffire LX Installation Manual
Electronic hotel lock, installation guide outline (28 pages)
Door locks Dormakaba ML330 User Manual
Password / rfid card / spare key (2 pages)
Door locks Dormakaba MT RFID Installation Instructions Manual
(14 pages)
Door locks Dormakaba ED50LE Quick Start Manual
(2 pages)
Door locks Dormakaba SAFLOK MT Installation Instructions
(4 pages)
Door locks Dormakaba Quantum Series Installation Instructions Manual
(10 pages)
Door locks Dormakaba Saffire LX-D Installation Manual
For door thickness 1 3/8" to 2 1/8" (4 pages)
Door locks Dormakaba US 10 Mounting Instructions
(8 pages)
Door locks Dormakaba 8300 Series Installation Instructions Manual
Rim exit device (8 pages)
Door locks Dormakaba ED22 Installation Instructions Manual
Rim exit device (6 pages)
Door locks Dormakaba EML 310 Installation Instructions Manual
For 4-1/8”, 4-1/2”, 6” headers for use with drs rails and patch fittings (21 pages)
Door locks Dormakaba M Series User Manual
(32 pages)
This manual is also suitable for:
750 series
79e series
Rt series
E7900 series
E-730 series
Table of Contents
Print
Rename the bookmark
Delete bookmark?
Delete from my manuals?
Login
Sign In
OR
Sign in with Facebook
Sign in with Google
Upload manual
Upload from disk
Upload from URL


Need help?
Do you have a question about the 630 Series and is the answer not in the manual?
Questions and answers