
Related Manuals for Dormakaba 79 Series


Summary of Contents for Dormakaba 79 Series
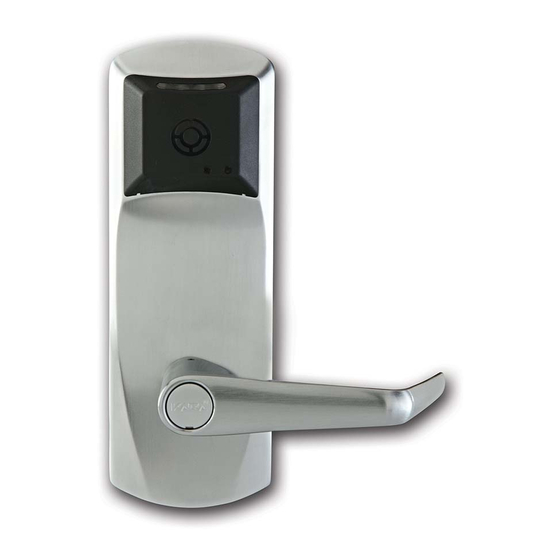
- Page 1 79/RT/E7900 Series 770 Series 660 Series E-760 Series 79/RT/E7900/770/E-760/660 Series ASM, ESM, ASM Auto Deadbolt Mortises & Cylindrical Models 2 3/8" and 2 3/4" Backset Installation instructions PK3678-T - 2018 - 01...
-
Page 2: Table Of Contents
6. Operating the Electronic Override (E-760 different than your model. See photo on / 770 / 79 Series only) front cover. 7. Lock Testing 660 Series only ©2018 Dormakaba. All trademarks and registered trademarks are the property of their respective owners. 79/RT/E7900/770/E-760/660 Series PK3678_T 04-18... -
Page 3: Introduction And Disclaimers
In these instructions, the term ASM refers to American Standard Mortise, and ESM refers to European Slim Mortise, and ADB refers to Autodeadbolt Mortise. Technical Assistance WARNING For technical assistance, call: 79 Series, 770, 760, 660/660i: 1.877.468.3555 / +1.514.340.9025 RT: 1.800.999.6213 / +1.248.837.3700 E7900: 1.800.849.8324 CAUTION WARNING IMPORTANT Carefully inspect windows, doorframe, door, etc. -
Page 4: Checklist And Exploded Views
= choice of finish). screws (#12 X 1" Philips) For outdoor installations, order gasket 033-510181-1 for Strike kit (screws, strike and ASM or Cylindrical E-760 Series. For 770/79 Series/RT Series order Gasket 033- dustbox) 512017-1. Gasket comes standard with 660/E-760/770/79 1 extension spring... -
Page 5: Asm/Esm
Checklist and Exploded Views 2.2 ASM, ESM, (For Cylindrical, see Appendix B) For all model except E7900 Note: D - American Standard Mortise illustrated. 79/RT/E7900/770/E-760/660 Series PK3678_T 04-18... -
Page 6: Autodeadbolt Asm Inside Trim Assembly
Checklist and Exploded Views 2.3 Autodeadbolt ASM Inside Trim Assembly E1/E2 NOTE: The inside trim assembly (E1), (E2) and (E3) for auto- deadbolt models includes the parts (M1 TO M4) shown, as- sembled at the factory. For ASM Office and ASM/ESM Store-room models, only some of the parts (M) are used. -
Page 7: Autodeadbolt - Asm Inside Trim Assembly For 79T (Toggle Mode)
Checklist and Exploded Views 2.5 Autodeadbolt - ASM Inside Trim Assembly for 79T (Toggle Mode) (for 79M standard mode with Autodeadbolt; ASM Office and ASM/ESM Storeroom models, use parts (M) as shown in Appendix A.3) NOTE: The inside trim assembly (E) for ASM and ADB on 79T models includes the parts (M) as shown below. Position of stopper M2 is very important Autodeadbolt Autodeadbolt... -
Page 8: Installation Of Asm & Esm Models
Installation of Standard ASM or ESM Models WARNING 3.1 Check the Mortise Handing CAUTION Door Handing (Top View) Compare the mortise with the diagram below. If the mortise is the correct handing for the door, continue with step 3.2. IMPORTANT Refer to Appendix A.1 to change the handing of a field-re- versible mortise. -
Page 9: Install The Strike
Installation of Standard ASM or ESM Models WARNING 3.2 Install the Strike 4. Position the strike against the doorframe and align it with the mounting screw holes. Trace the outline of the strike. 1. Align the paper template on the door frame at the desired CAUTION handle height ( ), and along the vertical center line of... -
Page 10: Install The Mortise
Installation of Standard ASM or ESM Models WARNING CAUTION 3.3 Install the Mortise If the door has a 3º bevel, fold and align the dashed line marked “H" on the template with the higher-beveled edge IMPORTANT of the door and mark the lock holes on that side of the door. Repeat on the side with the lower-beveled edge using the dashed line marked “L". -
Page 11: Install The Outside Housing & Inside Trim Assembly Without Key Override
Installation of Standard ASM or ESM Models 3.4 Install the Outside Housing and Inside Trim Assembly 3. Place the outside housing on the door so that the spindles engage the hubs on the mortise. For all locks with cables, Without Key Override (for Mechanical Override, see insert cables W when applicable in Hole (H1) on the door. - Page 12 Installation of Standard ASM or ESM Models For all models, connect outside housing cables with cor- 6. Assemble the lever on the outside housing, in the responding inside trim cables when applicable. Put excess horizontal rest position appropriate to the hand- cables in hole (H1) when installing the inside trim.
-
Page 13: Reversing The Outside Lever
Installation of Standard ASM or ESM Models 3.5 Reversing the Outside Lever (for Series without Mechanical Override) The lever is field reversible. If the handing is incorrect, in- sert a small pick or flat screwdriver in the hole in the hub as shown. -
Page 14: Lock Testing (E-760/770/79 Series Only)
OPEN unless otherwise indicated. IMPORTANT 770 insert keycards as shown, with the magnetic stripe fac- ing toward the door and to the left. For 79 Series, present Inside Lever: card to reader. Turn the inside lever downward. The latch bolt retracts fully. - Page 15 Lock Testing (E-760/770/79 Series only) for mechanical override, see Step 8 Page 23 / For RT lock series, please refer to system 6000 manual. C. Privacy Function: Lockout of Keycards Deadbolt Deactivation: (E-760/770/79/E7900 Series) Turn the thumbturn to the horizontal position for privacy.
- Page 16 Programming (E-760/770/79/E7900 Series) For RT lock series, please refer to system 6000 manual. For E7900 series, please refer to command card kit and/or software user guide Program the lock using the FDU and the E-760/770/790 communication cable (see Reference Manual). If this is not a new installation but a replacement of a single lock or a group of locks in a property already equipped with the Kaba lock- ing system, transfer the security information from a neigh-...
-
Page 17: Operating The Electronic Override (E-760 / 770 / 79 Series Only)
WARNING 6 Operating the Electronic Override (for E-760/ 770/790 Series) For RT lock series, please refer to system 6000 manual. CAUTION For multihousing refer to RezShield manual. lock flashes once disconnect the cable from the Serial IMPORTANT Port, wait 2 seconds and reconnect the cable. If the lock will not respond to any keycard (including the Main Menu: Emergency keycard), there are four options that should be... -
Page 18: Lock Testing 660 Series Only
Lock Testing (660 Series only) WARNING Outside Lever: CAUTION Turn the outside lever downward. The latch bolt does not retract If the latch bolt retracts verify that the batteries Perform the following procedures in order, with the door are properly installed. If the lever feels tight (hard to turn or OPEN unless otherwise indicated. -
Page 19: Operating The Override 660 Series Only
Lock Testing (660 Series only) Emergency Access (Deadbolt Override) Deadbolt Deactivation: After programming turn the thumb turn to the horizontal A. Deadbolt Deactivation by Thumbturn position to engage the Deadbolt/Privacy feature. While standing inside the room, close the door and then turn Deadbolt/Privacy engaged, access denied: the thumbturn to extend the deadbolt. - Page 20 9 Installation of Mechanical Override Models Parts and Tools List NOTE: For the purposes of Section 9 use the naming convention listed below in Parts and Tools List and Diagram of lock. Tools Required: Cylinder (J, provided with lock) or equivalent ( T ) Small flat scewdriver (less that 1/8") Diagram of lock:...
- Page 21 9 Installation of Mechanical Override Models WARNING CAUTION Upon unpacking, the lock housing with mechanical (J) Cylinder and 2 keys for 660 K/C included in the hardware override should look like the diagram below with: (M) The small indents on the cross of the override shaft in IMPORTANT line Horizontally (C) The nylon washer and the spring washer (not for lever...
- Page 22 9 Installation of Mechanical Override Models Preparing the lever handle and cylinder for installation Steps to attach the lever handle to the lock housing 3. Insert the cylinder (J) without key (N) into the lever handle NOTE: the position of the key is very important (H) (see Fig.3) 6.
- Page 23 WARNING 9 Installation of Mechanical Override Models CAUTION Attaching the Lever Handle to the Lock (with the key IMPORTANT as shown in Fig. 6 & Fig. 7) 7. Fit the lever handle (H) onto the drive tube (E) see page If it is not possible to turn the key (N) counter-clockwise to 18.
- Page 24 9 Installation of Mechanical Override Models WARNING WARNING CAUTION CAUTION Verify the attachment of the lever handle Test the mechanical override function (Complete all tests in Section 4, pages 13 & 14 after lock is assembled IMPORTANT on the door) To verify that the lever handle has been correctly attached IMPORTANT to the housing:...
- Page 25 9 Installation of Mechanical Override Models WARNING CAUTION Test the Mechanical Override Function (continued) 10. How to change lock cylinders 22a. Loosen the set screw (01) to free the lever using Allen IMPORTANT Key (P1) (Approx. 1/4 turn). Verify the functionality of the override after the lock is in- Fig.
- Page 26 WARNING 9 Installation of Mechanical Override Models CAUTION How to change lock cylinders (continued) IMPORTANT 30. Re-insert the cylinder plug (K) (Fig. 19) The Key Override itself does not retract the latch or Fig. 19 deadbolt. Do not use too much force when turning the key WARNING as this may damage the unit.
- Page 27 Read the following instructions before using any of the 3 keys supplied Left-handed lock The E-760/770/79 Series/RT with a recodable cylinder can be operated with three different keys. The keys are num- bered 1, 2 & 3, and each key is labeled and supplied in a sepa- rate plastic bag.
- Page 28 APPENDIX A Mortise Models A.1 Reversing the Mortise Handing ASM For Autodeadbolt ASM, rotate hub (H) until the deadbolt (D) is fully retracted. The deadbolt will extend approx. 1/16" 1. Remove the mortise faceplate. Remove screw (V) and lock from the mortise case. washer (W) if applicable and place the mortise on a flat surface for the following steps.
- Page 29 APPENDIX A Mortise Models A.1.1 Reversing the Mortise Handing ASM 4. Pull out the latch bolt (L), until it just clears the front plate. (Note: If you remove the bolt completely, you must 3. Push in the latch bolt (L) to the middle of its stroke, and turn it 90°...
- Page 30 APPENDIX A Mortise Models WARNING WARNING CAUTION CAUTION 5. Release the latch bolt (L). Position the latch bolt so that 7. Assemble back screw (V) and lock washer (W) if appli- the bottom tooth of the anti-friction latch (F) remains in- cable.
- Page 31 APPENDIX A Mortise Models A.1.2 Reversing the Mortise Handing ESM 3. Using a small screwdriver, slide up the locking pin (P). Pull out the latch bolt (L) and rotate it 180°. 1. Remove the mortise faceplate, and place the mortise on a flat surface for the following steps.
- Page 32 (4) parts (M) as shown, on the inside trim assembly (E), (E1) for 790/RT/660i or (E2) 79 Series. Release the latch bolt (L) while positioning anti-friction latch (F) so that it will remain inside the mortise. Ensure the bottom tooth of the anti-friction latch (F) remains inside the mortise case as shown.
- Page 33 APPENDIX A Mortise Models Place 3 spacers (S) on the door (for recent models only). A.3 Additional steps for ASM Office For concerned lock models, connect all cables (W) to corre- Do the following BEFORE placing the inside trim assembly sponding connectors of the inside trim assembly (E1) when on the door (page 11, step 5): applicable.
- Page 34 WARNING APPENDIX B Installing Cylindrical Models 2-3/8" & 2-3/4" Backset CAUTION WARNING B.1 Install the Strike IMPORTANT CAUTION Follow the same steps as for a mortise model strike (see page 9, all steps in section 3.2). Note that the handle height Use only the strike and strike box supplied.
- Page 35 APPENDIX B Installing Cylindrical Models 2-3/8" & 2-3/4" Backset WARNING B.3 Install the Cylindrical Unit Fig.1 Depending on the kind of Spacers shipped with the lock assembled in the factory for 1 3/4" door thickness, choose HANDING CAUTION door thickness Table 1 or door thickness Table 2 to prepare the attachement plate and cylindrical drive unit for the door thickness other than 1 3/4"...
- Page 36 APPENDIX B Installing Cylindrical Models 2-3/8" & 2-3/4" Backset B.3 Install the Cylindrical Unit (con’t) Put the thumbturn in the vertical position so that the arrow (A) on the disc points UP. 3. Insert the cylindrical unit from the outside of the door to- ward the inside, so that it engages the latch as shown.
- Page 37 APPENDIX B Installing Cylindrical Models 2-3/8" & 2-3/4" Backset WARNING 6. Three AA batteries should already be installed in the Cylindrical Plate Assembly Place all cables battery holder (C). Insert the battery holder into the through H1 CAUTION outside housing and secure it using the 6-32 x 5/16" hole (7.9mm) Torx drive screw (C2) for E-760/770/79/RT Series or 6-32 spanner drive screws for the 660 Series.
- Page 38 APPENDIX B Installing Cylindrical Models 2-3/8" & 2-3/4" Backset For E7900, insert the 4 AA batteries supplied with the lock. afterwards insert battery cover and secure into place with supplied screws. WARNING CAUTION 7. Testing the cylindrical lock: Follow all steps of page 13 or 16 but extension and retraction will be for latch only.
- Page 39 Note for Contactless 79 Series/RT customers: Statement according to FCC part 15.105 This equipment has been tested and found to comply with the limits for a Class B digital device, pursuant to Part 15 of the FCC Rules. These limits are designed to provide reasonable protection against harmful interference in a residential instal- lation.
- Page 40 Customer Services & Support 79 Series, 770, 760, 660/660i: 1.877.468.3555 / +1.514.340.9025 RT Series Support: 1.800.999.6213 / + 1.248.837.3700 E7900 Support with Enterprise software, 800.849.8324 E7900 Support with Aurora software US or Canada only 888.539.7226 Outside of US or Canada contact 905.430.7226...
Need help?
Do you have a question about the 79 Series and is the answer not in the manual?
Questions and answers