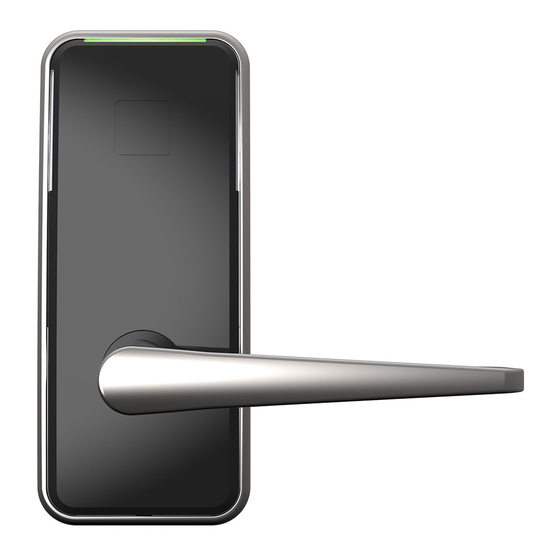
Dormakaba Saffire LX Installation Manual
Electronic hotel lock, installation guide outline
Hide thumbs
Also See for Saffire LX:
- Installation instructions manual (27 pages) ,
- User instructions (4 pages) ,
- Installation instructions manual (15 pages)

Related Manuals for Dormakaba Saffire LX


Summary of Contents for Dormakaba Saffire LX
- Page 1 SAFFIRE LX Installation Guide Outline Document Revision: Draft 1.0 Saffire LX Page...
-
Page 2: Table Of Contents
(2) l'utilisateur de l'appareil doit accepter tout brouillage radioélectrique subi, même si le brouillage est susceptible d'en compromettre le fonctionnement. Made in Canada ©2018 dormakaba Lodging Systems.All trademarks and registered trademarks are the property of their respective owners. Page 2 of 28 Saffire LX... -
Page 3: Introduction And Disclaimers
Target Audience: These instructions are designed for use by maintenance professionals or lock installers who are familiar with common safety practices and competent to perform the steps described. dormakaba is not responsible for damage or malfunction due to incorrect installation however arising. -
Page 4: Components
3. Components Page 4 of 28 Saffire LX... - Page 5 For doors more than 2 1/2" thick up to 3 3/4", order the appropriate hardware bag to receive the correct length of spindles and mounting screws. Part# 062-XXXXXX-XXX; (XXX = choice of finish). For outdoor installations, order gasket 033-515996-1 for standard lock and 033- 515996-2 for MKO lock. Page 5 of 28 Saffire LX...
-
Page 6: Install Key Cylinder (Optional)
• Insert the thumb turn spindle (item 2) into the thumb turn hole. Press firmly to ensure the spindle clicks in place. • Rotate the spindle to ensure that the part remains in place. Page 6 of 28 Saffire LX... -
Page 7: Install The Lock Spindle
There are 2 modes, Left Hand (LH) and Right Hand (RH) according door handing. • Turn the hub for correct door handing by turning clockwise for right and counter clockwise for left. • Page 7 of 28 Saffire LX... - Page 8 • Insert the spindle (item 1) smoothly until it clips. Page 8 of 28 Saffire LX...
-
Page 9: Setting Up The Inside Trim Assembly
• To set proper handing, insert the lever from the back plate and turn in the direction required for the handing (L or R). Page 9 of 28 Saffire LX... - Page 10 Rotate the lever handle to horizontal position corresponding to selected handing. • Push up the spring holder and install the snap holder for spring holder (item 8) to lock and prevent lever from disengaging Page 10 of 28 Saffire LX...
- Page 11 Page 11 of 28 Saffire LX...
-
Page 12: Installing The Locking Mechanism On The Door
Refer to corresponding drilling template for your lock model. Drilling templates are available in the center section of this installation instructions and on the dormakaba website. 8.1. Installing the mortise ASM (if lock equipped) Before installing the mortise, verify gap between the door and the frame. - Page 13 • Verify the mortise handing for LH or RH. If the handing needs to be adjusted, refer to instructions in annex A. • Remove the face plate by removing the two screws Page 13 of 28 Saffire LX...
- Page 14 Insert the mortise in the side of the door. If the mortise is equipped with a cable, route the cable so it comes out of top hole on the side of the inside trim assembly. • Use metal or wood screws depending door material to secure the mortise Page 14 of 28 Saffire LX...
-
Page 15: Installing The Cylindrical Models (If Lock Equipped)
8.2. Installing the cylindrical models (if lock equipped) IMPORTANT For cylindrical latch models, ensure the dead-locking pin will stop against the strike when the door is closed (see figure). An incorrect installation that permits Page 15 of 28 Saffire LX... - Page 16 Verify the door thickness. The lock is assembled in factory for door thickness of 1 ¾”. If the door thickness is different, refer to table below to adjust the spacers. Extra spacers and screws provided in the hardware bag. Page 16 of 28 Saffire LX...
- Page 17 Install the strike and the dust box on the door frame Important: Use only the strike and strike box supplied. The use of non- approved parts will result in a functionality problem and may void the warranty. Page 17 of 28 Saffire LX...
-
Page 18: Installing The Lock Housings On The Door
Install the housing on the inside of the door and aligning with the lock mechanism. • Install the front lock housing, routing the wire cable by the center hole at the • Install the inside housing • Install the screws provided and tighten LH shown Page 18 of 28 Saffire LX... -
Page 19: Connecting The Cables
• Secure the bracket with screw Connecting the cables Locks without wire guide • Connect each cable with its mating one and push back in the hole in the door the excess of cables. Page 19 of 28 Saffire LX... -
Page 20: Installating Inside Cover
Before installing the lock on the door, extend the wire guide out, without removing the cover. Wire guide • After securing the front lock housing with the inside trim chassis, remove the cover on the wire cover. The cover will no longer be used. Page 20 of 28 Saffire LX... - Page 21 Set the thumb turn on the inside cover to vertical position • Slide the inside cover onto the lever handle taking care not to scratch the lever handle • When the cover is fully in place, secure it using the 3 screws (item 5) Page 21 of 28 Saffire LX...
- Page 22 • For locks with ADB mortise, to apply the privacy thumb turn sticker. Page 22 of 28 Saffire LX...
-
Page 23: Installing The Outside Lever Handle
Install the outside lever handle according to the lock handing (L/R) • Insert the set screw and tighten till snug Install the batteries • Insert the batteries in the battery holder respecting the polarity indicated in the battery holder IMPORTANT: Use only Alkaline batteries Page 23 of 28 Saffire LX... -
Page 24: Test Lock Functionality
D - Release Outside Lever, Should Move Freely E - Rotate Inside Lever to Check Bolt Retraction F - Check Bolt Projection from Thumbturn Program the lock Refer to system user manual for lock programming. Page 24 of 28 Saffire LX... -
Page 25: Annex A
Page 25 of 28 Saffire LX... - Page 26 Page 26 of 28 Saffire LX...
- Page 27 Page 27 of 28 Saffire LX...
-
Page 28: Annex B
Annex B Install Outside Housing with Gasket Page 28 of 28 Saffire LX...
Need help?
Do you have a question about the Saffire LX and is the answer not in the manual?
Questions and answers