Dormakaba E7900 Series Installation Instructions Manual
Hide thumbs
Also See for E7900 Series:
- Installation instructions manual (22 pages) ,
- Installation instructions manual (40 pages)

Related Manuals for Dormakaba E7900 Series


Summary of Contents for Dormakaba E7900 Series
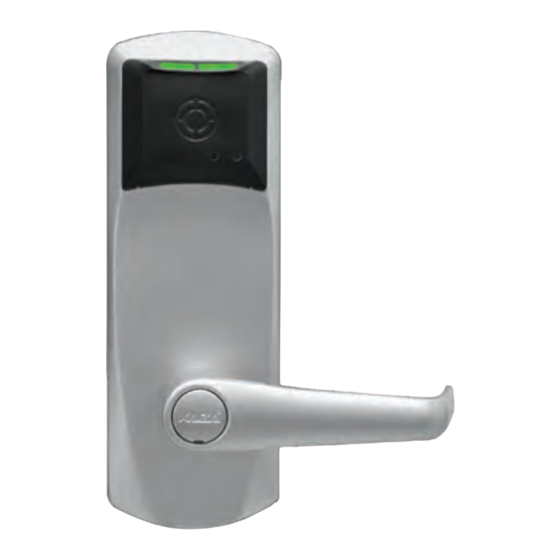
- Page 1 E7900 Series ASM, ASM Auto Deadbolt Mortises & Cylindrical Models 2 3/8" and 2 3/4" Backset Installation instructions KD10114-E-1122...
-
Page 2: Table Of Contents
B.1. Install the Strike B.2. Install the Latch B.3. Install the Cylindrical Unit B.4. Inside Trim Assembly B.5. Install Outside Housing & Trim Assembly © 2022 Dormakaba. All trademarks and registered trademarks are the property of their respective owners. E7900 Series KD10114-E-1122... -
Page 3: Introduction And Disclaimers
These instructions are designed for use by maintenance professionals or lock installers who are familiar with common safety practices and competent to perform the steps described. dormakaba is not responsible for damage or malfunction due to incorrect installation however arising. -
Page 4: Checklist And Exploded Views
Part# dustbox) 062-510189-XXX; (XXX = choice of finish). 1 extension spring For E7900 series, Gasket 033-512017-1 comes standard (M) Parts required to control thumbturn motion (ASM for outdoor installations. and ASM Office) See appendix A2 & A3 (Q1) 4 pairs of Flat Head Screws 10-24 (for cylindrical only) -
Page 5: Asm
Checklist and Exploded Views 2.2 ASM (For Cylindrical, see Appendix B) Note: D - American Standard Mortise illustrated. E7900 Series KD10114-E-1122... -
Page 6: 2.3 Autodeadbolt Asm Inside Trim Assembly
Parts (M) also available separately (kit #062-510484) to convert the standard lock to Autodeadbolt ASM, ASM Office or ASM Storeroom functions. 2.4 ASM, 79T Toggle Mode (For cylindrical, see Fully assembled view appendix B and section 2.7). Note: D - American Standard Mortise illustrated. E7900 Series KD10114-E-1122... -
Page 7: Autodeadbolt - Asm Inside Trim Assembly For 79T (Toggle Mode)
ASM Right & Right Hand Left Hand Left Hand 2.6 Cylindrical Unit and Inside Trim Assembly for 79M Standard Mode (see Appendix B) 2.7 Inside Trim Assembly 79T Toggle Mode Cylindrical For Right Hand Lock For Left Hand Lock E7900 Series KD10114-E-1122... -
Page 8: Installation Of Asm Models
Refer to Appendix A.1 to change the handing of a field-re- versible mortise. Right Hand (RH) Left Hand (LH) For RH (right hand) and For LH (left hand) and LHR (left hand reverse) RHR (right hand reverse) Right Hand Reverse (RHR) Left Hand Reverse (LHR) KD10114-E-1122 E7900 Series... -
Page 9: 3.2 Install The Strike
When strike is installed on wood frames under one inch thick, wood screws supplied are not adequate. use screws of efficient length to engage the structural stud behind the frame. Use only the strike and dust box supplied. Use of non-approved parts may void the warranty. KD10114-E-1122 E7900 Series... -
Page 10: 3.3 Install The Mortise
If the door has no bevel, fold the template along the solid lines. Align the fold with the edge of the door and mark the holes for the lock. Repeat on the other side of the door. KD10114-E-1122 E7900 Series... -
Page 11: Install The Outside Housing & Inside Trim Assembly Without Key Override
1/8" hex drive mounting screws (I ). Install mounting screws. (See page 3) the screws without tightening. Verify the inside lever and thumbturn operates smoothly. If not move the inside and outside housings slightly. Then tighten the screws. Plate and/or Gasket Notch E7900 Series KD10114-E-1122... - Page 12 (route the w6 in the switch holder as shown in the next figure) and put the excess cables in the area a when installing the inside trim. For E7900 series, the battery enclosure cover must be removed to install the mounting screws. E7900 Series...
- Page 13 Release the lever then turn it again after the LED stops too long. flashing. The latch must not retract after the LED stops flashing without first inserting the keycard. KD10114-E-1122 E7900 Series...
- Page 14 Present the emergency card to the reader. (The LED will flash for 4 seconds). Rotate the lever as soon as the LED starts flashing - The LED will stop flashing. If it does not, there is a problem with the lever detection. KD10114-E-1122 E7900 Series...
-
Page 15: Programming And Software Setup
• E-Plex Setup (Aurora) The software covered in this chapter is capable of working Defining a Person Type (Aurora) with a large variety of dormakaba products, the details of o Adding Users (Aurora) which can be found in a variety of other documents. - Page 16 • Transferring the Program File to the M-Unit • Programming E-Plex Locks • Transferring the Program File to the Lock • M-Unit Audits o Auditing an E-Plex 7900 Lock o Viewing Audits (LUNA) o Viewing Audits (Aurora) KD10114-E-1122 E7900 Series...
-
Page 17: Luna Installation And Setup
6. When asked if you want LUNA Access Control Software to make changes to your device, click Yes. The InstallShield Wizard will then begin the installation process. 7. Once the installation is complete, click Finish to exit the wizard. E7900 Series KD10114-E-1122... -
Page 18: Credential (Luna)
Clicking this icon toggles the user’s status from active to inactive and vice versa. 7. Additional user information/text can also be added for each person by use of the Optional Fields at the bottom of the screen. KD10114-E-1122 E7900 Series... -
Page 19: 19 5.3.4. Adding Locks (Luna)
3. Enter a name for the Schedule in the space provided. 4. Use the arrow icons to adjust the Start Time and End Time for each of the days of the week and for holidays. 5. Click the Save button. E7900 Series KD10114-E-1122... -
Page 20: Aurora Installation And Setup
6. Next, enter your new password, then re-enter this new before proceeding to the next module. password again in the places provided. Press Enter or click the Key icon to complete the password change. KD10114-E-1122 E7900 Series... -
Page 21: E-Plex Setup (Aurora)
• Follows schedules • Follows temp settings • Cannot override Lockdown ** (can be changed if Enhanced Lockdown is registered) M-Unit • 24/7 lock programming/auditing rights only but no access; no expiry • Temp settings do not apply E7900 Series KD10114-E-1122... -
Page 22: 22 5.5.4. Assigning Credentials To Users
* - For wireless lock setup only. Appears only if “Is Wireless” is checked. ** - For offline (non-wireless) lock setup only. Appears only if “Is Wireless” is unchecked. Click the Save button to add the lock to your Site and Door Group. KD10114-E-1122 E7900 Series... -
Page 23: 23 5.5.7. Schedules (Aurora)
5. In the "E-Plex Door Details", ensure that "Is Wireless" is unchecked, then click the Save button. 6. Locate and click the "Create Program File" button. A file named after your E-Plex Door will be created in your computer’s Documents folder E7900 Series KD10114-E-1122... -
Page 24: 24 5.6. Additional Topics For Wireless Setup
Gateway into the USB port of the computer. list of routers. Release the reset button once a USB connection is made. 6. Return to the Status Window and take the router out of Join On mode. KD10114-E-1122 E7900 Series... - Page 25 Store Location > select “Local Machine” then click Next b. To set your Certificate Store, select “Place c. Type your password in the space all certificates in the following store”, then provided (the one from step 6), then click Browse. click Next E7900 Series KD10114-E-1122...
-
Page 26: 26 5.6.4. Assigning E-Plex Locks To A
6. The door/lock will reboot and return to Factory the LED will blink Red. If unsuccessful, try Mode. presenting the ZAC Command Card again. If this fails, review the previous steps to ensure your setup is correct. KD10114-E-1122 E7900 Series... - Page 27 “Join Off” first if they have not already timed out. Once you have joined all of your E-Plex doors/ locks, return to the Status screen and place each of your Gateways back to “Join Off” if they have not already timed out. E7900 Series KD10114-E-1122...
-
Page 28: M-Unit For Offline Lock Setup
M-Unit programs the lock. 8. “Programmed Successfully” will display onscreen upon completion. Select OK by pressing the right- most arrow button below the screen to return to the main menu. Programming is now complete. KD10114-E-1122 E7900 Series... -
Page 29: 29 5.7.6. Auditing An E-Plex 7900 Lock
M-Unit pulls transactions from the lock. 9. “Audit success!” will appear on screen upon completion of the audit. Select OK by pressing the right-most arrow below the M-Unit’s display screen to return to the main menu. E7900 Series KD10114-E-1122... -
Page 30: 30 5.7.8. Viewing Audits (Aurora)
Transaction report, click the “Reports” icon on the Aurora main menu, then select “Transaction Report”. For more information on setting up and running a Transaction Report, please consult the Aurora Online Help by pressing F1 on your keyboard. KD10114-E-1122 E7900 Series... -
Page 31: 31 5.8.2. Site Survey Guidelines
• If the property has or will be installing Wi-Fi access points, ask for a markup of the locations. When placing the Gateway for survey, keep Gateway and Wi-Fi access points a minimum of 6 feet apart E7900 Series KD10114-E-1122... -
Page 32: 32 5.8.5. Ping Network
Lock Date – Displays the current date and time of the lock pulled from the MUnit when the door is programmed 8. Select OK by pressing the right-most arrow button below the screen and return to the main menu. KD10114-E-1122 E7900 Series... -
Page 33: Operating The Electronic Override
2. Use the electronic override feature (requires FDU and communication cable or ATLAS M-Unit and IPM). 3. Use mechanical key override if locking system has one (see section 7, step 8). 4. Contact Technical Support for instructions on using the drill point. E7900 Series KD10114-E-1122... - Page 34 (C) Nylon washer (G) Countersink (K1) Set Screw (D) Spring washer (H) Lever handle (M) Allen Key (not for lever feel) (I) Cap (O1) Adapter Front Back Facing view of drive tube: (E) (K1) (O1) Override (O2) Shaft KD10114-E-1122 E7900 Series...
- Page 35 (M) on the cross are now vertically in line. (Fig.1) Fig. 1 Fig. 2 Indents (M) In vertical position Override Shaft (L) Lever catch (F) Push lever catch (F) in E7900 Series KD10114-E-1122...
- Page 36 (T). Remove key (N). If the Lever is Not Assembled with the key in the position shown in Fig. 6 & Fig. 7, the inside mechanism of the lock IMPORTANT could be damaged if the lever is rotated and forced. KD10114-E-1122 E7900 Series...
- Page 37 (H). Insert the small screwdriver (T, page 34) into the small hole on the underside of the lever handle (H) and push in the lever catch (F). Re-do steps 2, 3, 4 & 5. E7900 Series KD10114-E-1122...
- Page 38 13. Turn the handle (H) clockwise (for a right-handed lock) or counter-clockwise (for a left-handed lock) Fig. 14 14. Release the handle (H) slowly. It should return freely to its horizontal position. (Fig.11) Fig. 11 Cylinder (B) inside drive hub rotates KD10114-E-1122 E7900 Series...
- Page 39 29. Replace the old cylinder with the new one in the lever handle (H). Only same kind of cylinder with 2 grooves in Fig. 16 cross, in the end of the cylinder plug could be used on the locks. (Fig. 18) Fig. 18 2 Grooves in cross E7900 Series KD10114-E-1122...
- Page 40 Resetting the E7900 locks with MKO - Refer to command 7 Pins 6 Pins card kit or appropriate software user guide (Aurora/ Thinner Thicker Enterprise). Adapter Adapter Two additional adapters are provided for use with other key in lever style cylinders. KD10114-E-1122 E7900 Series...
- Page 41 35. Turn the key clockwise until it stops (see Fig. 22) for both Now the lock should work with key #3, and key #2 has been left-handed and right-handed locks. cancelled. TEST: Try to use key #2 in the lock. It should no longer work. E7900 Series KD10114-E-1122...
-
Page 42: A Mortise Models
Release the deadbolt (D) gently. It should extend to 5/16" approx. and stop. If the deadbolt extends past this point, gently press it in until it locks at 5/16" throw, or start step Proceed to step 3. 2 again. 5/16" KD10114-E-1122 E7900 Series... - Page 43 Release the latch to the middle of the stroke and hold it there. Use a small screwdriver to push the lock mechanism back on lock position (see step 1 and 2) . IMPORTANT The lock mechanism has to be horizontal on lock position E7900 Series KD10114-E-1122...
- Page 44 If the auxiliary latch (X) is a crescent shape, remove it, turn it 180°, and replace it. The auxiliary latch slides easily in and out of the mortise. (re-insert) 180° For RH (right hand) and LHR (left hand reverse) X (crescent = must be reversed) KD10114-E-1122 E7900 Series...
-
Page 45: 2. Additional Steps For Asm Office
The notch on the stopper cam (M2) must engage the tab on the plate (M4), so that the thumbturn is locked in the vertical position. Install M2 onto M4, then slide both parts onto the thumbturn. The thumbturn should be locked in the vertical position E7900 Series KD10114-E-1122... -
Page 46: Installing Cylindrical Models
5. Drill the hole for the latch, and chisel out clearance for the latch plate. Closing 6. I nstall the latch using 1" Phillips mounting screws. Position Direction the deadlocking pin (D) opposite to the closing direction as shown. 7. Install Strike and strike box. KD10114-E-1122 E7900 Series... - Page 47 2-1/8" (54mm) to 2-3/16" (56mm) 3/4 (19mm) 2-1/4" (57mm) to 2-5/16" (59mm) 7/8 (22mm) 2-3/8" (60mm) to 2-1/2" (64mm) 7/8 (22mm) Cylindrical Unit Assembly Fig. 4 Screw Length (Full Scale) Length 3/8" Length 1/2" Length 5/8" Length 3/4" Length 7/8" E7900 Series KD10114-E-1122...
- Page 48 The cylindrical unit will engage the latch as shown in step 2 of B.3 (page 47). For 660i/790/RT/79M insert cables W1/W3/W5 when applicable in gasket & cylindrical plate assembly and in hole (H1) on the door. KD10114-E-1122 E7900 Series...
- Page 49 If not move the inside and outside housings slightly. Then tighten the screws. Connect cables to corresponding connectors where applicable and put excess cables in hole (H) in the door when installing the inside trim assembly (E) on the door. E7900 Series KD10114-E-1122...
- Page 50 IMPORTANT If the lock makes a continuous buzzing noise or the red LED lights continuously, reset the electronics by removing the battery holder for ten seconds, then reinsert it. KD10114-E-1122 E7900 Series...
- Page 51 L’exploitation est autorisée aux deux conditions suivantes : (1) l’appareil ne doit pas produire de brouillage, et (2) l’utilisateur de l’appareil doit accepter tout brouillage radioélectrique subi, même si le brouillage est susceptible d’en compromettre le fonctionnement. E7900 Series KD10114-E-1122...
- Page 52 Customer Services & Support E7900 Support with Enterprise software, 800.849.8324 E7900 Support with Aurora or LUNA software, For US or Canada only 888.539.7226 Outside of US or Canada contact 905.430.7226 General Information: www.dormakaba.com www.dormakaba.com...
Need help?
Do you have a question about the E7900 Series and is the answer not in the manual?
Questions and answers