
Related Manuals for Dormakaba c-lever pro


Summary of Contents for Dormakaba c-lever pro
- Page 1 Option: TouchGo Technical Manual HAC Standard fixing - 02/2018...
-
Page 2: With Drill Jig / Door Side
No part of this document may be reproduced or used in any form or by any means without prior written permis- sion of dormakaba Schweiz AG. All names and logos of third-party products and services are the property of their respective owners. -
Page 3: Table Of Contents
19 4.1.1 General 19 4.1.2 Door thickness 19 4.1.3 Mortise lock 19 Replace c-lever with c-lever pro 19 Spindle standoff 20 Drilling fixing holes 20 4.4.1 With drill jig / door side 1 21 4.4.2 With drill jig / door side 2 22... - Page 4 Disposal / dismantling 72 10.1 Decommissioning / dismantling 72 10.2 Disposal 72 Packaging/return 73 11.1 Preparing a device to be returned 73 11.2 Complete devices 73 11.3 Electronic component assemblies 73 11.4 Labelling 73 dormakaba c-lever pro HAC Standard fixing - 02/2018...
-
Page 5: About This Document
Technical Manual About this document 1 About this document This section contains information for the proper use of this document. 1.1 Validity This document describes the product: Product designation: dormakaba c-lever pro Types: 262... Variant: Standard fixing TouchGo option Product designation:... -
Page 6: Availability Of The Documents
Click on the confirmation link in your email to activate your account. 1.5 Supplementary documents • Programmer 1460 technical manual • Documentation for the system software used TouchGo option • Operating manual for dormakaba TouchGo c-lever • dormakaba TouchGo system description dormakaba c-lever pro HAC Standard fixing - 02/2018... -
Page 7: Abbreviations/Definition Of Terms
Product c-lever pro Device c-lever pro Actuator c-lever pro Programmer Programmer 1460 S-module S-module for c-lever pro Kaba evolo Manager Multi RFID device Handle above cylinder Handle below cylinder Symbols Acoustic signal Visual signal HAC Standard fixing - 02/2018 dormakaba c-lever pro... -
Page 8: Hazard Categories
They help to make best use of the product and its functions. 1.9 Symbols Symbols with the following meanings are used for hazards (depending on hazard source.) General hazard Hazard from electric shock Risk of explosion Risk to electronic components from electrostatic discharge dormakaba c-lever pro HAC Standard fixing - 02/2018... -
Page 9: Basic Safety Instructions
Opening the device will lead to exclusion of all liability and warranty. This excludes replacing the batteries. The elimination of faults and maintenance work may only be performed by skilled personnel (see chapter 1 Target group). HAC Standard fixing - 02/2018 dormakaba c-lever pro... -
Page 10: Esd Prevention Measures
Avoid contact between PCBs and clothing. The wrist strap protects PCBs against an elec- trostatic discharge voltage from the body only. However, damage can also be caused by an electrostatic discharge voltage from clothing. • Transport and ship dismantled modules in conductive anti-static bags only. dormakaba c-lever pro HAC Standard fixing - 02/2018... -
Page 11: Handling Of Lithium Batteries
Make sure that the regulations for emergency exits and escape routes are observed. • Make sure that local regulations are observed for fire door assemblies. • Make sure that only standardised mortise locks are used. HAC Standard fixing - 02/2018 dormakaba c-lever pro... -
Page 12: Product Description
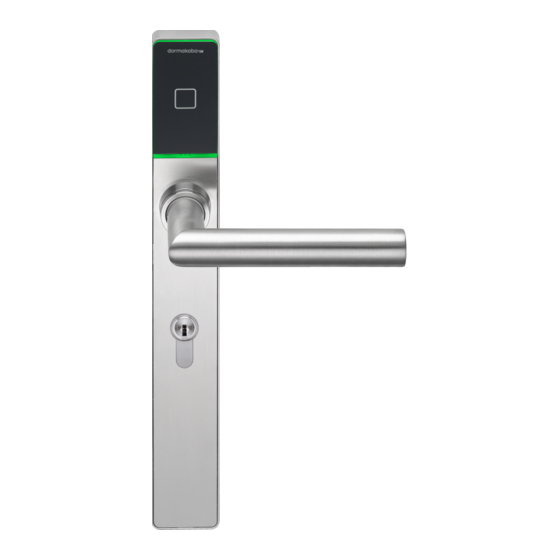
This section provides an overview of the product and gives information on technical details. 3.1 Overview c-lever pro is an electronic door fitting. The external fitting contains an antenna and a mechatronics unit (coupling unit). Following identification of an authorised medium, the door can be opened manually. -
Page 13: Structure
(2 pieces) Elongations (2 pieces) Frame Battery holder Batteries, AA lithium (2 pieces) Backplate with screws TouchGo option Plastic sleeve for spindle Plastic sleeve for connection mandrel (Delivered assembled) (Delivered assembled) HAC Standard fixing - 02/2018 dormakaba c-lever pro... -
Page 14: Scope Of Delivery
AU 90 PZ 70, 72, 78 RZ 74, 78 Blind PZ 98, SK 105 PZ 85, 88, 90, 92 RZ 94 PZ 70, 72R, 78 RZ74, 78 Blind *Version described in this document dormakaba c-lever pro HAC Standard fixing - 02/2018... - Page 15 This document describes the PZ version. Overview of cylinder support (Option) Item Cylinder support Profile Hole spacing, centre distance (mm) 72, 78 74, 94 70, 78, 85, 90 72, 88, 92 *Version described in this document HAC Standard fixing - 02/2018 dormakaba c-lever pro...
-
Page 16: Technical Data
According to test certificate: 0432 - BPR - 0061 (Kaba); 0432 - BPR - 0003 (BKS); 0432 - BPR - 0005 (Dorma) Protection class EN 1906 class 0 EN1906 class 2 for ES1 - TBD dormakaba c-lever pro HAC Standard fixing - 02/2018... -
Page 17: Dimensions
The configuration influences figuration: whitelist without the battery life acoustic signal) ¹ Certification not yet complete. 3.4.1 Dimensions Ø 8 ±42° 21,1 21,1 Ø 8 Ø 8 ±42° 21,1 21,1 Ø 8 HAC Standard fixing - 02/2018 dormakaba c-lever pro... -
Page 18: Conformity
Technical Manual 3.4.2 Conformity This product conforms to the EU directives 2014/53/EU Radio Equipment Directive 2011/65/EU RoHS Directive You can download the original declaration of conformity in PDF format at www.kaba.com/con- formity. dormakaba c-lever pro HAC Standard fixing - 02/2018... -
Page 19: Installation
Make sure that a mortise lock with key-operated latch function is used. Mortise locks with key-operated latch function enable mechanical opening via the locking cylinder. 4.2 Replace c-lever with c-lever pro Replacement plate • If the c-lever being replaced in the upper area leaves marks on the door, a replacement plate can be used. -
Page 20: Spindle Standoff
46 – 50 46 – 71 46 – 92 46 – 68 46 – 85 46 – 72 46 – 46 KD angled 46 – 56 4.4 Drilling fixing holes (Only for standard fixing) dormakaba c-lever pro HAC Standard fixing - 02/2018... -
Page 21: With Drill Jig / Door Side 1
Drill the fastening hole Ø13 mm up to the lock mortise. ø13 mm ø9 mm Drill the fastening hole Ø9 mm up to the lock mortise. 8. Remove the drill jig and C-clamp. 9. Clean the lock mortise. 10. Insert the mortise lock. HAC Standard fixing - 02/2018 dormakaba c-lever pro... - Page 22 6. Drill the fastening hole Ø13 mm up to the lock mortise. ø13 mm ø9 mm Drill the fastening hole Ø9 mm up to the lock mortise. 8. Remove the drill jig and C-clamp. 9. Clean the lock mortise. 10. Insert the mortise lock. dormakaba c-lever pro HAC Standard fixing - 02/2018...
-
Page 23: With Drilling Template / Door Side 1
Drill the fastening hole Ø13 mm up to the lock mortise. ø13 mm ø9 mm 6. Drill the fastening hole Ø9 mm up to the lock mortise. Clean the lock mortise. 8. Insert the mortise lock. HAC Standard fixing - 02/2018 dormakaba c-lever pro... - Page 24 6. Drill the fastening hole Ø9 mm up to the lock mortise. Clean the lock mortise. 8. Insert the mortise lock. ð The fastening holes for the fitting are drilled on both sides of the door. dormakaba c-lever pro HAC Standard fixing - 02/2018...
-
Page 25: Installing The Cylinder Support
Make sure that the cover of the antenna is not scratched by the subsequent actions. • Push the cover at the bottom out of the groove (3.), pull it forwards slightly (4.) and swivel it out (5.). HAC Standard fixing - 02/2018 dormakaba c-lever pro... -
Page 26: Inserting The Cylinder Support
Inserting the cylinder support • Place the external fitting on a base. • Position the cylinder support in the frame as shown (1. - 2.). • Swivel the cylinder support into the frame (3.). dormakaba c-lever pro HAC Standard fixing - 02/2018... -
Page 27: Positioning The Cylinder Support
Example for a hole spacing of 88 mm: 4.5.4 Fitting the cover • Make sure that the cover of the antenna is not scratched by the subsequent actions. • Align the cover (1.). HAC Standard fixing - 02/2018 dormakaba c-lever pro... - Page 28 When moving and tightening the union nut, make sure that it does not touch the threaded pin. • Slide the union nut in the direction of the frame. • Tighten the union nut using the multitool. dormakaba c-lever pro HAC Standard fixing - 02/2018...
-
Page 29: Preparing The External Fitting
Align the spindle according to the lever Align the spindle according to the lever handle direction and insert it into the handle direction and insert it into the coupling unit. coupling unit. HAC Standard fixing - 02/2018 dormakaba c-lever pro... - Page 30 Screw the spindle in place with the Screw the spindle in place with the threaded pin. threaded pin. ** TouchGo option: Ensure that there is no groove present on the side of the spindle marked with **. dormakaba c-lever pro HAC Standard fixing - 02/2018...
-
Page 31: Inserting And Connecting The Coupling Unit
The coupling unit is installed and secured in the external fitting. • Insert the coupling unit plug into the white socket (1.). • Insert the antenna cable into the black socket (2.). HAC Standard fixing - 02/2018 dormakaba c-lever pro... - Page 32 Installation Technical Manual • Guide the antenna cable through the backplate. • Attach the backplate. dormakaba c-lever pro HAC Standard fixing - 02/2018...
-
Page 33: Installing The External Fitting
Guide the antenna cable through the fixing hole in the door (1.). • Place the external fitting on the outside of the door (2.). -> The external fitting is inserted into the door but not yet secured. HAC Standard fixing - 02/2018 dormakaba c-lever pro... -
Page 34: Determining Screw Length
Clamping length* (mm) Screw length Number of M5 x elongations from 40 mm 50 mm 60 mm 40 mm 50 mm 60 mm *Clamping length = door thickness + thickness of the replacement plate(s) dormakaba c-lever pro HAC Standard fixing - 02/2018... -
Page 35: Preparing The Internal Fitting
With locking cylinder: If necessary, loosen the forend locking stud. • Push the cover out of the groove (1), pull it forwards slightly (2) and turn (3). If the c-lever pro is already programmed, the clock settings are lost approx. 45 seconds after the battery is removed. •... -
Page 36: Dormakaba C-Lever Pro Hac Standard Fixing -
Installation Technical Manual • Align the lever handle. dormakaba c-lever pro HAC Standard fixing - 02/2018... -
Page 37: Installing The Internal Fitting
Place the internal fitting onto the spindle (and the locking cylinder) (2). • Place the special washers onto the screws. • Align the external fitting and screw it in place (maximum torque: 2.5±0.5 Nm). HAC Standard fixing - 02/2018 dormakaba c-lever pro... - Page 38 Let go of the cover. • Tighten the threaded pin on the lever handle. Option TouchGo: Maximum torque: 1.0 Nm • Tighten the forend locking stud. • Carry out a function check; see Operation [} 6]. dormakaba c-lever pro HAC Standard fixing - 02/2018...
- Page 39 Technical Manual Installation • Remove the protective film on the external fitting. HAC Standard fixing - 02/2018 dormakaba c-lever pro...
-
Page 40: Checking The Installation
Make sure that the device and the mortise lock have been correctly installed mechanically. • Make sure that the device and the mortise lock are working properly. • After programming: Carry out a function check, see Operation [} 6]. dormakaba c-lever pro HAC Standard fixing - 02/2018... -
Page 41: Dismantling
Push the cover out of the groove (1), pull it forwards slightly (2) and turn (3). • Push the battery holder in the direction shown (1.) and at the same time swivel it for- wards (2.). • Unplug the antenna cable. HAC Standard fixing - 02/2018 dormakaba c-lever pro... - Page 42 Remove the cables in such a way that there is no risk of pinching or shearing. • Loosen the screws and remove them along with the special washers. • Remove the internal fitting from the spindle (and locking cylinder). The internal fitting is dismantled. dormakaba c-lever pro HAC Standard fixing - 02/2018...
-
Page 43: Disassembling The External Fitting
Remove the antenna cable from the black socket (2). • Loosen the threaded pin in the outside lever handle. • Remove the coupling unit from the external fitting. • Loosen the threaded pin and remove the spindle. HAC Standard fixing - 02/2018 dormakaba c-lever pro... -
Page 44: Programming
Products with RCID Firmware Transmission technology c-lever proTouchGo E310 RCID and RFID c-lever proTouchGo E110 RCID See: dormakaba c-lever TouchGo operating instructions Programming TouchGo products with RFID Products with RFID Firmware Transmission technology c-lever proTouchGo E310 RCID and RFID See next Chapter. - Page 45 Lost User media should be immediately blocked and deleted from all components. (Delete lost User media in the system software in the whitelist (add CardLink to the blacklist) or delete all User media with the corresponding master and then re-program all User media). HAC Standard fixing - 02/2018 dormakaba c-lever pro...
-
Page 46: Program Structures
B masters as required. For example, a B1 master only manages 50 users whilst another master, B2, manages up to 3950 users. 5.6 A/B and B structures A structure Master A Master B User media B structure Master B User media dormakaba c-lever pro HAC Standard fixing - 02/2018... -
Page 47: Programming User Media With B Masters
Master B approx. 1 shold in front of the antenna. Note: If no master medium is held up within 20 seconds, program- ming mode ends automatically and one long acoustic signal sounds. HAC Standard fixing - 02/2018 dormakaba c-lever pro... -
Page 48: Deleting Individual User Media
Master B approx. 1 shold in front of the antenna. Note: If no master medium is held up within 20 seconds, program- ming mode ends automatically and one long acoustic signal sounds. dormakaba c-lever pro HAC Standard fixing - 02/2018... -
Page 49: Deleting Individual Master Bs
Hold Master A in front of the an- tenna briefly (approx. 1 s). 1 long signal sounds. Note: If no master medium is held up, programming mode is deactiv- ated after 20 s and one long signal sounds. Changes were implemented. HAC Standard fixing - 02/2018 dormakaba c-lever pro... -
Page 50: Deleting All User Media
Mas- 2 x short Beep ter B approx. 10 s Beep All User media under the Master B 1 x long are deleted. 1 x short 10 s Key: Firmware version 42xx dormakaba c-lever pro HAC Standard fixing - 02/2018... -
Page 51: Ini Reset With Master Media For Whitelist And Cardlink
Master A approx. 15 s hold in front Beep 1 x short, of the antenna. The INI reset will be after 15 s, executed after 15 s. 2 x short 15 s HAC Standard fixing - 02/2018 dormakaba c-lever pro... - Page 52 15 s. 15 s Master A 2 x short Beep Master A approx. 15 s hold in front Beep of the antenna. The INI reset will be executed after 15 s. 15 s dormakaba c-lever pro HAC Standard fixing - 02/2018...
-
Page 53: Operation
Firmware Data transmission used TouchGo c-lever pro E310 RCID TouchGo c-lever pro E110 RCID See: dormakaba c-lever TouchGo operating instructions Operating TouchGo products with RFID Products with RFID Firmware Data transmission used TouchGo c-lever pro E310 RFID See next Chapter. - Page 54 Beep briefly flash four times. Beep Beep Key: If the function(s) have been activated using the programmer 1460 or the system soft- ware. dormakaba c-lever pro HAC Standard fixing - 02/2018...
-
Page 55: Maintenance
Only disinfection agents that are explicitly formulated for cleaning delicate metal surfaces and plastics may be used. The use of unsuitable cleaning agents or methods can damage the components' surface. Use a soft, damp cloth to clean the surface. HAC Standard fixing - 02/2018 dormakaba c-lever pro... -
Page 56: Service
Using the multitool, loosen the union nut from the internal fitting (>360°). >360° • With locking cylinder: If necessary, loosen the forend locking stud. • Push the cover out of the groove (1), pull it forwards slightly (2) and turn (3). dormakaba c-lever pro HAC Standard fixing - 02/2018... - Page 57 • Insert the battery holder (1), push it towards the lever handle (2) and at the same time swivel it into the frame (3). • If present: Remove the contact protection film. HAC Standard fixing - 02/2018 dormakaba c-lever pro...
-
Page 58: Replacing The Touchgo Media Battery
Tighten the union nut using the multitool. • Let go of the cover. • Carry out a function check, see Operation [} 6]. 8.3 Replacing the TouchGo media battery See dormakaba c-lever TouchGo operating instructions dormakaba c-lever pro HAC Standard fixing - 02/2018... -
Page 59: Connecting The Programmer
Technical Manual Service 8.4 Connecting the programmer • Connect the c-lever and programmer using the programming cable and the adapter (1355-42B) for the programmer cable (grey). HAC Standard fixing - 02/2018 dormakaba c-lever pro... -
Page 60: Configuration And Traceback
8.5 Configuration and traceback For correct time management, the clock time and the date on the device must be up-to-date. c-lever pro without wireless module: Configuration, updates (e.g. of the clock time) and traceback read-outs are performed using the programmer. - Page 61 Technical Manual Service • Select Actuator. • Select INI reset. • Select Yes. Two signals will sound following a successful reset. A detailed description can be found in the programmer operating instructions. HAC Standard fixing - 02/2018 dormakaba c-lever pro...
-
Page 62: Reset Using Tweezers
Using the multitool, loosen the union nut from the internal fitting (>360°). >360° • With locking cylinder: If necessary, loosen the forend locking stud. • Push the cover out of the groove (1), pull it forwards slightly (2) and turn (3). dormakaba c-lever pro HAC Standard fixing - 02/2018... - Page 63 Move the cover in the sequence shown (2–3) and insert it into the groove (4). -> The cover protrudes on the side opposite the groove. • Press the protruding cover against the frame (5) and hold down. HAC Standard fixing - 02/2018 dormakaba c-lever pro...
-
Page 64: Firmware Update
Service Technical Manual • Tighten the union nut using the multitool. • Let go of the cover. 8.7 Firmware update See Programmer 1460 user manual. dormakaba c-lever pro HAC Standard fixing - 02/2018... -
Page 65: Emergency Opening
Replace the batteries in the device; see ‘Replacing batteries’ chapter. • Disconnect the device and the external power supply. • Set the time. • Carry out a function check; see Operation chapter. HAC Standard fixing - 02/2018 dormakaba c-lever pro... -
Page 66: Replacing The Antenna
Install the antenna • Place the new antenna with seal into the frame and press against the frame. You will be able to hear the antenna click into place. • Remove the protective film. dormakaba c-lever pro HAC Standard fixing - 02/2018... - Page 67 Insert the antenna cable into the black socket (2.). • Guide the antenna cable through the backplate. • Attach the backplate. • Install the external fitting. [} 4.9.1] • Install the internal fitting. [} 4.12.1] HAC Standard fixing - 02/2018 dormakaba c-lever pro...
-
Page 68: Troubleshooting
Master medium is not detec- — — – Antenna not connected to – Establish connection or e-module power supply – No power supply Other errors – Unintentional re-start — short short short green dormakaba c-lever pro HAC Standard fixing - 02/2018... - Page 69 – Time is missing on e-mod- – Set time, check program- does not open or close at ule or is not correctly set ming programmed time – Incorrect programming – Replace coupling unit HAC Standard fixing - 02/2018 dormakaba c-lever pro...
-
Page 70: Touchgo Applications Error Analysis
The lever handle on 1 x short 1 x green Device detects an au- Increase distance the outside engages thorised user medium between user medium accidentally and device dormakaba c-lever pro HAC Standard fixing - 02/2018... -
Page 71: Programming Error Analysis
Maximum number of pro- Ensure that the number of pro- perman- grammable media reached grammed media has not been ently, as exceeded in the key plan long as medium in range, then 1 x red HAC Standard fixing - 02/2018 dormakaba c-lever pro... -
Page 72: Disposal / Dismantling
Disposal in Germany: dormakaba EAD GmbH will take responsibility for correct disposal of supplied goods once they are no longer in use as per statutory regulations (ElektroG in Germany). The owner of the used electrical appliance bears any costs incurred for transport to the manufacturer's plant. -
Page 73: Packaging/Return
Improperly packed assembly groups and devices may produce extra costs due to damage dur- ing transport. Please observe the following instructions when sending dormakaba products. dormakaba is not liable for damage to products which is due to inadequate packaging. 11.1 Preparing a device to be returned •... - Page 74 Packaging/return Technical Manual • Accurate description of fault. Returns from countries outside the EU also require a customs invoice with an accurate cus- toms value and customs tariff number. dormakaba c-lever pro HAC Standard fixing - 02/2018...
Need help?
Do you have a question about the c-lever pro and is the answer not in the manual?
Questions and answers