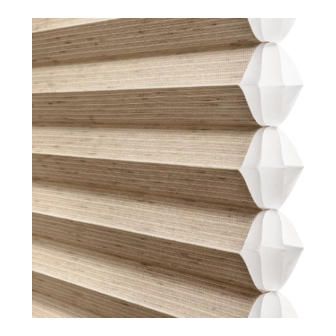
HunterDouglas Duette Installation And Care
Honeycomb shades angles and specialty shapes
Hide thumbs
Also See for Duette:
- User manual ,
- Installation operation care (51 pages) ,
- Installation manual (35 pages)
Subscribe to Our Youtube Channel
Summary of Contents for HunterDouglas Duette
- Page 1 Installation and Care Duette and Applause ® ® Honeycomb Shades Angles and Specialty Shapes...
-
Page 2: Table Of Contents
CONTENTS GETTING STARTED Product View — Angle ............1 Product View — Specialty Shape .........2 Tools and Fasteners Needed ..........3 Installation Overview .............3 STAND-ALONE ANGLE INSTALLATION Mount the Specialty Brackets ..........4 Install the Stand-Alone Angle ..........5 ANGLE SHARING A RECTANGULAR SHADE HEADRAIL INSTALLATION Mount the Specialty Brackets for the Angle ......6 Mount the Rectangular Shade..........6... -
Page 3: Getting Started
GETTING STARTED Product View — Angle (non-operable) Stand-Alone Angle Specialty Brackets Top Rail Bottom Rail Specialty Brackets Specialty Brackets Angle Sharing a Rectangular Shade Headrail Filler Strip Magnet Rectangular Shade Headrail... -
Page 4: Product View - Specialty Shape
GETTING STARTED Product View — Specialty Shape (non-operable) Octagon Top Rail Specialty Brackets Bottom Rail Not Shown: Hexagon and Trapezoid... -
Page 5: Tools And Fasteners Needed
GETTING STARTED Thank you for purchasing Hunter Douglas Duette and Applause Honeycomb Shades. With ® ® proper installation and care, your new shades will provide years of beauty and performance. Please thoroughly review this instruction booklet and the enclosed packing list before beginning the installation. -
Page 6: Stand-Alone Angle Installation
STAND-ALONE ANGLE INSTALLATION Mount the Specialty Brackets Your order will include specialty brackets ■ ■ Width of Brackets Required specific to your pleat size. Bottom Rail for Each Rail The number of specialty brackets required 12" – 36" ➤ ■ varies with the bottom rail width, as shown ⁄... -
Page 7: Install The Stand-Alone Angle
STAND-ALONE ANGLE INSTALLATION Press each rail against the mounting surface until the templates stick to the mounting ■ ■ surface. Carefully remove the shade from the window opening. ■ ■ IMPORTANT: Make sure the templates stay on the mounting surfaces. Mark the screw holes. -
Page 8: Angle Sharing A Rectangular Shade Headrail Installation
ANGLE SHARING A RECTANGULAR SHADE HEADRAIL INSTALLATION Mount the Specialty Brackets for the Angle Mount the specialty brackets for the top rail of the angle. Refer to the procedures on pages 4 and 5. Mount the Rectangular Shade IMPORTANT: Angles can only be attached to a rectangular shade that is end mount. For end mount bracket location and headrail installation, refer to the “End Mount”... -
Page 9: Specialty Shape Installation
SPECIALTY SHAPE INSTALLATION Mount the Specialty Brackets Your order will include specialty brackets specific to your ■ ■ Brackets pleat size. Width of Rail Required The number of specialty brackets required varies with 8" – 60" ➤ ■ rail width, as shown in the table. ⁄... -
Page 10: Install The Specialty Shape
SPECIALTY SHAPE INSTALLATION Carefully remove the shade from the window opening. ■ ■ IMPORTANT: Make sure the templates stay on the mounting surface. Mark the screw holes. ■ ■ Carefully remove the templates from the mounting surface. ■ ■ Drill the screw holes using a ⁄... -
Page 11: Care
CARE Removing the Shade, If Necessary Specialty Brackets Push the rail against the brackets to release ■ ■ Front the latch and lift it out of the brackets. Rail Bracket Removing the Angle and Rectangular Shade Angle Grasp the bottom cell and magnet of the angle and lift up to detach from the magnet on ■... -
Page 12: Cleaning Procedures
Bathtub Cleaning/Water Immersion CAUTION: Do not immerse Alexa, Alexa Metallic, Calypso, Commercial, Elan, India Silk, all Batiste fabrics, all Alustra Duette fabrics, and all room-darkening fabrics. Do not immerse ® Applause Esprit fabrics. Immerse the shade in a basin or bathtub filled with warm water and a mild detergent. - Page 13 CARE Ultrasonic Cleaning CAUTION: Do not ultrasonically clean Commercial, Batiste 1 ⁄ " Semi-Sheer, and all room-darkening fabrics. Specify that a mild detergent solution be used. ■ ■ Dry the shade completely in the lowered (or fanned out) position. ■ ■ Injection/Extraction Cleaning This type of professional cleaning injects a cleaning solution into the fabric and extracts the dirty solution in the same motion.
- Page 14 Notes...
- Page 16 If you are not thoroughly satisfied, simply contact Hunter Douglas at (888) 501-8364 or visit hunterdouglas.com. In support of this policy of consumer satisfaction, we offer our Lifetime Limited Warranty as described below.


Need help?
Do you have a question about the Duette and is the answer not in the manual?
Questions and answers