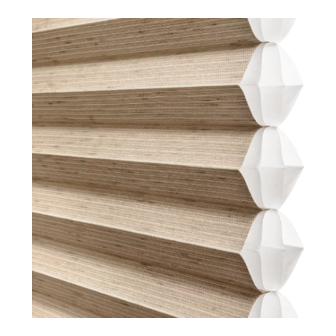
HunterDouglas Duette Installation Operation Care
Honeycomb shades cordlock lifting systems
Hide thumbs
Also See for Duette:
- User manual ,
- Installation operation care (51 pages) ,
- Installation manual (35 pages)
Summary of Contents for HunterDouglas Duette
- Page 1 Installation Operation Care • • Duette and Applause ® ® Honeycomb Shades Cordlock Lifting Systems...
-
Page 2: Table Of Contents
CONTENTS Getting Started: Mounting Types And Window Terminology ....... 1 Installation Components Needed ........1 Optional Components ............ 2 Tools And Fasteners Needed .......... 2 Product View ..............3 Installation: Mount The Installation Brackets — Inside Mount .... 4 Mount The Installation Brackets — Outside Mount ..5 Mount The Installation Brackets —... -
Page 3: Getting Started
GETTING STARTED ® ® Thank you for purchasing Hunter Douglas Duette or Applause cordlock honeycomb shades. With proper installation, operation, and care, your new shades will provide years of beauty and performance. Please thoroughly review this instruction booklet before beginning the installation. -
Page 4: Optional Components
GETTING STARTED Optional Components ■ Extension Brackets. Extension brackets can add up to 3 " of clearance for outside and end mounts. If ordered, there should be the Extension Bracket same number of extension brackets as installation brackets. ■ Spacer Blocks. Each spacer block projects the installation bracket ∕... -
Page 5: Product View
GETTING STARTED Product View Cordlock Installation Brackets Tassel Cord Breakaway Cord Stop Tassel Not Shown: Duette ® And Applause Duolite ® ™ Top-Down, And Two-On-One Shades. -
Page 6: Installation
INSTALLATION Mount The Installation Brackets — Inside Mount ■ Measure and mark 3" in from each jamb for end bracket location. ➤ If more than two installation brackets came with your order, space additional bracket(s) evenly between the two end brackets. Space Evenly Space Evenly 3"... -
Page 7: Mount The Installation Brackets - Outside Mount
INSTALLATION Mount The Installation Brackets — Outside Mount ■ Center the headrail over the window opening at the desired height. Use a pencil to lightly mark each end of the headrail. ■ Measure and mark 3" in from each end of the headrail. ➤... -
Page 8: Mount The Installation Brackets - End Mount
INSTALLATION ■ When using extension brackets, attach an installation bracket Speed to the underside of each extension bracket using the Extension Bracket provided screws and speed nuts. Installation Bracket Mount The Installation Brackets — End Mount End mount the headrail when conventional mounting techniques will not work, for example, in an arched window. -
Page 9: Install The Shade
INSTALLATION Install The Headrail Into The Window ■ Position the fully lowered shade in the window. ■ Gently push the fabric away from the bracket to allow access to the bracket screw holes. ■ Secure the brackets to the mounting surface using two screws per bracket. ■... -
Page 10: Attach The Hold-Down Brackets (Optional)
OPERATION Attach The Hold-Down Brackets (Optional) Hold-down brackets are only used on outside mounted shades. ■ Lower the shade and place the pins from the hold-down brackets into the bottom rail end caps. ■ On the mounting surface, mark the bracket hole locations. ■... -
Page 11: Troubleshooting
OPERATION Troubleshooting Problem Solution ■ The shade will not fi t into Check that the installation brackets are level and aligned. the installation brackets. Adjust and/or shim to level, if necessary. ■ Be sure the heads of the mounting screws are fl ush against the installation bracket. - Page 12 OPERATION Problem Solution The bottom rail is not Shade Height Adjustment level, or the shade height Bottom Rail Shade height and adjustments to is incorrect. Pocket level the bottom rail can be made by adjusting the cord on the underside Ferrule Pull cord of the bottom rail.
- Page 13 OPERATION Problem Solution The tassel cord length is Adjust The Tassel Cord Length too long. The tassel cord length is usually length of the fully closed shade. To shorten Tassel the tassel cord: ■ Slide the tassel up the cord revealing the knot.
-
Page 14: Care
CARE Cleaning Procedures Hunter Douglas honeycomb shades are made of an anti-static, dust-resistant fabric which repels dirt and dust. For most honeycomb fabrics, the following options are available if your shade needs cleaning. Dusting ■ Regular light dusting with a feather duster is all the cleaning that is needed in most circumstances. -
Page 15: Remove The Shade
CARE Ultrasonic Cleaning ■ Some honeycomb fabrics can be ultrasonically cleaned by a professional. ■ Specify that a mild detergent solution be used. ■ Never immerse the headrail into the solution. ■ Dry the shade completely in the lowered position. ®... -
Page 16: Child Safety
CHILD SAFETY Warning WARNING For more safety information call 1-888-501-8364 in the U.S. or 1-866-662-0666 in Canada. Young children can wrap cords around their necks and STRANGLE. ■ Always keep cords out of the reach of children. ■ Move cribs, playpens and other furniture away from cords. Children can climb furniture to get to cords. - Page 17 Notes...
- Page 18 The Hunter Douglas Lifetime Guarantee is designed to ensure a thoroughly satisfying experience when selecting, purchasing and living with your window fashion products. If you are not thoroughly satisfied, simply contact Hunter Douglas Inc. at 1-888-501-8364 or visit hunterdouglas.com. COVERED...


Need help?
Do you have a question about the Duette and is the answer not in the manual?
Questions and answers