HunterDouglas Duette Installation Operation Care
Hunter douglas duette skyrise hard-wired motorized honeycomb
shades
motorized lifting system
Hide thumbs
Also See for Duette:
- User manual ,
- Installation operation care (51 pages) ,
- Installation manual (35 pages)

Related Manuals for HunterDouglas Duette


Summary of Contents for HunterDouglas Duette
- Page 1 Installation Operation Care • • ® Duette Honeycomb Shades ® Skyrise Hard-Wired Motorized Lifting System...
-
Page 2: Table Of Contents
CONTENTS Getting Started: Mounting Types And Window Terminology ....... 1 Installation Components Needed ........1 Power Supply Requirements .......... 3 Product View ..............4 Installation: Assemble The Shade On The Ground ......5 Test Shade Operation ............ 6 Installation — Inside Mounts ......... 7 Installation —... -
Page 3: Getting Started
Bottom Sill Installation Components Needed Duette Skyrise Hard-Wired Motorized shades ship with a motor ONLY, unless a power supply, the Platinum ™ wall switch and remote control are specifi ed at the time of ordering. If you are using an alternative home automation solution, please refer to the Appendix and the Troubleshooting section for information concerning wire layout and setting shade positions. - Page 4 GETTING STARTED Rail Seal (Inside Mount). Rail seal may be pre-attached to the rails prior to shipment. Otherwise, attaching the rail seal is done prior to installing the shade. Threaded Fitting Support Cord (Shades Over 48" Wide). On wider shades, Back Front Headrail...
-
Page 5: Power Supply Requirements
GETTING STARTED In addition, you will need fasteners designed to work with your specifi c mounting surface(s). #6 Hex Head Screws (Provided). Two 1 ∕ " screws are provided per installation bracket. Longer Hex Head Screws (Not Provided). If using spacer blocks, use a #6 screw long enough for a secure attachment. -
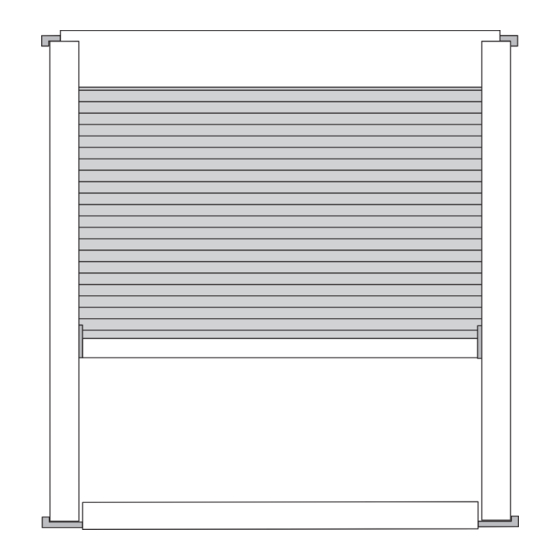
Page 6: Product View
GETTING STARTED Product View Skyrise Top Stack Shown ® Motor Pulley Assembly Headrail Side Rail Moving Rail Sill Rail... -
Page 7: Installation
INSTALLATION Assemble The Shade On The Ground Unpack the shade. Carefully remove the wrapping from around the shade. Do not cut the wrapping. Locate the wire exiting the headrail. Cut off the blue, male connector at the end of the wire. Strip the end of the wire. -
Page 8: Test Shade Operation
On shades over 48" wide, check the support cord for any sagging. If adjustments need to be made, refer to the Troubleshooting section, Adjusting the Support Cord Tension on page 18. CAUTION: Never use a lubricant of any kind on the Duette ®... -
Page 9: Installation - Inside Mounts
INSTALLATION Installation — Inside Mounts Jamb Roll Mount The Installation Brackets Sill Position installation brackets. " Installation Brackets Jamb ® Place the installation bracket in a vertical position with the bottom end of each bracket " in from the sill opening. ‚ Sill ®... -
Page 10: Installation - Side-By-Side Inside Mounts
INSTALLATION Slip a screwdriver past the rail seal and push back the brackets to install the lower end of the shade. RAIL IMPORTANT: If the shade SEAL height is greater than 48", attach the side rails to the window frame with mounting screws. - Page 11 INSTALLATION Install The Side-By-Side Shades Connect the leads from the fi rst shade to the ends of the wire going to the controller. For wiring specifi cations, refer to the Appendix section, Laying Out The Wire and ™ Wiring For The Platinum Technology Wall Switch on pages 24-25.
-
Page 12: Installation - Outside Mounts
INSTALLATION Installation — Outside Mounts Plan The Installation With outside mount applications, use the universal mounting brackets to attach the side rails, headrail, and sill rail to the mounting surface. Universal Mounting Brackets Side Rail Headrail Or Clearance Sill Headrail Three holes on the long side of the mounting bracket allow for a variety of rail attachments and a choice of clearances... - Page 13 INSTALLATION Attach universal mounting brackets to the rails. ® The back sides of the different types of Headrail Or Sill Headrail rails will be different distances from the Side Rail Sill Rail mounting surface depending upon how the bracket is mounted. For example, if the side rails are fl...
- Page 14 INSTALLATION ® Attach the universal mounting brackets " Clearance (Maximum) " Clearance to the sill rail with a minimum clearance of Short Side (Minimum) Hidden " and a recommended maximum clearance of ". One or two headrail screws may be used to attach the brackets. Brackets are attached to the sill rail with Headrail Screw “stack top”...
-
Page 15: Installation - Side-By-Side Outside Mounts
INSTALLATION Connect the wiring to the shade. Connect the wire leads from the shade to the already installed 14/4 gauge wire using wire nuts. For correct wire connections refer to the Appendix section, ™ Laying Out The Wire and Wiring For The Platinum Technology Wall Switch on pages 24-25. -
Page 16: Operation
Third Party Remote Control Operation Third party infrared (IR) remote controls (i.e. unversal remotes) ® ® can be used to operate Duette Skyrise Hard-Wired Motorized shades that are wired directly to a Platinum Technology wall switch. These remotes can “learn” the commands necessary to... -
Page 17: Troubleshooting
Troubleshooting section, Leveling The Moving Rail on page 18. Check if the support cord is too loose or too tight. Troubleshooting section, Adjusting The Support Cord Tension on page 18. CAUTION: Never use a lubricant of any kind on the Duette ® with Skyrise ®... - Page 18 OPERATION Problem Solution The shade stops and Adjusting Cable Tension starts while the motor Set the cable tension so that the pulley on the left end of the sill runs at a constant rail is all the way up and the pulley on the right end is raised only speed.
- Page 19 OPERATION Problem Solution (Adjusting Cable Tension Continued) With the cable ends pointing in opposite directions, loosen the screw in the end cap with a Phillips screwdriver. Cable Cable Side Hole Hold the screwdriver in the screw and slip the left end cap back inside the side rail.
- Page 20 OPERATION Problem Solution The moving rail is not Leveling The Moving Rail level. Determine if the moving rail is level by measuring the distance from the headrail to each end of the moving rail. Make sure that they are equal. Adjust the rail by pulling out the right side rail while pushing in the...
- Page 21 OPERATION The shade operates If the red light on the remote control ™ using the Platinum (indicator LED) does not light up IR Channel Indicator Selector Technology wall when the UP L/DOWN M button Switch switch, but does not is pressed, replace the batteries operate using the in the remote control.
- Page 22 With power off to the switch, reverse the motor wires on the back of the switch. Then try operating the shade again. Check that the batteries in the remote control are fresh and installed correctly. CAUTION: Never use a lubricant of any kind on the Duette ® with ®...
- Page 23 OPERATION One shade does not Press the UP L/DOWN M button longer when operating shades. consistently respond It can take longer for the signal to reach one of the shades. to the “Group” or Check at different areas of the room (home). There could be blind “ALL”...
-
Page 24: Care
CARE Cleaning Procedures ® Hunter Douglas Duette honeycomb shades are made of an anti-static, dust-resistant fabric which repels dirt and dust. For most honeycomb fabrics, the following options are available if your shade needs cleaning. Dusting Regular light dusting with a feather duster is all the cleaning that is needed in most circumstances. -
Page 25: Removing The Shade From The Window
CARE Ultrasonic Cleaning Some honeycomb fabrics can be ultrasonically cleaned by a professional. Specify that a mild detergent solution be used. Never immerse the headrail into the solution. Dry the shade completely in the lowered position. CAUTION: Do not ultrasonically clean Commercial, fabric-covered valances, Opalessence ™... -
Page 26: Appendix
APPENDIX Laying Out The Wire Wiring For An Inside Mount CAUTION: If your installation includes multiple shades, be sure the wiring is in " Minimum " For Flush Mount a central home-run confi guration (where each shade is wired directly to the switch). Do not use a daisy-chain confi... -
Page 27: Wiring For The Platinum ™ Technology Wall Switch
APPENDIX ™ Wiring For The Platinum Technology Wall Switch CAUTION: To prevent accidental short circuits and avoid possible component damage, do not plug the power supply into the wall outlet until the wiring connections are complete. MOTOR Use the diagram to BACK OF White With determine the wire... - Page 28 APPENDIX Multiple Shades Wiring Connect one shade to one switch. However, in multiple shade installations, you can group the power wires from multiple switches together and connect them to one power supply. IMPORTANT: Do not install the switch plate to the switch box until after you have tested the shade to make sure the switch operates the shade in the proper direction.
-
Page 29: Calibrating The Shade
APPENDIX Calibrating The Shade ™ Before operating and/or programming the shade, you must fi rst calibrate it to the Platinum Technology wall switch. IMPORTANT: A Platinum Technology remote control is required to initiate the calibration sequence. Calibration Sequence FRONT OF THE PLATINUM ™... -
Page 30: Setting And Clearing Intermediate Positions
APPENDIX Setting And Clearing Intermediate Positions ™ If using a Platinum Technology wall switch to operate a shade, up to two intermediate stops can be set between the fully raised and the fully lowered shade positions. This feature allows the shade to be preset so that it can be stopped at the same height each time the shade is raised or lowered. - Page 31 APPENDIX To Clear The Lower Intermediate Position: Lower the shade completely. Press the DOWN M button on the wall switch. The LED on the wall switch will begin blinking. Continue pressing the DOWN M button for 5 seconds, the LED will become a solid light, indicating the lower position has been cleared.
- Page 32 The Hunter Douglas Lifetime Guarantee is designed to ensure a thoroughly satisfying experience when selecting, purchasing and living with your window fashion products. If you are not thoroughly satisfied, simply contact Hunter Douglas Inc. at 1-888-501-8364 or visit hunterdouglas.com. COVERED...
Need help?
Do you have a question about the Duette and is the answer not in the manual?
Questions and answers