HunterDouglas Duette Owner's Manual
Powerrise battery, operated shades
Hide thumbs
Also See for Duette:
- User manual ,
- Installation operation care (51 pages) ,
- Installation manual (35 pages)
Table of Contents
Advertisement
Advertisement
Table of Contents

Related Manuals for HunterDouglas Duette


Summary of Contents for HunterDouglas Duette
- Page 1 Owner’s Guide ® Duette Honeycomb Shades ® PowerRise Battery Operated Shades...
-
Page 2: Table Of Contents
Operating Instructions ............. 17 Operation ..................... 19 Replacing Batteries ..................22 Troubleshooting ..................24 Care And Cleaning ..................27 INTRODUCTION Thank you for purchasing a Duette ® with PowerRise ® battery operated shade. Please review these instructions before installing or operating your shade. -
Page 3: Installation Instructions
INSTALLATION INSTRUCTIONS... -
Page 4: Materials Included
MATERIALS INCLUDED Extension Brackets (Optional) Spacer Blocks (Optional) Installation Brackets Battery Wand CAUTION: TO AVOID DAMAGE, DO NOT DROP THE BATTERY WAND. Duette ® PowerRise ® must be reset after PowerRise ® Use 8 AA alkaline batteries as shown below. -
Page 5: Tools And Supplies Needed
TOOLS AND SUPPLIES NEEDED Carpenter’s level Measuring tape Power drill, " hex driver, and drill bits Screwdrivers (flat blade and Phillips) Wood screws or other fasteners, such as expansion bolts, toggle bolts, or anchors (not included) Mounting Surface Fastener Wood No. -
Page 6: Install The Battery Wand
End Cap according to the AA Battery Wands Used For Shades More Than 26" Wide instructions on the battery wand label. Removable Duette ® PowerRise ® must be reset after changing batteries. 1) Fully lower shade. Install the wand into... -
Page 7: Connect The Optional Components
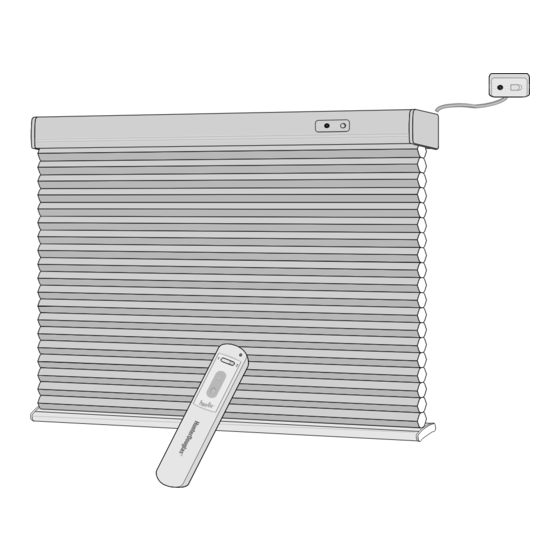
CONNECT THE OPTIONAL COMPONENTS If you ordered the satellite battery pack or AC transformer, connect it to the motor. Flip up the cover rail to open. Optional Satellite Battery P Optional Satellite Battery P ack or AC T ack or AC T ransformer ransformer Optional Satellite Battery P... -
Page 8: Mount The Installation Brackets
MOUNT THE INSTALLATION BRACKETS Mounting Requirements Mount the headrail level for proper shade operation. Use a carpenter’s level to check that the mounting surface is level on an inside mount and that the tops of the installation brackets are level and aligned on an outside mount. - Page 9 INSIDE MOUNT APPLICATIONS The minimum mounting depth is ". Minimum Fully Depth Recessed " " " Depth Chart Bracket Placement The depth required to fully recess a shade depends on the pleat size. Depth Chart: Inside Mount Bracket Placement Pleat Size Minimum Fully Recessed 2"...
- Page 10 OUTSIDE MOUNT APPLICATIONS The minimum height measurement is ". Bracket Placement " Center the shade over the window Minimum opening and mark the ends of the headrail. Mark On Wall Measure a minimum of " in from the marks on the wall and mark the bracket locations.
- Page 11 Extension Brackets (Optional) Nuts Extension brackets project the installation brackets up to 3" away from the Extension mounting surface. Bracket Mount the extension brackets on a surface at least " high. Check that each bracket is level and aligned. Attach using two screws. Installation Attach the installation brackets to the Bracket...
-
Page 12: Install The Shade
INSTALL THE SHADE CAUTION: Be sure the wires Locking Tab coming from the satellite eye, Of Bracket satellite battery pack, or AC transformer do not become pinched by the brackets or headrail during installation. Headrail Note: If using a satellite eye, Cover Lower Lip remove the rubber bands... -
Page 13: Install The Optional Components
INSTALL THE OPTIONAL COMPONENTS Once the optional components (satellite battery pack, satellite eye, and AC transformer) are connected and the shade installed, install the components. Outside Mount Satellite Battery Pack Determine where to mount the satellite Determine where to mount the satellite Determine where to mount the satellite Determine where to mount the satellite Determine where to mount the satellite... - Page 14 Satellite Eye CAUTION: Handle the satellite eye carefully to avoid damaging the infrared eye. Do not touch or push on the infrared eye. Determine where to mount the Determine where to mount the Determine where to mount the Determine where to mount the Determine where to mount the Satellite Eye Mounting Options satellite eye.
- Page 15 AC Transformer The AC transformer plugs into a standard 110V outlet. Route the wire to a location where it will not interfere with the shade. On outside mounts , the wire exits from the top of P/N # 298119800 AC-DC Adaptor the shade.
-
Page 16: Remove The Shade
Install The Remote Control Batteries Remove the back center panel of the remote control by pushing down on the latch and pulling it out. Remove both AAA batteries inside. Replace the batteries with two new AAA alkaline batteries as shown inside the remote control. -
Page 17: Operating Instructions
OPERATING INSTRUCTIONS... -
Page 19: Operation
Channel Selection Duette with PowerRise shades operate on specially designated channels, Channel 1 or Channel 2. To operate the shade, the remote control must be set on the same channel as the shade. - Page 20 Reset The Shade Indicator Channel Light Selector Select the shade’s operating channel on the remote control. Press and release the DOWN button to lower the shade completely. With the shade completely lowered, press and hold the DOWN button for 5 seconds. This will clear the memory and the shade can be operated normally.
- Page 21 Use The Manual Control Button Manual Control Infrared The manual control button is located next to the Button infrared eye on the headrail or the satellite eye. Headrail Press the button to alternately lower, stop, and raise the shade. Infrared Manual Control Button Satellite Eye...
-
Page 22: Replacing Batteries
AA Battery Wands Used For Shades More Than 26" Wide Install the wand into the headrail with the Removable Duette ® PowerRise ® must be reset after changing batteries. 1) Fully lower shade. CAUTION: TO AVOID DAMAGE,... - Page 23 Replace The Batteries In The Satellite Battery Pack Load batteries into the satellite Load batteries into the satellite Load batteries into the satellite Load batteries into the satellite Load batteries into the satellite battery pack. battery pack. battery pack. battery pack. battery pack.
-
Page 24: Troubleshooting
TROUBLESHOOTING Problem Symptom/Solution Check that the battery wand is oriented The shade does not correctly in the headrail. operate using either the remote control or the manual control button. Check that the battery wand is completely inserted in the clips and fits snugly in the headrail. - Page 25 TROUBLESHOOTING Problem Symptom/Solution The shade operates using Check that the correct channel is selected on the remote. See Channel Selection , page 19. the manual control button, but does not operate using the remote control. If the red light on the remote control does not light up when the UP /DOWN buttons...
- Page 26 TROUBLESHOOTING Problem Symptom/Solution The shade does not Check for obstructions in the shade’s path. lower completely. The shade does not The Memory Stop may be activated. See Set And Clear The Memory Stop , page 21. raise completely. Check the batteries and replace if necessary. The shade does not Check that the mounting brackets are level.
-
Page 27: Care And Cleaning
CARE AND CLEANING Duette ® with PowerRise ® honeycomb shades are as durable as they are beautiful. With proper installation and care, they will provide many years of beauty and performance. The honeycomb fabric is anti-static and dust-resistant. Light dusting is all that is generally needed to keep your shade looking like new. - Page 28 Customer Information Center at 1-888-501-8364 Visit our Web site at hunterdouglas.com © 2003, 2005 Hunter Douglas Inc. ® Registered trademark of Hunter Douglas Inc. ™ Trademark of Hunter Douglas Inc. Patented in the U.S. and foreign countries. U.S. and foreign patents pending.
Need help?
Do you have a question about the Duette and is the answer not in the manual?
Questions and answers