Table of Contents
Advertisement
Advertisement
Table of Contents

Related Manuals for Nauticam NA-RX100VI


Summary of Contents for Nauticam NA-RX100VI
- Page 2 ORWARD Thank you for your purchase of a NAUTICAM housing. At NAUTICAM, we pride ourselves in the ability to recognize the requirements of professional as well as amateur underwater photographers and fulfill them through the innovative designs of our products. We strive to achieve a high level of user-friendliness by allowing stress-free installation and easy operation of all important functions of the camera.
-
Page 3: Table Of Contents
ABLE OF ONTENTS Warranty ……………………………………………………………………………………………………………. Precautions ………………………………………………………………………………………………………… Package Contents ………………………………………………………………………………………………. Specifications …………………………………………………………………………………………………….. Identification of Parts ………………………………………………………………………………………… Opening and Closing the Housing ……………………………………………………………………… Preparation of the Housing ………………………………………………………………………………… Installing the Camera ………………………………………………………………………………………… Changing the Port………………………………………………………………………………………………. N50 Short Port with Bayonet Mount – Camera Settings…………………………………….. Installing Handle Brackets and Shutter Release Extension ……………...…………………. -
Page 4: Warranty
NAUTICAM does not hold responsibility for damage, of any nature, to any equipment used with and/or placed within our products. NAUTICAM accepts no liability for any loss of captured images or the inability to capture images even if it is due to the malfunctioning of our products. -
Page 5: Precautions
O-ring(s). 1. Do not use lubricants from other brands with the silicone rubber O-ring on this housing, only use the lubricant provided by NAUTICAM. 2. Discontinue use immediately should you notice any leakage. - Page 6 6. Do not open the product in a wet or sandy environment. Protect the interior from moisture and debris in order to prevent malfunction or leakage. 7. Do not store the product in an environment of high humidity. 8. Do not leave the housing and the monitor in direct sunlight for prolonged periods. 9.
-
Page 7: Package Contents
ACKAGE ONTENTS 11. NA-RX100VI housing 12. Set of handle brackets with shutter release extension 13. Spare silicone rubber O-ring for housing 14. O-ring remover 15. CR2032 battery 16. Lubricant 17. Set of Allen keys 18. Instruction manual... -
Page 8: Specifications
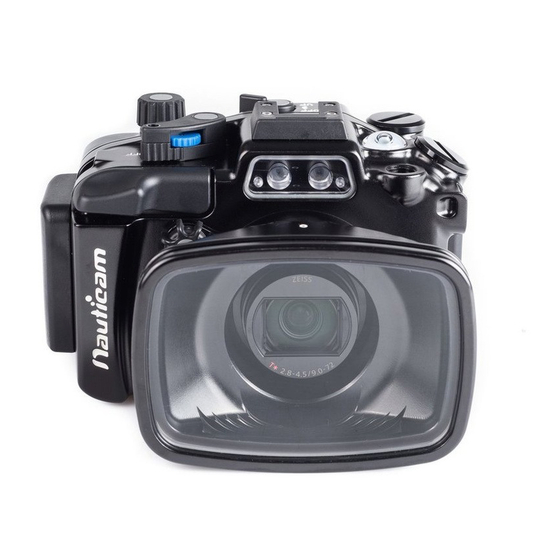
PECIFICATIONS Housing body: Aluminum alloy Construction Surface treatment: Hard anodized Display window: Abrasion resistant polycarbonate Width: 151mm Dimensions Height: 101mm Depth: 136mm Weight Approx. 1.05kg Buoyancy Slightly negative Depth rating 100 meters Compatible Sony Cyber-shot DSC-RX100 VI Digital Camera camera... -
Page 9: Identification Of Parts
DENTIFICATION OF ARTS Mode dial On/Off button Zoom lever Housing release safety button Threaded holes for handle brackets Housing lock Shutter release lever Front control wheel N50 Standard Port... - Page 10 Flash up/off lever Accessory coldshoe Moisture alarm window Optical fiber mount M14 accessory port M16 accessory port Threaded holes for handle brackets M10 strobe mounting base...
- Page 11 Fn button Mounting holes for LCD Movie button magnifier attachment rails MENU button Rear control wheel Display / Up selection button SET button Flash mode / Right selection button Drive mode / Left selection button Exposure compensation / Playback button Down selection button Custom / Delete button selection button...
- Page 12 1/4”-20UNC tripod socket* *The maximum length of screws that can be used with the tripod socket is 4mm...
-
Page 13: Opening And Closing The Housing
PENING AND LOSING THE OUSING To open the housing: 1. Press the housing lock safety button. 2. Turn the housing lock anti-clockwise for 270°, until the lock reaches the “Open” position as shown. - Page 14 To close the housing: When closing, make sure there is nothing caught between the closing surfaces of the two halves of the housing. 3. Close the housing while the housing 4. Turn the housing lock clockwise for lock is in the “Open” position. 270°, until the lock reaches the “lock”...
-
Page 15: Preparation Of The Housing
REPARATION OF THE OUSING 1. After verifying that the main O-ring is in good condition, lightly coat it with the 4. Setting up the moisture alarm: lubricant provided. 2. Make sure the O-ring groove located in the front part of the housing is free from any foreign material;... - Page 16 3. Switch the alarm on. The LED light will 2. Test the alarm by connecting the two flash blue once and turn blue for five wires near the bottom of the housing seconds indicating the battery is with a damp cotton bud; the alarm normal.
- Page 17 Optional Vacuum Valve: Vacuum valve can be attached to the housing via one of the accessory port for conducting a vacuum seal test. Please refer to the manual of the vacuum valve for details of the operation. LED status identification: On start up: LED indicator Status...
- Page 18 After start up: LED indicator Status Flashing "Blue" light Standby mode. The moisture alarm is active, and the system is ready for vacuum indication whenever a vacuum is detected. Flashing "Red" light with Moisture is detected. beeping sound Flashing "Yellow" light Some vacuum is detected, target vacuum level is not reached.
-
Page 19: Installing The Camera
NSTALLING THE AMERA To install the camera into to the housing: 2. Close the housing and confirm that 1. Place the camera inside the housing all the controls of the housing are as shown. correctly engaged. -
Page 20: Changing The Port
HANGING THE While holding the red port lock Press and hold the red port lock safety button, turn the port anti- safety button to un-lock. clockwise until the "I" mark on the port aligns with the "o" mark on the housing. Then gently pull the port out. - Page 21 HANGING THE Turn the port clockwise until the Align the “I” mark on the port with "o" mark on the port aligns with the “O” marl on the housing. the "o" mark on the housing. Gently push the port towards the housing until it cannot go any further.
-
Page 22: N50 Short Port With Bayonet Mount - Camera Settings
AMERA ETTINGS When using the NA-RX100VI with the optional N50 Short Port with Bayonet Mount (PN 38703) it is recommended to change the following settings to insure the camera’s zoom range is limited to the supported length. If the zoom length is exceeded the camera will lock-up and will need to be powered down. - Page 23 N50 S – C HORT ORT WITH AYONET OUNT AMERA ETTINGS Scroll to CAMERA 1 menu Scroll to sub-menu 3/12 titled SHOOT MODE/DRIVE and select MR 1/2 MEMORY. Select “1” from the top icons. You will receive a notification on the LCD at completion.
- Page 24 N50 S – C HORT ORT WITH AYONET OUNT AMERA ETTINGS Ensure MODE DIAL is still set to MR and set the lens to 65mm. This will be the setting for MACRO using the CMC. Press the MENU button Scroll to sub-menu SHOOT MODE/DRIVE and select MR 1/2 MEMORY...
- Page 25 N50 S – C HORT ORT WITH AYONET OUNT AMERA ETTINGS 10. Select “2” from the top icons. You’ll receive a notification on the LCD upon completion. To change between WIDE (MR1) and MACRO (MR2) press the FN button, scroll to MR 1/2 RECALL and choose either “1”...
-
Page 26: Installing Handle Brackets And Shutter Release Extension
NSTALLING ANDLE RACKETS AND HUTTER ELEASE XTENSION A pair of handle brackets is supplied with the housing for use with optional Easitray (#71206) or Flexitray (#71207) with right handle (#71208), providing additional stability. Strobe mounting balls (#71311) are required. To install the handle brackets: 1. - Page 27 The Shutter release extension provides easy shutter release access from the handle grip for users with big hand, or thick drysuit gloves who prefer shooting from a handle. To install the shutter release extension: flip Wheel 1. Confirm that the wheel is located at 2.
- Page 28 Loosen to Adjust Mount shutter release Loosen the two screws as shown extension onto the right handle until the wheel assembly can freely bracket as shown. move vertically. Adjust the position of the wheel so that it touches on the housing shutter release lever and tighten.
-
Page 29: Installing Hdmi Bulkhead (Optional)
HDMI B NSTALLING ULKHEAD OPTIONAL This housing is compatible with HDMI output to external monitor with optional monitor housing. A specific HDMI bulkhead (#25032) and socket extension (#25028) are required To install the HDMI bulkhead and socket extension on M16 accessory port: 1. - Page 30 4. Connect the HDMI cable to the 3. Open the housing and insert the HDMI bulkhead. HDMI cable through the threaded hole from inside of the housing.
- Page 31 5. Tighten the HDMI bulkhead by 6. Connect the HDMI cable to the turning the threaded ring on the camera’s HDMI connector before socket extension. placing the camera inside the housing. Please refer to the monitor housing manual for connection between camera housing and monitor housing.
-
Page 32: Care And Maintenance
O-ring with the provided lubricant before reinstalling it in the groove. A damaged O-ring should be discarded immediately and replaced only with one that is provided by NAUTICAM. • Replace the main O-ring annually. It is recommended that you ship the housing to our... - Page 33 PTIONAL CCESSORIES P.N. 25131 P.N. 25624 P.N. 25106 LCD Magnifier attachment rails M14 Vacuum Valve II LCD Magnifier with Dioptric for NA-RX100IV/RX100V/RX100VI (Pushbutton Release) Adjustment P.N. 25107 P.N. 38703 M67 flip diopter holder N50 Short Port with Bayonet Mount for Wet Wide Lenses for standard port...
-
Page 34: Optional Accessories
SMC-1 at 200mm generates a 15mm wide image frame with an estimated 5” working distance Wet Lens Compatibility with PN. 38703 N50 Short Port with Bayonet Mount on the NA-RX100VI **This port supports the 24mm – 70mm focal lengths** WWL-1 compatibility begins at 28mm focal length...
Need help?
Do you have a question about the NA-RX100VI and is the answer not in the manual?
Questions and answers