Table of Contents
Advertisement
Quick Links
Advertisement
Table of Contents

Related Manuals for Carl Valentin DYNACODE II


Summary of Contents for Carl Valentin DYNACODE II
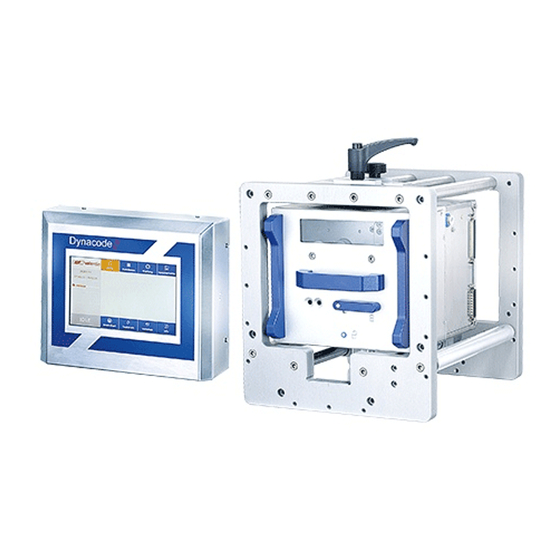
- Page 1 DYNACODE II Service Instructions...
- Page 2 It must not be concluded from the missing labelling that it is not a registered brand or a registered trademark. Carl Valentin direct print modules comply with the following EU directives: EU Low-Voltage Directive (2014/35/EU)
-
Page 3: Table Of Contents
Control Inputs and Outputs (Option) ........54 Wiring Plans ................. 59 12.1 Control Unit ................59 12.2 Print Mechanics Dynacode II 53 ..........60 12.3 Print Mechanics Dynacode II 107 .......... 61 12.4 Print Mechanics Dynacode II 128 .......... 62 05.17... - Page 4 Table of Contents Dynacode II Layout Diagrams ..............63 13.1 CPU ..................63 13.2 Power Electronics ..............64 13.3 Dispenser I/O ................. 65 13.4 Motor Plate ................66 Connector Assignment of Control Unit ......67 Index ..................69 Service Instructions...
-
Page 5: Notes On This Document
Dynacode II Notes on this Document Notes on this Document 1.1 User Notes This service manual is intended for qualified service and maintenance staff. This manual contains information about the electronics and the mechanical part of the direct print module. -
Page 6: Cross References
Notes on this Document Dynacode II 1.3 Cross References References to specific items in a figure are marked with letters. They Drawings are identified with parentheses in the text, e.g. (A). If no figure number is provided, letters in the text always refer to the graphic directly above the text. -
Page 7: Safety Instructions
Dynacode II Safety Instructions Safety Instructions 2.1 General Safety Instructions Workplace and Keep the area around the device clean during and after method of working maintenance. Work in a safety-conscious manner. Store dismantled device parts in a safe place while maintenance is being performed. - Page 8 Safety Instructions Dynacode II Protective equipment WARNING! Risk of injury in case of missing or faulty protective equipment. After performing maintenance work, attach all safety equipment (covers, safety precautions, ground cables etc.). Replace faulty parts and those which have become unusable.
-
Page 9: Safety Handling When Working With Electricity
Safety Instructions Dynacode II There are warning stickers on the direct print modules that draw your attention to dangers. Therefore the warning stickers are not to be removed as then you and others cannot be aware of dangers and may be injured. -
Page 10: Environmentally-Friendly Disposal
It may only be organised, used and disposed of by the manufacturer. Valentin products accordingly labelled can therefore be returned to Carl Valentin GmbH. This way, you can be sure your old equipment will be disposed of correctly. -
Page 11: General Notes
Dynacode II General Notes General Notes 3.1 Continuous Mode Material Speed Please note that the material has sufficient adhesion at the pressure transducer roll or encoder roll to permit the exact speed by the encoder. It is only possible to print when respecting the operating conditions, i.e. -
Page 12: Intermittent Mode
General Notes Dynacode II 3.2 Intermittent Mode Print Principle Printhead Feed Packaging material Print surface Figure 3 After starting a print order the printhead moves against the print medium. Afterwards the printing carriage moves corresponding to the set or transferred layout length linear over the material which is to be printed. -
Page 13: Change The Module Type
General Notes Dynacode II 3.3 Change the Module Type Tap on the Functions button. On the left side of the display, select Maintenance/ System Settings. Maintenance - System settings Select Printer Info, tap on the desired Printer Type and confirm your selection. - Page 14 General Notes Dynacode II Service Instructions 05.17...
-
Page 15: Electronics (Replacing Components)
Dynacode II Electronics (Replacing Components) Electronics (Replacing Components) DANGER! Risk of death via electric shock! Before opening the housing cover, disconnect the printing system from the mains supply and wait for a moment until the power supply unit has discharged. -
Page 16: Cpu Pcb
Electronics (Replacing Components) Dynacode II 4.2 CPU PCB Figure 6 Remove the NOTICE! CPU PCB Save the configuration of direct print module onto a CF card. 1. Unplug the control unit from the electrical outlet. 2. Remove the cover of control unit. -
Page 17: Battery
Dynacode II Electronics (Replacing Components) 4.3 Battery DANGER! Danger of explosion due to improper replacement of the battery! Use non-conductive tools. Pay attention to polarity. 1. Lift up the fixing bracket by means of a non-metallic device (e.g. - Page 18 Electronics (Replacing Components) Dynacode II Figure 7 1. Unplug the control unit from the electrical outlet Remove the I/O board 2. Remove the cover of control unit. 3. Remove the CPU PCB (see chapter 4.2, page 16). 4. Remove all connections from the I/O interface (B).
-
Page 19: Power Supply Unit
Dynacode II Electronics (Replacing Components) 4.5 Power Supply Unit Figure 8 Figure 9 Remove the power 1. Unplug the control unit from the electrical outlet. supply unit 2. Remove the CPU PCB (see chapter 4.2, page 16). 3. Remove the insulating plate (C). - Page 20 Electronics (Replacing Components) Dynacode II Service Instructions 05.17...
-
Page 21: Cleaning
Dynacode II Cleaning Cleaning DANGER! Risk of death via electric shock! Before opening the housing cover, disconnect the printing system from the mains supply and wait for a moment until the power supply unit has discharged. NOTICE! When cleaning the label printer, personal protective equipment such as safety goggles and gloves are recommended. -
Page 22: Transfer Ribbon Roller
Cleaning Dynacode II 5.2 Transfer Ribbon Roller A soiled ribbon roller can lead to reduced print quality and can affect transport of material. Figure 10 1. Remove the transfer ribbon cassette. 2. Remove deposits with the roller cleaner and a soft cloth. -
Page 23: Printhead
Dynacode II Printhead Printhead 6.1 Replace the Printhead CAUTION! The printhead can be damaged by static electricity discharges and impacts! Set up the device on a grounded, conductive surface. Ground your body, e.g. by wearing a grounded wristband. -
Page 24: Angle Adjustment
Printhead Dynacode II 6.2 Angle Adjustment Figure 12 The installation angle of the printhead is default 26° to the print surface. However, manufacturing tolerances of printhead and mechanics can require another angle. CAUTION! Damage of printhead by unequal use! Higher wastage of ribbon by faster ripping. -
Page 25: Ribbon Cassette (Replacing Components)
Dynacode II Ribbon Cassette (Replacing Components) Ribbon Cassette (Replacing Components) View of transfer ribbon cassette Figure 13 7.1 Track Roller NOTICE! The track roller can be removed without previous loosening of the switch roll. Use a screw driver with max. diameter 5 mm and remove the screw (B). - Page 26 Ribbon Cassette (Replacing Components) Dynacode II NOTICE! The sliding supports of track roller are destined for unlubricated operation and therefore are not to be oiled. However, a one-time lubrication at installation improves the infeed manner. Install the track roller 1. Install the track roller (A) to the pillar.
-
Page 27: Return Pulley
Dynacode II Ribbon Cassette (Replacing Components) 7.2 Return Pulley Figure 15 Remove the 1. Loosen three Allen head screws on the inside and remove the rod return pulley at the side with the handhold (cassette). 2. Unscrew the Allen head screw (A) of the corresponding roll. -
Page 28: Ribbon Rewinder Roll/Unwinder Roll
Ribbon Cassette (Replacing Components) Dynacode II 7.3 Ribbon Rewinder Roll/Unwinder Roll Figure 16 Remove the ribbon 1. Remove the screw (D) from the appropriate ribbon roll. Take care rewinder roll/ to hold the centring sleeve (B). unwinder roll 2. Remove the chuck cone (C), centring sleeve (B), springs (A) and ribbon roll (E). -
Page 29: Printing Carriage (Replacing Components)
Dynacode II Printing Carriage (Replacing Components) Printing Carriage (Replacing Components) View of printing carriage Figure 17 Figure 18 Figure 19 05.17 Service Instructions... -
Page 30: Printhead Fastener, Pressure Bail, Interlayer
Printing Carriage (Replacing Components) Dynacode II 8.1 Printhead Fastener, Pressure Bail, Interlayer Figure 20 1. Remove the transfer ribbon cassette. 2. Push both tension springs (C, Figure 19) with tweezers from the pillars (B, Figure 19). 3. Remove the printhead cable (E, Figure 18) from the printhead (A, Figure 18). -
Page 31: Guiding Carriage
Dynacode II Printing Carriage (Replacing Components) 8.2 Guiding Carriage L M N Figure 21 1. Replacing pneumatic cylinder for replacing the pneumatic cylinder (L), remove the Allan head screws (M) and then remove the pneumatic tube. 2. Replacing linear guiding for replacing the linear guiding (O), remove the Allan head screws (N). -
Page 32: Motor Circuit Board
Printing Carriage (Replacing Components) Dynacode II 8.3 Motor Circuit Board Figure 22 Remove the motor 1. Remove the connecting cable between the control unit and print mechanics. circuit board 2. Loosen the side screws and remove the mechanics housing at the rear. -
Page 33: Print Mechanics (Replacing Components)
Dynacode II Print Mechanics (Replacing Components) Print Mechanics (Replacing Components) 9.1 Pneumatic Valve DANGER! Danger of injury by causing a short-circuit. Because of technical reasons, the adjusting screw of pressure control device unit is on a voltage potential of 5V. -
Page 34: Pressure Switch
Print Mechanics (Replacing Components) Dynacode II 9.2 Pressure Switch DANGER! Danger of injury by causing a short-circuit. Because of technical reasons, the adjusting screw of pressure control device unit is on a voltage potential of 5V. Use isolated tools. -
Page 35: Encoder
Dynacode II Print Mechanics (Replacing Components) 9.3 Encoder Figure 25 Figure 26 1. Remove the connecting cable between the control unit and print Remove the encoder mechanics. 2. Loosen the side screws and remove the mechanics housing at the rear. -
Page 36: Limit Switch
Print Mechanics (Replacing Components) Dynacode II 9.4 Limit Switch A(8x) Figure 27 1. Loosen the side screws and remove the mechanics housing at the Remove the limit switch rear. 2. Remove the screws (A) of cover plate (B). The limit switches (E) are on the bottom side of aluminium plate. -
Page 37: Cassette Switch
Dynacode II Print Mechanics (Replacing Components) 9.5 Cassette Switch A(8x) Figure 28 1. Loosen the side screws and remove the mechanics housing at the Remove the cassette switch rear. 2. Remove the screws (A) of the cover plate (B). The cassette switch (C) is visible after removing the cover plate (B). -
Page 38: Leds
Print Mechanics (Replacing Components) Dynacode II 9.6 LEDs A(8x) Figure 29 1. Loosen the side screws and remove the mechanics housing at the Remove the LEDs rear. 2. Remove the screws (A) of the cover plate (B). The LEDs (D) are visible after removing the cover plate (B). -
Page 39: Error Correction
Dynacode II Error Correction 10 Error Correction Error message Cause Remedy Line too high Line rises up completely or Move line down (increase Y partly over the upper edge of value). label. Check rotation and font. Line too low Line rises up completely or Move line up (reduce Y value). - Page 40 Error Correction Dynacode II Error message Cause Remedy Field number Received line number is invalid. Check sent data. Check connection PC - printer. Length mask Invalid length of received mask Check sent data. statement. Check connection PC - printer. Unknown mask Transferred mask statement is Check sent data.
- Page 41 Dynacode II Error Correction Error message Cause Remedy Invalid parameter Entered data do not correspond Check code data. to the characters allowed from the application identifier. Application Selected application identifier is Check code data. Identifier not available in GS1-128. HIBC definition Missing HIBC system sign.
- Page 42 Error Correction Dynacode II Error message Cause Remedy Delete directory Attempt to delete the actual Change directory. directory. Invalid path Too long indication of path. Indicate a shorter path. Drive write- Memory card is write-protected. Deactivate write protection. protected Directory not file Attempt to indicate a directory Correct your entry.
- Page 43 Dynacode II Error Correction Error message Cause Remedy No media No CF card is inserted. Insert CF card in the slot. Webserver error Error at start of web server. Please contact your distributor. Wrong PH FPGA The direct print module is Please contact your distributor.
- Page 44 Error Correction Dynacode II Error message Cause Remedy Hotstart CF No CF card found. If option hotstart was activated, a CF card must be inserted. Switch off the printer before inserting the memory card. Flip/Rotate Selection of print of several It is only possible to select one columns and also mirror/rotate.
- Page 45 Dynacode II Error Correction Error message Cause Remedy RFID programming Error at programming the RFID Check RFID definitions. label. Scanner timeout The scanner could not read the bar code within the set timeout time. Defective printhead. Check printhead. Wrinkles in transfer ribbon.
- Page 46 Error Correction Dynacode II Error message Cause Remedy Invalid Tag type Wrong Tag type. Adapt data or use the correct Tag type. Tad data do not match the Tag type in the printer. RFID inactive RFID module is not activated.
- Page 47 Dynacode II Error Correction Error message Cause Remedy Wrong directory Invalid target directory when Target directory must not be copying. within the source directory. Check target directory. No label PH2 No label found at the rear Insert new label roll.
- Page 48 Error Correction Dynacode II Error message Cause Remedy Wrong material Label material does not fit to User label material with printing data. suitable label and/or gap length. Invalid mark-up tag Invalid mark-up formatting Correct the formatting characters in text. characters in the text.
-
Page 49: Inputs And Outputs
Dynacode II Inputs and Outputs 11 Inputs and Outputs 11.1 Control Inputs and Outputs (Standard) Plug connection - back side of control unit Figure 30 A = Output 1 Port 9-12 B = Input 1 Port 1-4 C = Output 2... - Page 50 Inputs and Outputs Dynacode II Connection of a lamp to a 24V relay by Out 1: Example Figure 32 Output II PIN (bushing) Output II Figure 30, C Out 5 / Port 13: Print-Ready signal It is indicated if the print module is ready to process a start impulse.
- Page 51 Dynacode II Inputs and Outputs Control inputs By means of the control inputs the print procedure can be controlled. The control inputs at Input I are galvanic separated and have to be provided with an external voltage source. The signal level is active "HIGH".
- Page 52 Inputs and Outputs Dynacode II External bushing I/O-24 This input is executed as 15-pole and provides user-sided Figure 30, D 24V/100mA. In case of using this bushing, exists no galvanic separation. Port Function 24 V / 100 mA Print start (NPN initiator)
- Page 53 Dynacode II Inputs and Outputs Example 1 Figure 37 Example 2 Figure 38 Example 3 Figure 39 05.17 Service Instructions...
-
Page 54: Control Inputs And Outputs (Option)
Inputs and Outputs Dynacode II 11.2 Control Inputs and Outputs (Option) Plug connection - back side of control unit Figure 40 A = Output 1 Port 9-12 B = Input 1 Port 1-4 C = Output 2 Port 13-16 D = Input 2... - Page 55 Dynacode II Inputs and Outputs Connection of a lamp to a 24V relay by Out 1: Example Figure 42 Output II PIN (bushing) Output II Figure 30, C Out 5 / Port 13: Print-Ready signal It is indicated if the print module is ready to process a start impulse.
- Page 56 Inputs and Outputs Dynacode II Control inputs By means of the control inputs the print procedure can be controlled. The control inputs at Input I are galvanic separated and have to be provided with an external voltage source. The signal level is active "HIGH".
- Page 57 Dynacode II Inputs and Outputs Input II PIN (pin) Input II Figure 40, D In 5 / Port 5: Not used In 6 / Port 6: Not used Figure 46 In 7 / Port 7: Not used In 8 / Port 8: Not used 05.17...
- Page 58 Inputs and Outputs Dynacode II Service Instructions 05.17...
-
Page 59: Wiring Plans
Dynacode II Wiring Plans 12 Wiring Plans 12.1 Control Unit Figure 47 05.17 Service Instructions... -
Page 60: Print Mechanics Dynacode Ii 53
Wiring Plans Dynacode II 12.2 Print Mechanics Dynacode II 53 Figure 48 Service Instructions 05.17... -
Page 61: Print Mechanics Dynacode Ii 107
Dynacode II Wiring Plans 12.3 Print Mechanics Dynacode II 107 Figure 49 05.17 Service Instructions... -
Page 62: Print Mechanics Dynacode Ii 128
Wiring Plans Dynacode II 12.4 Print Mechanics Dynacode II 128 Figure 50 Service Instructions 05.17... -
Page 63: Layout Diagrams
Dynacode II Layout Diagrams 13 Layout Diagrams 13.1 CPU Figure 51 Jumper plan gesteckt offen 05.17 Service Instructions... -
Page 64: Power Electronics
Layout Diagrams Dynacode II 13.2 Power Electronics Figure 52 100-240 VAC input 48V output Protective conductor connection Service Instructions 05.17... -
Page 65: Dispenser I/O
Dynacode II Layout Diagrams 13.3 Dispenser I/O I/O board with external sensor Figure 53 In the function menu the verification of I/Os can be done in menu service functions. The signal levels input low are indicated as '-' and signal levels input high as . -
Page 66: Motor Plate
Layout Diagrams Dynacode II 13.4 Motor Plate Top face Figure 54 Bottom side Figure 55 LEDs for Voltage Description voltage control Supply voltage for CPU Printhead voltage Motor voltage Service Instructions 05.17... -
Page 67: Connector Assignment Of Control Unit
Dynacode II Connector Assignment of Control Unit 14 Connector Assignment of Control Unit C D E Figure 56 Switch Serial interface RS-232 USB Host interface (USB-B) Connecting cable Power Ethernet interface USB interface (USB-A) CF card slot Connection encoder Connecting cable SPI (printhead + sensor) - Page 68 Connector Assignment of Control Unit Dynacode II Service Instructions 05.17...
-
Page 69: Index
Dynacode II Index 15 Index angle adjustment (printhead) ............. 24 battery, replacing ................17 cassette switch (print mechanics), replacing........37 changing, module type ............... 13 cleaning cleaning instructions ............... 21 printhead ..................22 transfer ribbon roller ................ 22 connecting plan, control unit .............. 67 continuous mode material guiding ................ - Page 70 Index Dynacode II layout diagram ................65 replacing ................... 17, 18 instructions ................... 5 interlayer (printing carriage), replacing ..........30 intermittent mode print position ................... 12 print principle .................. 12 jumper plan, CPU ................63 layout diagrams CPU ....................63 I/O board 24V .................
- Page 71 Dynacode II Index pressure switch (print mechanics), replacing ........34 primary fuses, replacing ..............15 print mechanics wiring plan II 107 ................61 wiring plan II 128 ................62 wiring plan II 53 ................60 printhead cleaning................... 22 replacing ..................23 printhead fastener (printing carriage), replacing ........
- Page 72 Carl Valentin GmbH Neckarstraße 78 86 u. 94 . 78056 Villingen-Schwenningen Phone +49 7720 9712-0 . Fax +49 7720 9712-9901 info@carl-valentin.de . www.carl-valentin.de...
Need help?
Do you have a question about the DYNACODE II and is the answer not in the manual?
Questions and answers