Table of Contents
Advertisement
Quick Links
Advertisement
Table of Contents

Related Manuals for Tvone CORIOmaster mini


Summary of Contents for Tvone CORIOmaster mini
- Page 1 ...
-
Page 2: Table Of Contents
Important Safety Instructions ......................15 Initial Operation Check Using Factory Default Settings ..............15 4 Introduction to the CORIOmaster mini ................16 5 Quick Guide ........................18 CORIOmaster mini Capabilities ......................18 ... - Page 3 Layout Grid ............................39 11.2.1 Base Size ............................40 11.3 Projector Alignment ..........................41 11.3.1 Edge Alignment ........................... 41 12 CORIOmaster mini Canvas View ..................45 12.1 Window Generation .......................... 45 ...
- Page 4 Document Control General Information: Title TV One C3-510 CORIOmaster mini Product Manual Code MNL-C3-510 Author Mark Trevena, Training Manager Version Brief Product Manual for CORIOmaster mini Description Version Control: Version Amendments...
-
Page 5: Disclaimer
Disclaimer This product is intended for professional use. This product is not intended for use in a medical environment and does not have the required certifications for such use. Similarly, use aboard any aircraft or spacecraft while in flight or as an adjunct to any surface, airborne or marine navigation system or any offshore marine activity, including control of any watercraft, or any use similar to those specifically herein mentioned is prohibited. -
Page 6: Manual Copyright Notice
Caution: This equipment is intended for use in the manner prescribed in the Instruction Manual. Any user changes or modifications not expressly approved by TV One Multimedia Solutions could void the user’s authority to operate the equipment. Connecting this equipment to external devices requires appropriate cabling for FCC compliance. The Instruction Manual shows or describes the proper connection of this equipment for operation that insures FCC compliance. -
Page 7: Important Safety Instructions
IMPORTANT SAFETY INSTRUCTIONS To insure the best from this product, please read this manual carefully. Read these instructions Keep these Instructions Heed all warnings Follow all instructions Do not use this apparatus near water ... - Page 8 CONSIGNE IMPORTANTE DE SECURITE Pour obtenir les meilleures performances avec ce produit, nous vous demandons de lire soigneusement ce manuel. Lisez ces consignes Conservez ces consignes Respectez tous les avertissements Respectez toutes les consignes ...
- Page 9 2. 1 Propriété intellectuelle Certaines puces à circuits imprimés de ce produit contiennent des données confidentielles et (ou) des secrets professionnels. Par conséquent, vous ne pouvez pas recopier, modifier, adapter, traduire ou distribuer son contenu ou procéder à une ingénierie inverse ou à une décompilation de ce contenu.
- Page 10 WICHTIGE SICHERHEITSANWEISUNGEN Lesen Sie diese Bedienungsanleitung sorgfältig, um zu gewährleisten, dass Sie den optimalen Nutzen aus diesem Produkt ziehen. Lesen Sie diese Anweisungen. Bewahren Sie diese Anweisungen auf. Beachten Sie alle Warnhinweise. Befolgen Sie alle Anweisungen.
- Page 11 INSTRUCCIONES IMPORTANTES DE SEGURIDAD Para garantizar el máximo rendimiento de este producto, lea cuidadosamente este manual. Lea estas instrucciones Guarde estas instrucciones Respete todas las advertencias Siga todas las instrucciones No use este aparato cerca del agua ...
- Page 12 BELANGRIJKE VEILIGHEIDSINSTRUCTIE Om dit product optimaal te kunnen gebruiken, dient u deze handleiding aandacht te lezen. Lees deze instructies Bewaar deze instructies Let op alle waarschuwingen Volg alle instructies Gebruik dit apparaat niet in de nabijheid van water ...
- Page 13 VIKTIGA SÄKERHETSANVISNINGAR För att få ut det bästa av din produkt bör du läsa denna bruksanvisning noggrant. Läs dessa anvisningar Spara dessa anvisningar Rätta dig efter alla varningar Följ alla instruktioner ...
- Page 14 VIKTIGE SIKKERHETSANVISNINGER For at du skal få mest mulig ut av dette produktet, ber vi deg lese denne håndboken nøye. Les disse anvisningene. Ta vare på disse anvisningene. Vær oppmerksom på alle anvisningene. ...
- Page 15 TÄRKEITÄ TURVALLISUUSOHJEITA Lue tämä opaskirja huolellisesti, jotta saat parhaan hyödyn tästä tuotteesta. Lue nämä ohjeet Säilytä nämä ohjeet Ota kaikki varoitukset huomioon Noudata kaikkia ohjeita Älä käytä tätä laitetta veden lähellä ...
-
Page 16: Unpacking And Installation
UNPACKING AND INSTALLATION Shipping Carton Your unit will arrive boxed with internal foam inserts for maximum protection during shipping. You are encouraged to retain the box and all packing material so the unit can be returned in the unlikely event that repairs should ever become necessary. ... -
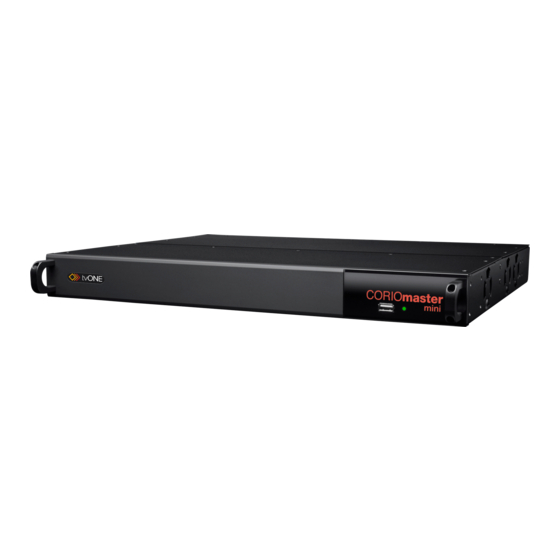
Page 17: Introduction To The Coriomaster Mini
Notes: ¹Both systems can be mounted by their rack ears but for CORIOmaster mini we also recommending using a side rail kit due the reduced height. ²CORIOmaster and CORIOmaster mini are fully modular system and can use a number of input and output cards. - Page 18 In typical system use, users will set up their inputs and outputs before saving them as Presets and controlling the CORIOmaster mini from the Live mode.
-
Page 19: Quick Guide
5.4 CORIOmaster mini Connections The rear of the CORIOmaster mini has a dual Universal DVI input, CPU Card and a Power Supply with slots available for another 5 input or output modules together with internal space for an addition power supply. - Page 20 Using these module slots the CORIOmaster mini has the following capability: ...
-
Page 21: User Interface Tour
User Interface Tour 6.1.1 Logging In The CORIOmaster mini is controlled using a PC application. In addition to connecting with your CORIOmaster, there are also a number of useful functions available on the Login screen. -
Page 22: Configuring Inputs And Outputs
You can also Save Log to a text file if you wish to keep a copy of the log. The default Login details for your system are: Username: admin Password: adminpw ... -
Page 23: Output Configuration
6.1.3 Output Configuration The Layouts menu is used to create physical screen layouts which can consist of a number of physical displays. Displays can be identical or of different sizes and resolutions. By default the display will be zoomed in to around 30% which is suitable for normal type layout setups. -
Page 24: Creating Multiple Window Layouts
6.1.4 Creating Multiple Window Layouts On the left of the Canvas menu you can select our active Layouts below which there is a Take button and a Grid selector. The centre area is our Canvas where the user can add Windows. The bar on the right is used for editing Windows. ... -
Page 25: Working In Live Mode
As soon as you hit OK on Add Window menu the Window will be displayed on the Canvas. It can be repositioned and resized using your mouse or the controls on the editing bar. 6.1.5 Working in Live Mode ... -
Page 26: Getting Started
Display 900+ line monitor recommended The initial connection between the computer and the CORIOmaster mini is via the RS232 connector on the rear using an appropriate cable or USB to RS232 converter and preloading any driver onto the PC. -
Page 27: Connections
7.3 Connections CORIOmaster mini can accept modules for Universal DVI, 3G-SDI, HD-SDI and HDBaseT. Input Cards Output Cards Universal DVI CM-DVIU-2IN CM-DVIU-SC-2OUT 3G-SDI CM-3GSDI-2IN CM-3GSDI-SC-2OUT HD-SDI CM-HDSDI-4IN ----- HDBaseT ----- CM-HDBT-SC-2OUT-1ETH *Most cards are dual input or output except the HD-SDI input card which has 4 inputs. -
Page 28: Connecting Equipment To The Coriomaster
Connecting Equipment to the CORIOmaster Your CORIOmaster mini will have been pre-configured at our factory with the cards that you order. Below is a diagram of the rear of the unit. Input/output modules can be placed in slots 1 to ... - Page 29 positive values represent a downward direction on the screen, this is possible by selecting the down button. The final option is to change the menu language between German and American English. Please note that although the menus are multi-language, the strings are in English.
-
Page 30: Coriomaster General Settings
PC for use by the application. On future connections between the PC and a unit the application may offer the user the chance of CORIOmaster mini can be loaded with configurations stored on the PC. ... -
Page 31: General Navigation
9.3 General Navigation Six buttons are shown along the top right marked from Save All Settings to Logout. The active button is shown Red. The four buttons Settings, Layouts, Canvases and Live follow the natural way to set up the unit from installation to use in a live environment. -
Page 32: Comm Data
9.6 Comm Data The Comm Data tab is not used under normal operation but if a communication fault should occur the tab background will change colour. If this occurs the user can open this tab and investigate what may be causing a problem. ... -
Page 33: Settings
Settings 10.1 General Settings In the settings menu, you can set and see your system configuration, set up Ethernet control and configure system inputs and outputs. 10.1.1 System Window Configuration Control ... -
Page 34: Universal Dvi Input Modules
10.3 Universal DVI Input Modules The above image is the screen that appears when a UNIVERSAL DVI input has been selected on the left hand list. ... -
Page 35: Sdi Input Modules
appropriate resolution. If the source device is connected via HDMI the HDMI found line is set to Found. 10.4 SDI Input Modules For SDI Inputs the configuration is minimal. There is no analogue option and no return channel to the source to permit auto configuration. -
Page 36: Universal Dvi Output Modules
10.6 Universal DVI Output Modules It is important to select the correct output resolutions for each of the devices connected to the unit at this stage. Changes of resolution later in the process of generating good quality results can be compromised by setting different resolutions later. For each output click on the output resolution line and from the pop up select the correct resolution for the monitor or projector connected. -
Page 37: Sdi Output Modules
10.8 SDI Output Modules The SDI output modules should be configured for the desired output resolution no other adjustment is possible. 10.9 Genlock Function Each output will normally free run at the chosen output resolution. In many situations the user may want to have these outputs co-timed. -
Page 38: Coriomaster Layout View
The left hand side shows the current layout, currently the because of hardware constraints the CORIOmaster mini unit restricts the user to one layout in the system. Click on a layout to select and this can be named on the current layout box. Names must start with a letter and contain no spaces ... - Page 39 The output then appears on the layout with its centre at point 0,0. The user can now move the output in a number of ways. For more accurate positioning the user may enter accurate numbers into the Layout Centre of the Output Properties field. For fine tuning the arrows provide a nudge facility for actual alignment.
-
Page 40: Layout Aids
11.2 Layout Aids To help the user construct layouts a number of extra tools have has been added to the software. The Zoom All button sizes the layout screen to show all placed outputs. The Centre Layout Origin places the 0,0 point in the centre of the screen, where new outputs are placed. -
Page 41: Base Size
11.2.1 Base Size On the left hand side is a user defined value called Base Size, by default this is zero which turns off this function. If the user is using identical monitors on a layout then the Base Size has no function. -
Page 42: Projector Alignment
11.3 Projector Alignment The layout grid can also be used for setting up projectors for edge blending. This time however the gridlines should be spaced smaller than the projector resolution so that the outputs overlap on the layout. The maximum overlap is 500 pixels. - Page 43 CORIOmaster mini can blend horizontally, vertically or a combination of both to create complex video walls using projectors. Once all the projectors have been aligned the next stage is to correct for and brightness non linearity at the blends.
- Page 44 Linearity Correction allows us to control the overlap between the two projectors. The overlap is defined in the overlap area in the line-up graphic (not the amount of the projectors). With the control slid to the right the overlay has a strong gradient applied to both images which will result in a black edge in the centre of the image.
- Page 45 that output should be selected on the software (make it the only one red) and then adjust the appropriate gamma to remove any visible difference. When the Gamma correction has been completed a black source should be used to adjust the ‘Black Level Boost’. In very low light conditions it may be possible to see a lighter area on the blended edges.
-
Page 46: Coriomaster Mini Canvas View
CORIOmaster mini Canvas View After setting up the layout the user can then start to create the presentation on the Canvas. This is performed in the ‘Canvas’ tab. First assign a layout to the canvas, using the left hand layout tab. -
Page 47: Window Borders
12.1.2 Window Borders The user may add a border to a window this is set in pixel widths and may have any colour set from the colour table. Press done to store the colour. Then press take to send this to the unit for display. -
Page 48: Presets
12.1.7 Presets When using the Canvas Screen the user can store system wide configurations for later recall. The user on first clicking on the Preset Tab will see no Presets. To activate editing presets the user must restore all presets and wait. -
Page 49: Coriomaster Live Screen
CORIOmaster Live Screen Once all the presets have been created and stored the user can use the Live Screen to control their presentation. ... -
Page 50: Useful Information
TV One technical support. The second drive is the internal SD Card and will come up with the Label TVONE. This Drive is used to hold user files. To update the unit the user must drop two files into the root directory of this drive. -
Page 51: Replacing Modules
14.2 Replacing Modules CORIOmaster mini modules are factory installed and cannot be replaced in the field by end users. Module changes should be only carried out by a TV One Customer Service Engineer following approved procedures. ... -
Page 52: Info
The unit will reply to commands in various ways. A successful command may be replied by the !Info : ………. Where the text after the colon provides information on how the unit has interpreted the command !Error –nnn : ………. -
Page 53: Useful Command Line Commands
14.4.2 Useful Command Line Commands CORIOmax coriomax.Model_Name = CORIOmax coriomax.Model_Number = 8007 coriomax.Serial_Number = 0000000000000 coriomax.Backplane_Number = 0000000000000 coriomax.Software_Name = CORIOmax coriomax.Software_Version = V1.133.P4 Master coriomax.RebootToMaster() coriomax.RebootToMatrix() coriomax.Software_Date = Jul 30 2012 21:05:45 coriomax.Software_Update() System system.Comms = <...>... - Page 54 system.constraints.Bandwidth_Meters = <...> system.constraints.bandwidth_meters.Channel1 = 0% system.constraints.bandwidth_meters.Channel2 = 0% system.constraints.bandwidth_meters.Channel3 = 0% system.constraints.bandwidth_meters.Channel4 = 0% system.constraints.WDP_Free = <...> system.constraints.wdp_free.WDP_Q1 = 0 system.constraints.wdp_free.WDP_Q2 = 0 system.constraints.wdp_free.WDP_Q3 = 0 system.Filing = <...> system.filing.nand = <...> system.filing.nand.Files() system.filing.nand.Info() system.filing.sdcard = <...> system.filing.sdcard.Files() system.filing.sdcard.Info() ...
- Page 55 = Routing.Preset aliases.Video_2 = Slots.Slot1.In2 aliases.Camera_1 = Slots.Slot6.In1 aliases.Camera_2 = Slots.Slot6.In2 aliases.Video_1 = Slots.Slot1.In1 aliases.PC_1 = Slots.Slot2.In1 aliases.PC_2 = Slots.Slot2.In2 aliases.Studio_Sync = Slots.Slot4.In2 Resources resources.EDID = <...> resources.edid.s4o1.Filename = nand:\TVONE\EDID\S4O1.EDD resources.edid.s4o1.EDIDVersion = 1.3 resources.edid.s4o1.Manufacturer = TVO resources.edid.s4o1.Name = TVOneCORIOmax...
- Page 56 resources.edid.s4o1.SerialNumber = 0 resources.edid.s4o1.ManufactureDate = 201216 resources.edid.s4o1.Width_mm = 600 resources.edid.s4o1.Height_mm = 450 resources.edid.s4o1.HorizBdr_pix = 0 resources.edid.s4o1.VertBdr_pix = 0 resources.edid.s4o1.Extensions = 1 resources.edid.s4o1.Resolutions() resources.edid.s4o1.Remove_File() resources.LOGO() resources.STILL() resources.WARP() Slots slots.slot1.Cardtype = DVI_U 2-in slots.slot1.Carddata() slots.slot1.In1 = <...> slots.slot1.in1.FullName = In1 slots.slot1.in1.Status = INVALID slots.slot1.in1.Alias = Video_1 slots.slot1.in1.WindowList = <Empty>...
- Page 57 slots.slot1.in1.AudInD = NULL slots.slot1.in1.AFVChoiceA = Slot1.In1.AudInA slots.slot1.in1.AFVChoiceB = Slot1.In1.AudInB slots.slot1.in1.AFVChoiceC = Slot1.In1.AudInC slots.slot1.in1.AFVChoiceD = Slot1.In1.AudInD slots.slot1.in1.View = NULL slots.slot1.in1.ViewPosCode = 0 slots.slot1.in1.AudioBars = 0 slots.slot1.PhaseRetrain() slots.slot1.Module_Resolutions() Routing routing.Windows = <...> routing.windows.Window1 = <...> to routing.windows.Window36 = <...> windows.window1.FullName = Window1 windows.window1.Status = FREE windows.window1.Alias = NULL windows.window1.Input = NULL...
- Page 58 routing.layouts.layout1.Alias = NULL routing.layouts.layout1.Canvas = Canvas1 routing.layouts.layout1.CanWidth4kUnit = 4096 routing.layouts.layout1.CanHeight4kUnit = 4096 routing.layouts.layout1.CanXCentre = 0 routing.layouts.layout1.CanYCentre = 0 routing.layouts.layout1.OutputList = Slot11.Out1,Slot11.Out2,Slot13.Out1,Slot132 routing.layouts.layout1.Mode = Normal routing.Preset = <...> routing.preset.Alias = Preset routing.preset.Take = 0 routing.preset.Edit = 0 routing.preset.Read = 0 routing.preset.Valid = Yes routing.preset.NameRead = routing.preset.SeqNumRead = 468...
-
Page 59: Coriomaster Control Software Configuration
If you haven’t already got a copy of the CORIOmaster software you can download it from the following URL: http://www.tvone.com/tech_support_software.shtml The software will be contained in compressed folder so it’s advisable to first install a compression utility tool such as WinZip, WinRAR or 7-Zip. These are freely available to download from the internet. -
Page 60: Tech Specs
Tech Specs TV One Part Numbers CORIOmaster mini chassis with dual C3-510 Universal DVI inputs Universal DVI dual input module CM-DVIU-2IN Universal DVI dual output module CM-DVIU-SC-2OUT 3G-SDI dual input module CM-3GSDI-SC-2OUT HD-SDI quad input module CM-HDSDI-4IN HDBaseT dual output module... - Page 61 380W Theoretical Maximum (with dual PSU’s under full load) Voltage 110v to 240v auto-detecting Power Supply Single with optional dual PSA Box Contains CORIOmaster mini chassis with specific input/output modules fitted, Control Software, Operational Manual, Power Cable Optional Accessories Redundant PSU CM-1RPS Rack support rails (24”) RM-120 Rack support rails (32”)
-
Page 62: Appendix A: Framelock Vs. Genlock
Appendix A: Framelock vs. Genlock What is Genlock? When you run a variety of outputs, you want to make sure they don’t get out of sync with each other. The CORIOmaster provides the ability to lock certain outputs to the reference signals taken from a specified input, in order to make sure they stay synchronised. - Page 63 ...
Need help?
Do you have a question about the CORIOmaster mini and is the answer not in the manual?
Questions and answers