
Related Manuals for Tvone CORIOview


Summary of Contents for Tvone CORIOview
- Page 1 CORIOview™ Multi-window Processor Dynamic mode CORIOgrapher™ V2.9 and above User Guide V1.20 Firmware version M409 and above PDF-MWP-DYN-V1.20 Oct 2019...
-
Page 2: Table Of Contents
Setting up a CORIOview™ in CORIOgrapher™ CORIOgrapher™ system requirements About CORIOgrapher™ Getting started with CORIOgrapher™ To connect to your CORIOview and get its configuration To log in with secure mode To create a configuration offline To send a configuration to your CORIOview... - Page 3 Problems sharing settings between CORIOview units Changing the mode of your CORIOview™ I don't know which mode I'm using Which mode do I want? User settings Creating and editing users What are user roles? Why set a timeout time? Changing other users' passwords...
- Page 4 Before you start Adding and editing media streams Adding media items, streams, and playlists to your play queue Playing a multicast stream from an Encoder-100 on multiple CORIOview units Changing the duration of media items Playing streams with low latency...
- Page 5 Checking and updating the CORIOview™ firmware Checking your firmware version and downloading new firmware Updating the firmware I can't see my CORIOview™ in the Discovered Devices list I can't log in securely to CORIOgrapher™ The picture keeps coming and going on my CORIOview™...
-
Page 6: Welcome
Thanks for buying this CORIOview multi-window processor. CORIOview works with CORIOgrapher software to support your needs with an easy-to-use interface and front panel buttons. CORIOview now runs in two modes. This Quick Start Guide covers setting up your CORIOview in either mode. About modes: Classic mode Classic mode gives you more control over features like audio, transitions, borders, and rotating your output. - Page 7 CORIOgrapher V2.9 is packed with features to help you create and manage your visual space. Intuitive software interface Add custom window labels Choose which presenters appear in which windows Mute and unmute audio and video Manage streaming media PDF-MWP-DYN-V1.20 tvONE...
-
Page 8: Quick Start
Quick start This Quick Start Guide gives you an overview of the steps involved in setting up your CORIOview™ hardware and CORIOgrapher™ software. 1. Install your hardware. a. Connect your display or displays to your output module. Connect a source to each port of your input modules. If you intend to use classic mode, we recommend you label your cables 1 up to 8. - Page 9 If you can hear your source, repeat this step for buttons 2-8. c. If you can't hear your source, check it's not muted, at the source device or in CORIOgrapher. Read more about controlling audio with CORIOgrapher in tvONE Help. In CORIOgrapher, select and search, or ask a question.
- Page 10 1. 6. Choose your operating mode. You can use your CORIOview in two modes. Classic mode gives you more control. Dynamic mode has a simplified interface, and some functions are automated. Classic mode is better for more sophisticated activities like broadcast management and medical applications, dynamic mode is better for running meetings and lectures, and for security monitoring.
- Page 11 Select > Networking. b. Select Secure connection. c. Select Save > Save. CORIOview restarts. d. Select Secure and log in. 2. Optional, but recommended: name your input and output ports. Select > Slot Status. Give each port a name that describes the device connected to it.
- Page 12 1. Optional: enable secure mode. a. Select > Networking. b. Select Secure connection. c. Select Save > Save. CORIOview restarts. d. Select Secure and log in. 2. Optional: If you want to use more than one display, enable output cloning. PDF-MWP-DYN-V1.20 tvONE...
- Page 13 Next steps Congratulations, your CORIOview is set up! If your CORIOview contains one or more Streaming media and 4K playback input modules, you need to set those up too. Read about setting up Streaming media and 4K playback input modules on page 1.
-
Page 14: Get To Know Your Products
In classic mode, use your CORIOview to show up to eight video sources on a single display. Slots Your CORIOview has three slots that can contain input or output modules. You can have up to two input modules and one output module. -
Page 15: Using The Buttons Of The Front Panel
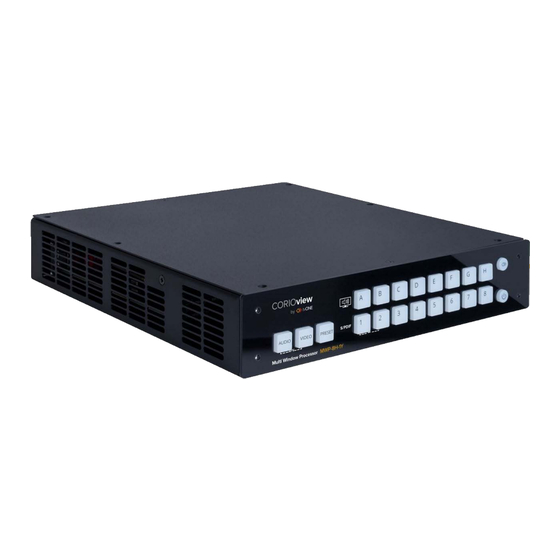
Optional: connect directly to a PC with Ethernet or RS-232 CORIOview mounting accessories You can mount your CORIOview to a surface, rack, or ONErack system with our mounting accessories, sold separately. Ask your distributor about: RM-CV-1RU-SINGLE: ONErack mounting module for CORIOview... - Page 16 A button from 1-8 is lit more brightly to tell you how many windows appear on your display. Buttons from A-H are lit dimly to tell you which presenters are connected. Your display shows the number of windows you selected. PDF-MWP-DYN-V1.20 tvONE...
- Page 17 Window labels You can show or hide labels that tell you which presenter appears in which window. If someone is presenting full screen, the label shows for three seconds and then hides. To show or hide labels, press PDF-MWP-DYN-V1.20 tvONE...
-
Page 18: About Modules
About modules CORIOview™ supports the following modules. You can have one output module, and up to two input modules. Each module supports specific connections, but our range of adapters means you can connect almost any type of source or display to your CORIOview. -
Page 19: Output Modules
Play single IP streams up to 100 Mb/s Play dual IP streams up to 40 Mb/s Play still images up to 8K Play streams with low latency Play media from streaming server Create and save up to 20 playlists Primary channel supports up to 4K @30 Hz PDF-MWP-DYN-V1.20 tvONE... -
Page 20: Streaming Media And 4K Playback Input Module - Quick Start Guide
Connect an Ethernet cable to play media over IP. If any status indicator stays red, restart your CORIOview. If that doesn't work, contact tvONE support. Contact details are at the back of this guide. - Page 21 Make sure your CORIOview is connected to your display devices and to an AC power outlet. 2. Download the latest firmware for your CORIOview from tvone.com/firmware-updates. 3. Download the latest version of CORIOdiscover and CORIOgrapher from tvone.com/softwares. 4. Use CORIOdiscover to update your firmware.
- Page 22 If you choose a static IP address, make sure you enter a unique value for your IP address. Using the same IP address for multiple devices can cause your devices to disconnect. If you need help with network settings, contact your network administrator. PDF-MWP-DYN-V1.20 tvONE...
- Page 23 Streaming media and 4K playback presenters. From Properties, select (Media Player) Manage. 2. Select your media source. Your media items appear as icons. Still image Saved stream Video clip Found encoder Playlist Found encoder, streaming Information about the media item appears on the right. PDF-MWP-DYN-V1.20 tvONE...
- Page 24 If you want to stream from the internet, or from an encoder that does not appear in Discovered encoders, add the stream. Select IP Streams > Add IP Stream and enter a useful name and the URL of the media stream. 4. Choose a resolution for your media stream. PDF-MWP-DYN-V1.20 tvONE...
-
Page 25: Hardware Recommendations
74. Hardware recommendations At tvONE, we design our products to the highest quality standards. To get the best results from our products, we recommend that you use the best quality connectors, cables, and adapters. Consider the points below when you choose accessories and position equipment. - Page 26 In industrial environments, use shielded Ethernet cables. Shielded Ethernet cables are often marked F/UTP or FTP. Use shielded Cat 6 cables with HDBaseT input and output modules and Streaming media and 4K playback input modules. Use good quality USB 3.0 drives. PDF-MWP-DYN-V1.20 tvONE...
-
Page 27: Set It Up
Set it up This section contains everything you need to know about installing and setting up your CORIOview™. In this section Planning and installing hardware Setting up a CORIOview™ in CORIOgrapher™ CORIOgrapher™ system requirements About CORIOgrapher™ Getting started with CORIOgrapher™... -
Page 28: Planning And Installing Hardware
Distance from CORIOview to sources and display For best results, use cables under 15 m long, or shorter if you use connection adapters. If you need to place your CORIOview more than 15 m away from your sources or displays, use a signal extender. Read about our adapters on page 14. - Page 29 3. Connect your sources to the input modules of your CORIOview. Connect cables for any dynamic sources. For best results, make a note of which source is connected to which port. If you want to use your CORIOview in classic mode, label your cables from 1 up to 8. If you want to use your CORIOview in dynamic mode, label your cables from A up to H.
-
Page 30: Setting Up A Corioview™ In Coriographer
You can now set up your inputs and output in CORIOgrapher. Setting up a CORIOview™ in CORIOgrapher™ When you've finished installing your hardware and connected everything to your CORIOview, you can set up your CORIOview in CORIOgrapher. In this section CORIOgrapher™... -
Page 31: About Coriographer
Home window. If you've set up your hardware already, you can connect to your CORIOview™ and get information about its configuration of modules. If you haven't set up your hardware yet, you can create a configuration offline. Or, if you have one, you can load a configuration from a file. -
Page 32: To Log In With Secure Mode
CORIOview. To create a configuration offline You don't need to be connected to a CORIOview to create a display, but you do need to recreate the configuration of your CORIOview so that you're using the correct inputs, outputs, and devices. -
Page 33: To Send A Configuration To Your Corioview
Read about the configuration of a CORIOview on page 9. To send a configuration to your CORIOview You can send a configuration to your CORIOview from Home. You can either create a configuration offline, or load a saved configuration. 1. Create or load a configuration. -
Page 34: The Dashboard
If you have a Streaming media and 4K playback input module: Open media player Save your current settings on your Show or hide window labels. CORIOview™. Save your current settings to a file Mute all audio. on your computer. Show the lobby. -
Page 35: Enabling Secure Mode
Secure mode disables unsecured connections over Ethernet. Unencrypted third-party controllers do not work over Ethernet when you use secure mode. You can still use unsecured controllers that are connected directly to your CORIOview, using the serial port of the CPU module. -
Page 36: Setting Up A Second Display
Setting up a second display If your output module has more than one output port, you can add a second display. CORIOview™ clones your output onto your second display. Both displays show the same output at the same resolution. Read more about output resolution on page 31. -
Page 37: Testing Your Installation
Poor quality or damaged cables You have an invalid or unsupported custom EDID file You can now test audio. If your test was not successful, you might need to contact tvONE support. See contact details on page 106. PDF-MWP-DYN-V1.20 tvONE... -
Page 38: Settings
Read more about problems with audio on page 99. Settings You can manage device settings, network settings, and user settings. You can also get information about your CORIOview™, and name your input and output ports. In this section Device settings Naming your CORIOview™... -
Page 39: Device Settings
You can give your CORIOview a unique name. Why should I name my CORIOview? If you have more than one CORIOview unit on your network, giving each unit a unique name can make it easier to find and log in to that unit quickly. -
Page 40: Backing Up And Restoring Your Settings
Backing up and restoring your settings You can save your settings to a file on your CORIOview™, or to a file on your computer. You can restore your settings from either file. You can share a file saved on a computer between several CORIOview units that have the same configuration of modules. -
Page 41: Restoring Or Copying Settings From A File On Your Computer
You can't share saved settings between devices with different configurations of modules. You might not be able to copy settings from one CORIOview to another if they have very different firmware versions, or you might lose some data in the process. -
Page 42: Changing The Mode Of Your Corioview
> General. Risk of losing settings When you switch modes, CORIOview only keeps your network settings. Consider making a backup copy before you switch, in case you want to switch back again. Read more about making a backup on page 35. -
Page 43: User Settings
Why set a timeout time? By default, a connection to a CORIOview must stay active, or it is disconnected after five minutes. An active connection sends at least one command to the CORIOview™ every five minutes. -
Page 44: Changing Other Users' Passwords
3. Enter the same password in the Confirm Password box and select Save. Network settings Administrators can configure network settings for CORIOview™ units and Streaming media and 4K playback input modules. In this section Configuring network settings for your CORIOview™... - Page 45 3. OPTIONAL: Configure your static IP address. Enter a value for your IP address and subnet mask. If your CORIOview and PC are on different networks, enter a value for your gateway. If you need help with network settings, contact your network administrator.
-
Page 46: Configuring Network Settings For Streaming Media
If you choose DHCP, an IP address is assigned to you. If you choose Static, the last static IP address you saved is available to edit. If you haven't previously saved a static IP address, default values for a static IP address are available to edit. PDF-MWP-DYN-V1.20 tvONE... -
Page 47: Finding The Mac Address Of Your Streaming Media And 4K Playback Input Module
If you have a Streaming media and 4K playback input module, you can view the status of your playlists, delete all playlists or individual playlists, move playlists between modules, and rename playlists. In this section Renaming playlists and moving playlists between modules Deleting playlists PDF-MWP-DYN-V1.20 tvONE... -
Page 48: Renaming Playlists And Moving Playlists Between Modules
Deleting playlists If you have a Streaming media and 4K playback input module, you can delete all your playlists, or individual playlists. Deleting all your playlists 1. In CORIOgrapher, select > Playlists. 2. Select Remove all saved playlists. PDF-MWP-DYN-V1.20 tvONE... -
Page 49: Managing Encoders And Streams
Search for an encoder that doesn't appear automatically. Select an encoder to see details about that encoder. Select Manage the encoder, or change your configuration. Read about configuring an Encoder-100at help.tvone.com/products/C3-series/C3- 5XX/Content/Topics/ENCODER-100/ENCODER-100-configure-encoders.htm. Remove an inactive encoder. Preview the stream from an encoder. PDF-MWP-DYN-V1.20 tvONE... - Page 50 You can edit the name and URL of saved streams. 1. Select the stream and then select > Edit. 2. Edit the name or URL of the media stream. Get more help with an Encoder-100 at help.tvone.com/products/C3-series/C3-5XX/Content/Topics/ENCODER- 100/ENCODER-100-about-E100. PDF-MWP-DYN-V1.20 tvONE...
-
Page 51: Using Your Corioview
Using your CORIOview™ When your CORIOview™ is set up, you can start a simple meeting, create custom labels, and play media and streams. In this section Start a simple meeting Selecting and customizing window layout Viewing and customizing window labels... -
Page 52: Selecting And Customizing Window Layout
Your display shows all connected presenters. About preset window layouts CORIOview™ also has a range of built-in preset window layouts. Use preset window layouts for more control over your display, and for applications like security monitoring. By default, presets show windows in alphabetical order by input ID, starting with A. For example, preset 4 shows windows A, B, C, and D. -
Page 53: Using The Lobby
All other connected presenters appear as thumbnails, even if you were using a preset window layout before choosing an active presenter. Using the lobby In the lobby, presenters appear on your display when they connect to your CORIOview. To enter the lobby Using the front panel: 1. -
Page 54: Customizing Preset Window Layouts
Choosing an active presenter You can choose a presenter to be the active presenter. The active presenter appears in a larger window and can share audio. Active presenters can appear above thumbnails of other connected presenters, or can be full screen. PDF-MWP-DYN-V1.20 tvONE... - Page 55 Press the button again to switch between showing the chosen presenter full screen and with thumbnails. Using CORIOgrapher: From Dashboard, select a presenter to be the active presenter. Select the presenter again to switch between showing the chosen presenter full screen and with thumbnails. PDF-MWP-DYN-V1.20 tvONE...
-
Page 56: Viewing And Customizing Window Labels
Show labels. If a presenter is full screen, labels show for three seconds and then hide. Hide labels. To create customized labels 1. From Dashboard, select underneath a presenter. For example, to add a custom label for presenter A, select underneath presenter A. PDF-MWP-DYN-V1.20 tvONE... -
Page 57: Cutting Video To Black
You can play audio on your displays, and you can play audio on a digital audio device connected to the S/PDIF output of your CORIOview™. About audio Your CORIOview has an S/PDIF audio output that you can connect to a digital audio device with an RCA cable. PDF-MWP-DYN-V1.20 tvONE... -
Page 58: Audio Icons On Your Display
Audio icons on your display When you show labels on your display, you also see icons that tell you the audio status of your CORIOview. If an individual presenter is muted in CORIOgrapher, they do not appear muted on your display. If you can't hear the active presenter but their label shows , check if they are muted in CORIOgrapher. -
Page 59: Adjusting The Audio Input Level Of A Presenter
If any presenter is muted or cut to black and muted and you don't have access to CORIOgrapher, reboot your CORIOview. To reboot your CORIOview, disconnect and reconnect the power cable, or switch off and on at the wall outlet. Media and streams If you have a Streaming media and 4K playback input module, you can play media items and streams. -
Page 60: Playing Media And Streams
Streaming media and 4K playback presenters. The media player is not available when you work offline. Streaming media and 4K playback input modules in CORIOview™ units support embedded audio, for streams and media items with the following embedded audio formats: CORIOview automatically mutes audio from streams with low latency. - Page 61 Only the active presenter can share audio. Read more about playing audio with your CORIOview on page 52. PDF-MWP-DYN-V1.20 tvONE...
-
Page 62: Before You Start
Adding and editing media streams You can manually add media streams from your network or from the internet. You can configure and add streams from an Encoder-100. Read about configuring an Encoder-100 at help.tvone.com/products/C3-series/C3- 5XX/Content/Topics/ENCODER-100/ENCODER-100-configure-encoders.htm. PDF-MWP-DYN-V1.20 tvONE... - Page 63 4. Enter a descriptive name and the URL of the media stream, and then select Add IP Stream. 5. To edit the details of a media stream, select the stream and then select > Edit. 6. Edit the name or URL of the media stream. PDF-MWP-DYN-V1.20 tvONE...
-
Page 64: Adding Media Items, Streams, And Playlists To Your Play Queue
You add all types of media, streams, and playlists the same way, when the play queue is playing, paused, or stopped. 1. From Dashboard, select underneath one of the Streaming media and 4K playback presenters. 2. Select your media source. PDF-MWP-DYN-V1.20 tvONE... -
Page 65: Playing A Multicast Stream From An Encoder-100 On Multiple Corioview Units
66. Playing a multicast stream from an Encoder-100 on multiple CORIOview units By default, your Encoder-100 supplies a single stream to a single CORIOview. You can supply a multicast version of that stream to more than one CORIOview. -
Page 66: Changing The Duration Of Media Items
For best results If you send a multicast stream on a large network, tvONE™ recommends using equipment with IPv4 multicast addressing, and/or IGMP v2 support. For more information, contact your network administrator. Changing the duration of media items By default, still images play for 10 seconds, video clips play for the length of the clip, and streams play indefinitely, until the stream ends. -
Page 67: Playing Streams With Low Latency
Repeat these steps for every item in the play queue that you want to play with low latency. CORIOview automatically disables the audio of streams with low latency. If you want to listen to audio from your stream, clear latency. -
Page 68: Managing The Play Queue
Drag a playlist into the play queue. Dragging a playlist into the play queue replaces the existing play queue. Saving the play queue You can save your play queue so that it is available the next time you start your CORIOview. PDF-MWP-DYN-V1.20 tvONE... - Page 69 Build your play queue and select Save on Device. You can save your play queue as a playlist. Build your play queue and select > Save as playlist. PDF-MWP-DYN-V1.20 tvONE...
-
Page 70: Playing The Play Queue Automatically
Playing the play queue automatically You can choose to play the play queue automatically when you start your CORIOview. 1. Build your play queue and select Play on startup. 2. Select Save on Device. Saving media to internal storage You can save media items from your USB drive to the internal drive. -
Page 71: Creating And Managing Playlists
Creating and managing playlists If you have a Streaming media and 4K playback input module, you can save media items and video streams to playlists. Your CORIOview™ can store up to 20 playlists. In this article About playlists Creating a new playlist... -
Page 72: Creating A New Playlist
You can choose to save or delete your playlists when you restore your CORIOview to factory default settings. Creating a new playlist 1. Select Playlists > 2. Enter a name and choose a resolution for your playlist. Names can be up to 64 characters long, or fewer, depending on your character set. -
Page 73: Saving The Play Queue To A Playlist
You can change the duration of an item in the playlist. You can choose to play a stream with low latency. If you choose to play a stream with low latency, CORIOview disables the audio from your stream. 6. To save your playlist permanently, select Saving the play queue to a playlist 1. -
Page 74: Managing And Editing Playlists
You can edit playlists, clear all the items from a playlist, and open a playlist to edit the items. You can load a playlist to the play queue, and play a playlist. You can also manage the names and locations of your playlists in Settings > Playlists. Read more about configuring playlist settings on page 43. PDF-MWP-DYN-V1.20 tvONE... - Page 75 1. Select Playlists and select a playlist. 2. Select > Edit details. 3. Enter a new name or choose a new resolution. Clearing all the items from a playlist From the playlist editor, select > Clear all items. PDF-MWP-DYN-V1.20 tvONE...
- Page 76 When you load and play a playlist, any items in the play queue are replaced. You can: Drag a playlist into the play queue and select Select a playlist and select > Load and play. From the playlist editor, select PDF-MWP-DYN-V1.20 tvONE...
-
Page 77: Deleting A Playlist
You can change the slot that a playlist is associated with in Settings > Playlists. Read more about configuring playlist settings on page 42. Deleting all playlists You can delete all your playlists in Settings > Playlists. Read more about configuring playlist settings on page 42. PDF-MWP-DYN-V1.20 tvONE... -
Page 78: Duplicating Playlists
3. Enter a name and choose a resolution for your playlist. 5. Repeat steps 2 and 3. Enter a unique name for the playlist each time. 6. Open each new playlist and add items in the playlist editor. PDF-MWP-DYN-V1.20 tvONE... -
Page 79: Using The Internal Drive
You can replace all the items on your internal drive with the items on the USB drive. All items currently on the internal drive are deleted. All items on your USB drive are copied exactly to the internal drive, including folders and folder structure, up to path names of 480 characters, or fewer, depending on the language you use. PDF-MWP-DYN-V1.20 tvONE... -
Page 80: Removing All Items From The Internal Drive
Copy or cut and paste individual items and folders. Select a media item or folder, and then select > Copy or Cut. Right-click in an empty space and select Paste. Copy or cut and paste individual items and folders with Ctrl+C or Ctrl+X, and Ctrl+V. PDF-MWP-DYN-V1.20 tvONE... -
Page 81: Playing Items From The Internal Drive
You play items from the internal drive in the same way you play all media items and streams. Drag items into the play queue, or into a playlist. Read more about playing media and streams on page 55. Read more about playlists on page 66. PDF-MWP-DYN-V1.20 tvONE... -
Page 82: Choosing The Best Resolution For Your Playlist Or Play Queue
The best resolution for your play queue or playlist depends on the frame rate of your media items, and their size in pixels. The resolution you choose determines the input resolution going into your CORIOview. All media items in the play queue or playlist are automatically scaled to fit this resolution. If you find that the resolution you choose doesn't give you the results you want, you can change this resolution whenever you want. - Page 83 In this case, choose your resolution based on the size of the video clips. Scanning Avoid mixing media items with progressive scanning and media items with interlaced scanning in the same play queue. PDF-MWP-DYN-V1.20 tvONE...
-
Page 84: Creating And Editing Custom Resolutions
Creating and editing custom resolutions You can use CORIOdiscover to create and save up to 10 custom resolutions to use on your CORIOview™. Custom resolutions are for both inputs and outputs. You can get the specific values for creating a custom resolution from the manufacturer of your source or display. -
Page 85: About Custom Resolutions
The vertical front and back porches must be twice the even field. The vertical sync pulse must be twice the even value. Custom resolution options When you create a custom resolution, you need to enter values for the following options. The values come from PDF-MWP-DYN-V1.20 tvONE... - Page 86 If you enter a value for CEA ID and your custom resolution does not conform to the CEA format for that value, you might not see an image on your display. PDF-MWP-DYN-V1.20 tvONE...
- Page 87 Enter a value in kHz to set the horizontal frequency, and a value in Hz to set the vertical frequency. Options for custom resolutions based on the VESA CVT standard Option Notes Version Enter the version number of the VESA CVT standard you want to use. PDF-MWP-DYN-V1.20 tvONE...
-
Page 88: Creating And Editing Custom Resolutions
The default username is admin, and the default password is adminpw. 3. Select custom only. 4. Find an empty custom slot, or choose a custom resolution to edit, and then select Edit. 5. Enter a useful name for your custom resolution. PDF-MWP-DYN-V1.20 tvONE... -
Page 89: Creating A Custom Resolution From A Video Standard
Creating a custom resolution from a video standard Creating a custom resolution from the CEA-861-D or VESA DMT standard 1. From Resolutions, find an empty custom slot, or choose a custom resolution to edit, and then select Edit. 2. Select your standard from the list. PDF-MWP-DYN-V1.20 tvONE... - Page 90 1. From Resolutions, find an empty custom slot, or choose a custom resolution to edit, and then select Edit. 2. Select your standard from the list. 3. Enter a useful name for your custom resolution. 4. Enter values for any other available options as needed. Read about rules for names and other options on page 80. PDF-MWP-DYN-V1.20 tvONE...
-
Page 91: Copying And Editing A Standard Resolution
From Resolutions, find the custom resolution you want to delete, and select Reset. Adding and managing custom EDID files You can upload an EDID file saved to your PC to your CORIOview™. You can manage the EDID files saved to your CORIOview in CORIOgrapher™. -
Page 92: Adding A Saved Edid File
Removing EDID files Risk of unexpected effects If you delete an EDID file that is in use and then reboot your CORIOview, your CORIOview says it is using the deleted EDID file but is actually using the default EDID file. Take care to not delete EDID files that are in use. -
Page 93: Troubleshoot It
This section contains frequently asked questions and advice on troubleshooting problems with your CORIOview™. If you can't find the help you need, contact your distributor, and if they can't help, contact tvONE™ support. Contact details are at the back of this guide. -
Page 94: Checking And Updating The Corioview™ Firmware
Read about saving a backup file on page 35. Before you start To install the latest CORIOview firmware, you need CORIOdiscover V1.7 or above. V1.7 of CORIOdiscover is available from the CORIOview page at tvone.com/firmware-updates. Checking your firmware version and downloading new firmware CORIOdiscover warns you if you try to install firmware that is older or the same as your existing firmware. -
Page 95: Updating The Firmware
The first time you log in you might be asked to choose which mode you want to use. Once you've chosen a mode, you won't be asked again. If you've been using CORIOview for a while and want to keep things the same, choose classic mode. Classic mode is best for applications like control rooms. -
Page 96: I Can't See My Corioview™ In The Discovered Devices List
I can't see my CORIOview™ in the Discovered Devices list What's the problem? When I tried to find my CORIOview in the Discovered Devices list on the Home window of CORIOgrapher™, I couldn't see it. I tried refreshing the list and it still wasn't there. - Page 97 IP address. Read about changing the IP address of your device on page 39. If the advice here doesn't work, first contact your distributor. If your distributor can't help, contact tvONE support tech.usa@tvone.com tech.europe@tvone.com or tech.asia@tvone.com.
-
Page 98: I Can't Log In Securely To Coriographer
I get an error message. Why does this happen? Your CPU module might not have a Real Time Clock (RTC) installed. CORIOview units purchased from 2019 include an RTC. If your CPU module includes an RTC, it might not have generated a secure certificate. - Page 99 Ask your distributor for part number CM-CV-CPU-HTTPS. With your new CPU, generate a secure certificate. If that doesn't work If the advice here doesn't work, first contact your distributor. If your distributor can't help, contact tvONE support tech.usa@tvone.com tech.europe@tvone.com or tech.asia@tvone.com.
-
Page 100: The Picture Keeps Coming And Going On My Corioview
The picture keeps coming and going on my CORIOview™ What's the problem? The display is continually dropping the signal and attempting to reconnect. The HDMI status property of the display switches between Found and Not_Found. Why does this happen? You probably have a display or output that doesn't support HDCP (High-bandwidth Digital Content Protection). -
Page 101: My Streaming Media And 4K Playback Input Module Keeps Overheating
3. Restart your CORIOview. Then try this 1. Place your hand near each fan outlet in turn and check that air is flowing out of your CORIOview. 2. Check the environment around your CORIOview. Is there anything covering the fan outlets? -
Page 102: The Video Signal From My Encoder-100 Is Delayed
If there's no embedded audio in the HDMI signal, but you selected HDMI as your audio source, the video can be delayed. What to do First try this 1. From Dashboard, select underneath one of the Streaming media and 4K playback presenters. 2. From Properties, select (Media Player) Manage. 3. Select Streams, select your Encoder-100, and select Manage. PDF-MWP-DYN-V1.20 tvONE... - Page 103 4. Select Capture. 5. Select None Analog from Audio. If that doesn't work If the advice here doesn't work, first contact your distributor. If your distributor can't help, contact tvONE support tech.usa@tvone.com tech.europe@tvone.com or tech.asia@tvone.com. PDF-MWP-DYN-V1.20 tvONE...
-
Page 104: I Can't Hear Any Audio
2. If the label for the active presenter shows , audio is muted. Press AUDIO. 3. If you still can't hear the active presenter, they might be muted in CORIOgrapher. From CORIOgrapher > Dashboard, find the active presenter and select underneath that presenter. PDF-MWP-DYN-V1.20 tvONE... -
Page 105: I Can't Update The Firmware Of My Streaming Media And 4K Playback Input Module
Read about updating your firmware on page 89. If the advice here doesn't work, first contact your distributor. If your distributor can't help, contact tvONE support at tech.usa@tvone.com, tech.europe@tvone.com, or tech.asia@tvone.com. I can't update the firmware of my Streaming media and 4K playback... - Page 106 The module status is UPDATEFAILED. Why does this happen? There was an error when you updated the firmware of your CORIOview™. The firmware download might be corrupted. There is a problem with a module. What to do First try this 1.
-
Page 107: General Troubleshooting Checklist
Customers in Europe, the Middle East, and Africa (EMEA), email tech.europe@tvone.com. Customers in Asia, email tech.asia@tvone.com. EMEA and Asia Customers in EMEA and Asia receive an RMA Request form from tvONE support. Complete the form and return it to tvONE support for your area. All customers tvONE support decides if your product needs to return for repair, and, if needed, provide a return authorization number. -
Page 108: What Are The Minimum Requirements For Running Coriographer
In a CORIOmaster micro, only slots 1 and 2 can contain Streaming media and 4K playback input modules. CORIOview™ In a CORIOview, slots 1 and 2 can contain Streaming media and 4K playback input modules. How large is the internal storage on a Streaming media and 4K playback input module? There are two models of Streaming media and 4K playback input module. -
Page 109: How Do I Find The Mac Address Of My Streaming Media And 4K Playback Input Module
CORIOview™, the media items and streams remain in the play queue. You can save all your settings, including your play queue, to a backup file on your CORIOview. If you want to load the same play queue at a later date, you can restore your settings from the backup file. Note: you will lose any work that you have done since creating the backup file. -
Page 110: More
More In this section What's new in CORIOgrapher™ V2.9 for CORIOview™ Regulatory compliance for CORIOview™ and all modules Contact us What's new in CORIOgrapher™ V2.9 for CORIOview™ CORIOgrapher V2.9 supports: Dual mode operation. Choose from classic mode and dynamic mode. -
Page 111: Contact Us
Information in this document is subject to change without notice. No part of this publication may be reproduced, stored in a retrieval system, or transmitted in any form or any means electronic or mechanical, including photocopying and recording for any purpose other than the purchaser's personal use without the written permission of tvONE. Copyright © 2019 tvONE™. All rights reserved.
Need help?
Do you have a question about the CORIOview and is the answer not in the manual?
Questions and answers