Table of Contents
Advertisement
Quick Links
Advertisement
Table of Contents
Troubleshooting

Related Manuals for Tvone C2-2855


Summary of Contents for Tvone C2-2855
- Page 1 C2-2855/2755/2655 User Manual V1.04...
-
Page 2: Table Of Contents
CONTENTS Contents DISCLAIMER .......................... 5 Regulatory Agency Acceptance ......................... 5 European ‘CE’ Mark Statement ......................... 5 FCC Statement ..............................5 Manual Copyright Notice ........................... 5 SAFETY INSTRUCTIONS ...................... 6 UNPACKING AND INSTALLATION ..................11 Shipping Carton ..........................11 Important Safety Instructions ......................11 Initial Operation Check Using Factory Default Settings .............. - Page 3 Audio ..............................28 Layer Order ............................29 Keying .............................. 29 Freeze .............................. 30 Preset ............................... 30 Logo..............................30 8.10 Transition ............................30 POPULAR TASKS........................ 31 Setting up Sources and Outputs ...................... 31 9.1.1 Source Set up ........................... 31 9.1.2 Output Set Up ........................... 31 Switching Sources ..........................
- Page 4 10.8 Genlocking your unit......................... 47 10.9 Layer Order ............................47 10.10 Keying .............................. 48 10.11 Presets ............................. 48 10.12 Transitions ............................48 TROUBLESHOOTING AND TECHNICAL SUPPORT ............49 FREQUENTLY ASKED QUESTIONS ................... 50 12.1 There is no picture on the Output..................... 50 12.2 There is excessive flicker on the Output.
-
Page 5: Disclaimer
Manual Copyright Notice This Operation Manual is the intellectual property of tvONE, ©2014. No portion of this manual may be copied or reproduced in any manner or by any means, including, but not limited to electronic and electro- mechanical, without the express written permission of tvONE. -
Page 6: Safety Instructions
2 Safety Instructions To insure the best from this product, please read this manual carefully. Keep it in a safe place for future reference. To reduce the risk of electric shock, do not remove the cover from the unit. No user serviceable parts inside. Refer servicing to qualified personnel. 2.1 Power and connections This unit is not disconnected from the AC power source as long as it is connected to the wall outlet. - Page 7 IMPORTANT: CONSIGNES DE SECURITE Afin de tirer le meilleur de ce produit, merci de lire attentivement ce manuel. Gardez-le dans un endroit sûr pour pouvoir le consulter à nouveau. Afin de réduire le risque de choc électrique, ne retirez pas l’unité de sa protection. Aucune pièce réparable par l’utilisateur à...
-
Page 8: Instrucciones Importantes De Seguridad
INSTRUCCIONES IMPORTANTES DE SEGURIDAD Para sacar el mejor provecho de este producto, léase este manual con detenimiento. Guárdelo en un lugar seguro para poder hacerle referencia en el futuro. Para reducir el riesgo de calambre, no quite la cubierta del aparato. No hay piezas utilizables dentro. - Page 9 WICHTIGE SICHERHEITSVORSCHRIFTEN Lesen Sie diese Bedienungsanleitung bitte sorgfältig, um Ihr Produkt optimal nützen zu können, und bewahren Sie sie zum späteren Nachschlagen an einem sicheren Ort auf. Entfernen Sie bitte keinesfalls die Abdeckung, um der Gefahr eines Stromschlags vorzubeugen. Im Inneren des Geräts befinden sich keine Teile, die vom Benutzer gewartet werden können. Lassen Sie Wartungsarbeiten nur von Fachpersonal durchführen.
- Page 10 BELANGRIJKE VEILIGHEIDSINSTRUCTIES Lees deze handleiding zorgvuldig door om het beste uit uw product te halen. Bewaar het op een veilige plek voor raadpleging in de toekomst. Haal nooit het omhulsel van de eenheid af, dit om de kans op een elektrische schok te verminderen. Maak het apparaat nooit open: er bevinden zich geen door de gebruiker in te stellen onderdelen in het apparaat.
-
Page 11: Unpacking And Installation
UNPACKING AND INSTALLATION 3.1 Shipping Carton Your unit will arrive boxed with internal foam inserts for maximum protection during shipping. You are encouraged to retain the box and all packing material so the unit can be returned in the unlikely event that repairs should ever become necessary. 3.2 Important Safety Instructions The AC power cable furnished with the unit should conform to the type in use in your country. -
Page 12: Quick Start
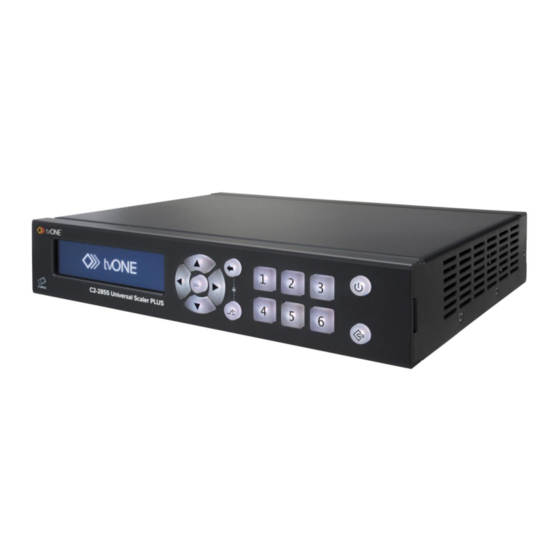
The C2-2855 is a Six Input Universal Scaler/Switcher with an advanced user interface together with support for a Still Images and a Logo Layer. The C2-2855 has six video inputs, five video outputs, together with audio in and out via Phoenix connectors and a 3.5mm Line Input. -
Page 13: Box Contents
Video Scaler PLUS C2-2655 Scan Converter PLUS 4.2 Box Contents 1 x tvONE C2-2x55 unit 1 x 12V DC Power Supply Unit and IEC Cable 1 x USB Pen Drive (Contains the user manual and software) 4 x Rubber Feet... -
Page 14: Menu Overview
Note; The unit shown is the C2-2855 – depending on the model you have purchased, some I/O connections may be missing. 4.4 Menu Overview The C2-2x55 has three sets of menus:- Live Provides end user functionality Presets, Source Switching Shortcuts... -
Page 15: Inputs/Outputs
Supports RGB, YUV & YPbPr 4.8.1 Universal DVI Universal DVI (DVI-U) is a tvONE led standard that uses a series of DVI adaptors to connect to a wide range of digital and analog signals even those with embedded audio. 15 |... - Page 16 This gives great flexibility for end users and gives you instant access to additional inputs and outputs: Digital: HDMI, DVI-D, DVI-A Analogue: RGBHV, RGBs, YUV, YPbPr, CV and Y/C HDMI Composite Video PC/HD (RGBHV, RGBs, YUV) S-Video YPbPr...
-
Page 17: Panel Interface
Panel Interface 5.1 Panel Overview The front panel uses a powerful combination of coordinated menus and colored backlit buttons to immediately indicate the unit state. All modes can be accessed using the context sensitive, front panel buttons. The buttons can be used for multiple functions and light up in different colors to indicate the current unit state. -
Page 18: Oled Panel Overview
5.3 OLED Panel Overview The OLED displayed menu displays a host of useful information on its four line display. The OLED display shows where you are within the menu structure and the current set up of the unit. The current menu position is shown as a dynamic menu tree with the selected menu shown on the left. -
Page 19: Menu Overview
6 Menu Overview The system has been designed with a Setup, Live and Shortcut menus. The Setup menu is typically used by the unit Installer to configure the system settings, while the Shortcuts and Live menus provide operator functionality:- Menu Functions Setup System Settings, Inputs, Outputs, Layers, Presets... -
Page 20: Swapping Layers
6.2 Swapping Layers For simple layer priority control between two active layers there is a Swap command – this allows P/B (Primary over Background) or B/F (Background over Primary). Swap is most commonly used when you want to key over a Still Image (SIS) as a SIS can only applied to the Primary layer. -
Page 21: Scaling Overview
6.4 Scaling Overview The CORIO™2.5 Scaler is a flexible tool and offers many different settings: Cropping cuts into the edge of the scaled layer. Crop Place Controls the Position and Size of the Scaled Image. Allows the output image to be flipped Vertically, Horizontally or both – most Image Flip commonly when a video projector is ceiling mounted, or for special effects. -
Page 22: Importing Items
6.7 Importing Items Still Images can be imported using the supplied CORIOcontrol Software where it can be resized as required. Using the C2-2x55 menu, the Stills can be used as the Primary video source and manipulated accordingly. -
Page 23: Button Navigation
7 Button Navigation 7.1.1 Powering Up The on/off button is used to take the unit in and out of standby mode. To prevent accidental power off events, the button requires a press-and-hold to turn the unit on or off The On/Off button has four operation states: On/Off Other Buttons Unit State... -
Page 24: Other Useful Selections
The Preset button is a hot key that is used in conjunction with the “1-6” buttons for recall of Presets. Presets – Pressing the Preset front panel put the C2- 2x55 into Preset Mode. Then press the relevant buttons marked “1-6” to switch between the Presets. Sources –... - Page 25 Press & Hold the ‘ok’ button Saving Save unti the message “Settings Settings Saved” appears Panel Panel Press Alt and then Back Lock Lock/Unlock until you hear a beep and the display will read, ‘Panel Locked’. Press ‘ok’, Back & Standby Reset Factory Reset...
-
Page 26: Shortcut & Live Menus
8 Shortcut & Live Menus 8.1 Overview Once the C2-2x55 has been configured most daily operations will be completed using Shortcuts menu and the Live menu. It is also possible to access the various related elements of the Setup menu from the Live menu through numerous “Settings” sub menus if required. -
Page 27: Shortcuts & Live Menu Map
8.2 Shortcuts & Live Menu Map Key aspects of the Live menu can be also be accessed through a Shortcuts menu – the Shortcut items are shown in red overlaid on the on the Live menu map:- 8.2.1 Shortcuts The Shortcut menus offer a simple and quick method to access the most used settings for normal use of the C2-2x55. -
Page 28: Live Menu
8.2.2 Live Menu The Live menu is focussed on the key tasks that will be used during normal operations following the initial system configuration and can be accessed by holding down the back button and navigating to the Live menu:- Primary Source, View (Full Screen, PIP or Hidden) Background... -
Page 29: Layer Order
Audio Output Selection Audio can embedded to the output from the following inputs: HDMI, DVI-U (DVI & HDMI), SDI, 3.5mm audio and Phoenix Audio (A1, A2 & A3). Audio Follow The audio output can be set to follow either the Primary or Background layer. -
Page 30: Freeze
For Broadcast applications it is possible to key through any background – eg Blue Screen, Green Screen, etc with full control over RGB values. For Digital Signage applications it is possible to key over a lower third by applying a Luma Key through black or white. -
Page 31: Popular Tasks
9 Popular Tasks 9.1 Setting up Sources and Outputs 9.1.1 Source Set up To set up a new Source enter the System menu and select Sources. In the Sources menu you can select between Inputs, SIS (Still Images) or Logos – select Inputs. Next select the Input you require –... -
Page 32: Creating A Picture In Picture Effect
Press ‘ok’ to enter the Transition menus and scroll to the desired transition type. Select it by hitting the ‘ok’ button or the corresponding number button. Once you selected the transition, pressing the right arrow key will take you to the Duration menu. -
Page 33: Adding A Still Image As A Background
A Back Color is always present behind the video layers and by default is set to Black but can be adjusted to any RGB Value. To change the Back Color navigate to Setup/Layers/Back Color. The default RGB value is 16/16/16 which represents black. 9.6 Adding a Still Image as a Background Using the CORIOcontrol Software a Still Image (SIS) can be optimized and uploaded to the C2-2x55. -
Page 34: Adding A Logo To A Presentation
2. Select your Video Source – Go to Live/Background and select a source before navigating to Live/Background/View selecting Full Screen. 3. Swap the Layer Order – Go to Live/Layer Order and set to B/P – you will now see your SIS move behind your video source. 4. -
Page 35: Using Audio From Alternative Sources
9.9 Using audio from alternative sources It is possible to choose audio from various sources. To select the audio being used go to the Live/Primary menu and scroll down to Audio – several options are available:- Follow Primary Audio from the Primary layer is heard. Follow Background Audio from the Background layer is heard. -
Page 36: Setup Menu
Yellow Power & Control Note; The unit shown is the C2-2855 – depending on the model you have purchased, some I/O connections may be missing. A wide range of Inputs and Outputs are avaialble for AV, Video and Audio connectivity:-... -
Page 37: Hdmi
PC/HD Connection using HD15 connectors Phoenix 3 Stereo inputs & 1 stereo output (Ground on centre) Audio 3.5mm Audio Stereo line in 10.2.1 HDMI The C2-2x55 has full support for the High-Definition Multimedia Interface (HDMI) to V1.4 on both dedicated Inputs/Outputs and also using the Universal DVI Inputs/Outs and an option dongle connector. -
Page 38: Universal Dvi
It is only possible to delete a user configurable EDID by re-flashing the unit with the same, or newer firmware. 10.2.2 Universal DVI Universal DVI (DVI-U) is available for Input and Output directly for DVI-I and DVI-A and using adapters for HDMI, PC/HD, CV & YC. This system can add great flexibility for installers or for use at events and DVI-U adapters can add Input/Output flexibility in system designs. -
Page 39: Audio Connections
10.2.6 Audio Connections The C2-2x55 has four Stereo Line Inputs (1 x 3.5mm and 3 x Phoenix) and a Stereo Phoenix Output. 10.2.7 Phoenix Audio It is possible to select Input audio on 3 stereo pairs and Output a stereo pair via Phoenix audio connectors. All inputs/outputs are auto gain to line level and each connector has a Ground connector in the center of each stereo pair. -
Page 40: Setup Menu
10.3 Setup Menu To enter the Setup menu, navigate to the Setup menu. 10.3.1 Setup Menu Map These navigation buttons are used to move to a chosen menu and select it. Valid navigation selections are highlighted using backlighting. Holding the ‘ok’ button down will save all System Settings which will be used the next time that the unit is power cycled 10.3.2 System Control... -
Page 41: Sources
10.3.3 Sources Inputs Selects and configures the system inputs including DVI-U, HDMI, SDI, PC/HD, YC and Using the CORIOcontrol Software it is possible to upload images from all common formats (JPEG, GIFF, PNG, etc) in a .PCX format as a Still image. The system can store 5 Stills of 263K each. -
Page 42: Rgb Settings
10.3.6 RGB Settings Calibrate This automatically finds the active area for RGB sources. Input Pixel Phase Ensures the analog sampling is taken from the middle of each pixel to avoid poor or smudged results. RGB Level Allows the contrast of the RGB levels to be adjusted. 10.3.7 YUV Settings Calibrate This automatically finds the active area for YUV sources. -
Page 43: Diagonal Interpolate
‘High’ providing the most compensation. Frame/Bob The two fields are shown consecutively. 10.3.12 Diagonal Interpolate Diagonal Interpolation increases the resolution of an image generates additional pixels in the image using interpolation when de-interlacing occurs by reducing ‘jagged’ artefacts on moving images. However is not suitable for noisy sources where the noise could be misinterpreted as a diagonal or sloping element of the picture. -
Page 44: Hdcp
There are several options available:- Monitor DVI-U Takes EDID information from the monitor connected to the DVI-U output. Monitor HDMI Takes EDID information from the monitor connected to the HDMI output. Default DVI-U The Default DVI-U EDID indicates to the source that the C2-2x55’s native resolution is 1920x1200 60Hz and not a HDMI sink. -
Page 45: Outputs
10.4 Outputs The Output menu is used to configure the DVI-U, HDMI, YC and CV outputs. DVI-U/YC/CV Connectors Signal Type, Digital Settings, YC/CV Settings HDMI Signal Type, HDCP, EDID Capture To Video Resolution, Layers On, H/V Shift Follow Primary, Follow Background, Mute Audio 10.4.1 Connectors The following sections will define the configuration of outputs connected to the C2-2x55. -
Page 46: Audio
10.4.3 Audio In the audio menu it is possible to embed a variety of audio sources on the output – HDMI, DVI-U (DVI or HDMI), SDI, 3.5mm connector or Phoenix connectors (A1, A2 or A3). Alternatively it is possible to follow the audio from the source currently displayed as the Primary or Background or to completely mute the output. -
Page 47: Genlocking Your Unit
3. With Primary and Background active when PIP, Key or Aspect Ratio is applied to Primary and Aspect Ratio Conversion on the Background. 4. When Background only is shown with Keying or Aspect Ratio Conversion. 10.8 Genlocking your unit We can set the Background to four different settings to accurately control the behaviour of the unit for Genlocking. -
Page 48: Keying
Background/Primary 10.10 Keying Keying can be used to key out a presenter on a colored (blue, green, etc) or to key text onto image as a Lower Third or for a Digital Signage application. By default the C2-2x55 is set to Luma Key through black although it is possible to set up a custom key value using YUV values and softness. -
Page 49: Troubleshooting And Technical Support
If problems are experienced, please read through the symptom topics below in order to resolve the problem. After doing so, if you still need to, contact Technical Support at http://www.tvone.com/support. Please have the following details of the problem handy: Overview... -
Page 50: Frequently Asked Questions
12 Frequently Asked Questions 12.1 There is no picture on the Output. If no LEDs are on, then ensure that the AC power adaptor is connected properly and the power switch is on at the AC outlet. If the Standby/ON LED on the unit is off but another blue LED is active then check that the monitor output from the computer is connected at both the computer and the unit. -
Page 51: The Rgb Input Is Selected But The Image Is Rolling Or Pink
12.9 The RGB input is selected but the image is rolling or pink. Check the Adjust sources menu and confirm that the input type and sync method is set correctly. (Having YUV input selected, instead of RGBHV often causes this problem). 12.10 The video signal from my DVD player does not appear to work. -
Page 52: Return Procedure
To be found on the underside of the unit Full details of the fault If you can provide a simple system drawing together with sources and output resolutions and frame rates that will help tvONE to replicate your fault. Invoice Number If avaialble... -
Page 53: Warranty Policy
sold.
Need help?
Do you have a question about the C2-2855 and is the answer not in the manual?
Questions and answers