Table of Contents
Advertisement
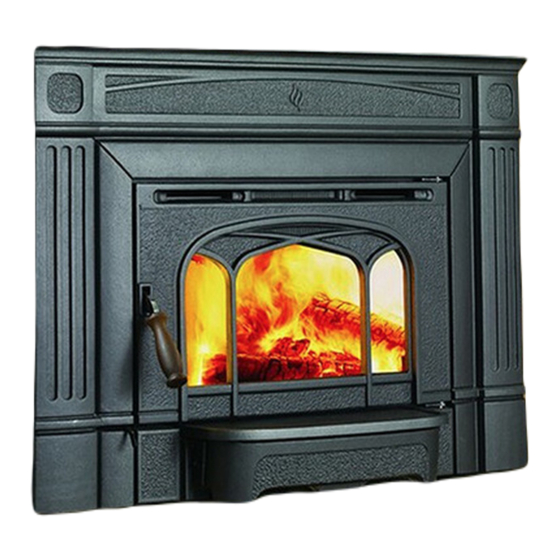
HI1150
Wood Cast
Insert
Owner's & Installation Manual
www.hampton-fire.com
French Manual: http://ow.ly/ZvrQj
Manuel en Français: http://ow.ly/ZvrQj
Tested by:
Installer: Please complete the details on the back cover
and leave this manual with the homeowner.
Homeowner: Please keep these instructions for future reference.
0219WN027S
FPI FIREPLACE PRODUCTS INTERNATIONAL LTD. 6988 Venture St., Delta, BC Canada, V4G 1H4
920-185b
06.17.20
Advertisement
Table of Contents

Related Manuals for HAMPTON BAY HI1150


Summary of Contents for HAMPTON BAY HI1150
- Page 1 HI1150 Wood Cast Insert Owner's & Installation Manual www.hampton-fire.com French Manual: http://ow.ly/ZvrQj Manuel en Français: http://ow.ly/ZvrQj Tested by: Installer: Please complete the details on the back cover and leave this manual with the homeowner. Homeowner: Please keep these instructions for future reference.
- Page 2 Model Hampton HI1150 – 1.7g /hr. “This manual describes the installation and operation of the Hampton HI1150 wood heater. This heater meets the 2020 U.S. Environmental Pro- tection Agency’s cord wood emission limits for wood heaters. Under specific test conditions this heater has been shown to deliver heat at rates ranging from 12,800 BTU/hr to 39,100 BTU/hr.
-
Page 3: Table Of Contents
Safety Maintenance Copy of the Safety Decal (HI1150) ........4 Maintenance ...............20 Creosote ................20 Ways to Prevent and Keep Unit Free of Creosote ....20 Dimensions Wood Storage ..............20 Fan Maintenance ..............20 Unit Dimensions With Standard Flue Adaptor ...... 5 Door Gasket ...............21... -
Page 4: Copy Of The Safety Decal (Hi1150)
CERTIFIÉ CONFORME AUX NORMES 2020 DU U.S. ENVIRONMENTAL PROTECTION AGENCY EN MATIÈRE D'ÉMISSION DE PARTICULES DE BOIS EN UTILISANT LE BOIS DE CORDE. HOMOLOGUÉ AVEC LA ASTM E3053. MODÈLE REGENCY HI1150 –1.7 G /H. CET APPAREIL DE CHAUFFAGE AU BOIS DOIT ÊTRE INSPECTÉ PÉRIODIQUEMENT ET RÉPARÉ POUR FONCTIONNER CORRECTEMENT. CONSULTER LE MANUEL D’INSTALLATION POUR PLUS D’INFORMATION. -
Page 5: Dimensions
OFFSET FLUE ADAPTOR (172-942) STANDARD FLUE ADAPTOR (172-942) OFFSET FLUE ADAPTOR (172-946) NOTE: Before assembling your Insert, use these dimensions to en- sure appropriate clearances will be met (refer to Masonry and Factory Built Fireplace Clearances section). HI1150 Hampton Wood Cast Insert... -
Page 6: Unit Dimensions With Offset Flue Adaptor
6" (152mm) Diameter 942) STANDARD FLUE ADAPTOR (172-946) OFFSET FLUE ADAPTOR (172-946) NOTE: Before assembling your Insert, use these dimensions to en- sure appropriate clearances will be met (refer to Masonry and Factory Built Fireplace Clearances section). HI1150 Hampton Wood Cast Insert... -
Page 7: Installation
211, the National Building Code of Canada, or the 10) Installer must mechanically attach the supplied applicable local code requirements. label to the inside of the firebox of the fireplace into which the insert is installed. HI1150 Hampton Wood Cast Insert... -
Page 8: Masonry And Factory-Built Fireplace Clearances
Your hearth extension must be made from a non-combustible material. Extending Clearances are critical. 16" for US and 18" for Canada—measured from the fuel loading door. ***Mantel can be installed anywhere in shaded area or higher using the above scale. HI1150 Hampton Wood Cast Insert... -
Page 9: Installing Your Insert
Before inserting the unit the adaptor should 7. Ensure that the unit is still level. 10. Re-install the door removed in step 1. hang, when level, slightly above the required height. Pull Rod Diagram 4 Flex Liner Diagram 1 HI1150 Hampton Wood Cast Insert... -
Page 10: Installation Into A Masonry Fireplace
846-508 6" Flue Adaptor-45 degree insert installation. If it does not, remove and 948-412/P 6" Flue Offset Adaptor (offsets back 4") store. 846-527 Flue Connector Kit 10 | HI1150 Hampton Wood Cast Insert... -
Page 11: Fan & Cast Faceplate Installation
Note: If screws do not lineup, loosen the 2 screws per side as shown in Diagram 2 and adjust left side and right side facia. Tighten the 2 screws per side and install the fan on the unit. HI1150 Hampton Wood Cast Insert 02/19/09 918-745b... - Page 12 Do not turn the fan ON until your insert has reached operating temperature or at least 30 minutes after starting fi re. Ashlip Diagram 6 Installer: Please record unit serial number here before installing blower. Serial No.______________________________ 12 | HI1150 Hampton Wood Cast Insert 918-745b 02/19/09...
-
Page 13: Brick Installation
4.250 x 8.000 x 30 DEG BRICK 802-147 3.500 x 4.500 BRICK 802-152 2.000 x 9.000 BRICK 902-111 9.000 x 4.500 STANDARD BRICK RD-14289 4.500 x 7.000 BRICK RD-14288 4.250 x 7.000 BRICK ITEM PART NUMBER QTY. DESCRIPTION HI1150 Hampton Wood Cast Insert... -
Page 14: Baffle Installation
Baffle Installation Note: unit in images may not be identical to the HI1150—they depict the process. 5. Install left and right baffle brackets (installation of left baffle bracket shown below). 1. Open the door. 2. Remove the front secondary air tube with pliers as shown below. -
Page 15: Stainless Steel Smoke Deflector Installation
WARNING: Operation of the unit without proper installation of smoke deflector will void warranty. Ensure deflector is seated so bolts are seated at the bottom of the slot before tightening. Smoke deflector installed with 2 bolts. Note: This is a cutaway view from the back of the unit HI1150 Hampton Wood Cast Insert... -
Page 16: Seasoned Wood
Two dry pieces banged together sound hollow; wet pieces sound solid and dull. • Dry wood weighs much less than wet wood. • Split a piece of wood. If the exposed surface feels damp, the wood is too wet to burn. 16 | HI1150 Hampton Wood Cast Insert... -
Page 17: Operating Instructions
How to Light & Maintain a draft. Wood Stove Fire 8. Some cracking and popping noises may be experienced during the heating up process. These noises will be minimal when your unit reaches temperature. HI1150 Hampton Wood Cast Insert... -
Page 18: Fan Operation
"high" or "Low". This will bypass the sensing device and allow full control of the fan. Switching from "Auto" to "Manual" or "High" to "Low" may be done at any time. Fan Wiring Diagram 18 | HI1150 Hampton Wood Cast Insert... -
Page 19: Ash Disposal
Burning coal, cardboard, or loose paper damage to your stove including warping and can produce soot, or large flakes of char or fly ash, premature steel corrosion. Over firing will void causing smoke spillage into the room. your warranty. HI1150 Hampton Wood Cast Insert... -
Page 20: Maintenance
(3 mm / 1/8" or more) it should be removed to reduce the Ashlip risk of a chimney fire. 20 | HI1150 Hampton Wood Cast Insert... -
Page 21: Door Gasket
After re-installing the door, carefully swing open and check the clearance to the Right Hand Cast Side. If tight or Wooden Door Handle rubbing, loosen the 7/16 nuts and adjust the clearance and then re-tighten. HI1150 Hampton Wood Cast Insert... -
Page 22: Latch Adjustment
5) Re-secure the Latch Assembly to the unit using 2 bolts. Confirm proper location of the door catch so that it closes tight, freely. Latch Assembly Latch Assembly removed from unit. Cleaning & Maintaining Your Wood Stove 22 | HI1150 Hampton Wood Cast Insert... -
Page 23: Secondary Air Tube Removal/Installation
Remove. 4. Remove top left and right metal retainers, followed by the fragile three piece C-Cast Baffles, then remove the remaining 2 tubes. HI1150 Hampton Wood Cast Insert... -
Page 24: Vertical Stainless Deflector Replacement
2. Loosen the two 7/16'' bolts + nuts to remove / replace vertical baffle. 3. Repeat steps to install new vertical deflector. NOTE: ENSURE BAFFLE IS PUSHED UP AS FAR AS POSSIBLE. TIGHT TO TOP OF FIREBOX. 24 | HI1150 Hampton Wood Cast Insert... -
Page 25: Annual Maintenance
We highly recommend that the chimney cleaning be done by a professional as they will have the necessary tools such as a proper sized brush and special vacuum cleaner designed to deal with fine particles. Cleaning & Maintaining Your Wood Stove HI1150 Hampton Wood Cast Insert... -
Page 26: Main Assembly
Glass Retainer Clips / Screws (set of 4) 210-111 Ashlip Metallic Black 940-356/P Glass - Replacement 210-115 Ashlip Timberline Brown 936-238 Adhesive Tape Gasket 948-467 Hinge Pin Lower 210-561 Door Assembly Metallic Black (no glass) 26 | HI1150 Hampton Wood Cast Insert... -
Page 27: Cast Faceplate
4.250 x 8.000 x 30 DEG BRICK 802-147 3.500 x 4.500 BRICK 802-152 2.000 x 9.000 BRICK 902-111 9.000 x 4.500 STANDARD BRICK RD-14289 4.500 x 7.000 BRICK RD-14288 4.250 x 7.000 BRICK ITEM PART NUMBER QTY. DESCRIPTION HI1150 Hampton Wood Cast Insert... -
Page 28: Warranty
At all times FPI reserves the right to inspect reported complaints on location in the field claimed to be defective prior to processing or authorizing of any claim. Failure to allow this upon request will void the warranty. 28 | HI1150 Hampton Wood Cast Insert Revision Date: July 2019 Regency Wood Products Warranty... - Page 29 Freight damages for products or parts are not covered under the terms of the warranty. Products made or provided by other manufacturers and used in conjunction with the FPI appliance without prior authorization from FPI may void this warranty. HI1150 Hampton Wood Cast Insert Revision Date: July 2019 Regency Wood Products Warranty...
- Page 30 To provide the best support for your product, we request that you complete a product registration form at http://www.regency-fire.com/Customer-Care/Warranty-Registration.aspx within ninety (90) days of purchase. 30 | HI1150 Hampton Wood Cast Insert Revision Date: July 2019 Regency Wood Products Warranty...
- Page 31 For fireplace care and tips and answers to most common questions please visit our Customer Care section on our Web Site. Please feel free to contact your selling dealer if you have any questions about your Regency product. HI1150 Hampton Wood Cast Insert...
- Page 32 Installer: Please complete the following information Dealer Name & Address: ______________________________________________ ___________________________________________________________________ Installer: ___________________________________________________________ Phone #: ___________________________________________________________ Date Installed: ______________________________________________________ Serial No.: __________________________________________________________ Printed in Canada © Copyright 2018, FPI Fireplace Products International Ltd. All rights reserved.
Need help?
Do you have a question about the HI1150 and is the answer not in the manual?
Questions and answers
The draft lever is impossible to move when stove is hot. Regency insert h1150