Table of Contents
Advertisement
Quick Links
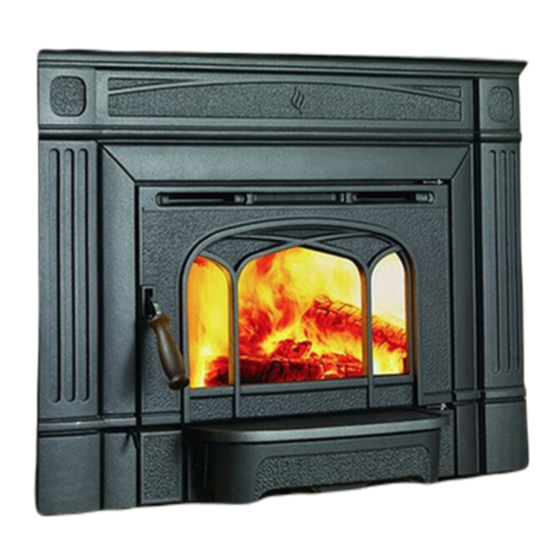
HI1150
Wood Cast
Insert
Owner's & Installation Manual
www.hampton-fire.com
French Manual: https://bit.ly/2OCYeIi
Manuel en Français : https://bit.ly/2OCYeIi
Tested by:
Installer: Please complete the details on the back cover
and leave this manual with the homeowner.
Homeowner: Please keep these instructions for future reference.
0219WN027S
FPI FIREPLACE PRODUCTS INTERNATIONAL LTD. 6988 Venture St., Delta, BC Canada, V4G 1H4
920-185d
09.28.22
Advertisement
Table of Contents

Related Manuals for HAMPTON BAY HI1155


Summary of Contents for HAMPTON BAY HI1155
- Page 1 HI1150 Wood Cast Insert Owner's & Installation Manual www.hampton-fire.com French Manual: https://bit.ly/2OCYeIi Manuel en Français : https://bit.ly/2OCYeIi Tested by: Installer: Please complete the details on the back cover and leave this manual with the homeowner. Homeowner: Please keep these instructions for future reference. 0219WN027S FPI FIREPLACE PRODUCTS INTERNATIONAL LTD.
- Page 2 Thank you for purchasing a Hampton FIREPLACE PRODUCT. The pride of workmanship that goes into each of our products will give you years of trouble-free enjoyment. Should you have any questions about your product that are not covered in this manual, please contact the HAMPTON DEALER in your area. “This wood heater has a manufacturer set minimum low burn rate that must not be altered.
-
Page 3: Table Of Contents
table of contents Safety Maintenance Copy of the Safety Decal (HI1150) ........4 Maintenance ..............20 Creosote ............... 20 Ways to Prevent and Keep Unit Free of Creosote ..... 20 Dimensions Wood Storage ............... 20 Fan Maintenance ............20 Unit Dimensions with Standard Flue Adaptor ..... 5 Door Gasket .............. -
Page 4: Copy Of The Safety Decal (Hi1150)
safety decal Copy of the HI1150 Safety Decal (Duplicate Serial #) LISTED FACTORY BUILT FIREPLACE INSERT DO NOT REMOVE THIS LABEL / NE PAS ENLEVER CETTE ÉTIQUETTE This is a copy of the label that accompanies each CERTIFIED FOR USE IN CANADA AND U.S.A. MODEL: HI1150 HII1150 Wood Insert. -
Page 5: Dimensions
dimensions Unit Dimensions with Standard Flue Adaptor 25” 21-1/4” 2-7/8” 39-13/16” 38-5/16” 24 1/4” Door Width 6" (152mm) Diameter 6" (152mm) Diameter 6" (152mm) Diameter OFFSET FLUE ADAPTOR (172-942) STANDARD FLUE ADAPTOR (172-942) OFFSET FLUE ADAPTOR (172-946) NOTE: Before assembling your In- sert, use these dimensions to ensure appropriate clear- ances will be met (refer to... -
Page 6: Unit Dimensions With Offset Flue Adaptor
dimensions Unit Dimensions with Offset Flue Adaptor 25” 21-1/4” 2-7/8” 39-13/16” 38-5/16” 6" (152mm) Diameter 6" (152mm) Diameter 942) STANDARD FLUE ADAPTOR (172-946) OFFSET FLUE ADAPTOR (172-946) NOTE: Before assembling your In- sert, use these dimensions to ensure appropriate clear- ances will be met (refer to Masonry and Factory Built Fireplace Clearances sec-... -
Page 7: Installation
installation Masonry And Factory-built Fireplace Clearances The minimum required clearances to combustible materials when installed into a masonry or factory built fireplace are listed below. Unit Adjacent Mantel*** Side Minimum Minimum From Top of Side Wall (to top) Facing Facing Hearth Hearth Side Door... -
Page 8: Installing Into A Masonry Fireplace
installation Installation into a Masonry Chimney Specifications Draft is the force which moves air from the ap- pliance up through the chimney. The amount of Fireplace draft in your chimney depends on the length of Before installing, check and clean your chimney the chimney, local geography, nearby obstructions system thoroughly. -
Page 9: Installation Into A Factory-Built Fireplace
installation Installation Into a Factory 1. When installed in a factory built fireplace, a WARNING full stainless steel rigid or flexible flue liner is Built Fireplace mandatory, for both safety and performance Fire Risk. purposes. When a flue or liner is in use, the When lining air-cooled factory-built Regency inserts are constructed with the highest insert is able to breathe better by allowing a... -
Page 10: Installing Your Insert
installation Installing Your Insert SAFETY NOTE: The insert is very heavy and will require two or three people to move it into position. The insert can be made a little lighter by removing the cast iron door by opening it and lifting it off its hinges. -
Page 11: Fan & Cast Faceplate Installation
HI200 installation Fan & Cast Faceplate Installation FAN & CAST FACEPLATE INSTALLATION Stop! Read Carefully. Enamel & Cast components are very fragile. Use extreme care when handling. Note: The liner and fl ue adaptor should be installed prior to 2) Slide the unit into position leaving partially out to allow for installation reading these instructions. - Page 12 HI200 installation 7) Install door and close with caution - adjustments may be 6) Place ashlip over fan by fi tting it onto the fl ange on the fi rebox. necessary. See Diagram 5 and 6. Diagram 7 8) Surround adjustments can be made up or down, loosen 4 bolts shown on face of unit (Diagram 7) and adjust.
-
Page 13: Brick Installation
installation Brick Installation Firebrick is included to extend the life of your stove and radiate heat more evenly. Check to see that all firebricks are in their correct positions and have not become misaligned during shipping. Install all firebricks (if bricks were removed at install) per the Diagram below and place in their correct positions. Do not use a grate. -
Page 14: Baffle Installation
installation Baffle Installation Note: unit in images may not be identical to the HI1150—they depict the process. 5. Install left and right baffle brackets (installation of left baffle bracket shown below). 1. Open the door. 2. Remove the front secondary air tube with pliers as shown below. Note: It will be easier to remove the air tubes by removing both the bottom right base brick and right side wall brick. -
Page 15: Stainless Steel Smoke Deflector Installation
installation Stainless Steel Smoke Deflector Installation The stainless smoke deflector is located in the upper front area of the firebox. The deflector is held in place with 2 bolts Prior to the first fire, ensure deflector is seated properly and secured with 2 hand tightened bolts which are accessible from behind the smoke deflector. Smoke Deflector Smoke deflector is installed through the door opening in location shown in Diagram To replace the deflector, loosen both bolts and slide deflector downward;... -
Page 16: Seasoned Wood
operating instructions Seasoned Wood Whether you burn wood in a fireplace, stove or insert, good quality firewood is the key to convenience, efficiency and safety. Wet wood and pieces that are not the right size and shape for your wood burner can be frustrating, burn inefficiently and deposit creosote that can fuel a dangerous chimney fire. -
Page 17: Operating Instructions
operating instructions Operating Instructions START UP AND OPERATING PROCEDURES: 7. When re-fueling, always open the primary air damper, load fuel, then wait for at least 10 1. For the first few days, the wood insert will minutes before adjusting the air to the desired With your unit now correctly installed and safety give off an odour from the paint. -
Page 18: Fan Operation
operating instructions Fan Operation The fan is to be operated only with the draft control rod pulled out at least 1/2" from the fully closed position. The fan is not to be operated when the draft control rod is in the closed position (pushed in). -
Page 19: Ash Disposal
operating instructions Ash Disposal 6. Do not permit creosote or soot build-up in the CAUTION: DO NOT BURN GARBAGE chimney system. Check and clean chimney at OR FLAMMABLE LIQUIDS SUCH AS regular intervals. Failure to do so can result in During constant use, ashes should be removed GASOLINE, NAPTHA OR ENGINE a serious chimney fire. -
Page 20: Maintenance
Enamel & Cast components are very fragile. Use Note: The liner and flue adaptor should be installed prior to 2) Slide t reading these instructions. of the maintenance 1) With door already removed - place fan in front of unit as shown below, 3) Install Loosen 2 fl... -
Page 21: Door Gasket
maintenance Door Gasket Glass Replacement If the door gasket requires replacement, 7/8" diameter material must be 1) Remove door from unit. used. A proper high temperature gasket adhesive is required. A gasket 2) To replace the glass remove the 4 screws highlighted in the diagram repair kit, Part # 846-570 is available from your local Hampton dealer. -
Page 22: Latch Adjustment
maintenance Latch Adjustment 3) Remove necessary amount of spacers sitting on the mounting bracket. Ensure an equal amount of spacers are removed from both top and bot- tom. The door latch or door alignment may require adjustment as the door gasket material compresses after a few fires. -
Page 23: Secondary Air Tube Removal/Installation
maintenance Secondary Air Tube Removal / Installation 1. Allow the stove to burn out and cool down, until cool to touch. 5. To reinstall or replace, first slide left side of tube into hole on left side air 2. Open stove door to access secondary air tubes. channel. -
Page 24: Vertical Stainless Deflector Replacement
maintenance Vertical Stainless Deflector Replacement I1200 CONTEMPORARY 7/16'' Bolts 7/16'' Nuts Slide right + down to remove. Reverse to replace. Vertical Deflector Remove 2 front air tubes 1. Remove 2 front secondary air tubes / vermiculite baffles (see manual for details). e 1 of 1 157-500.SLDASM 10/15/2019... -
Page 25: Annual Maintenance
maintenance Annual Maintenance Completely clean out entire unit Annually Inspect air tube and bricks Replace any damaged parts. Adjust door catch assembly If unable to obtain a tight seal on the door - replace door gasket seal. Readjust door catch after new gasket installed. Inspect condition and seal of: Glass Gasket Door Gasket... -
Page 26: Parts List
parts list Part Description Part Description 210-565 Door Assembly Timberline Brown (no glass) 075-037 SS Smoke Deflector 846-570 Med. Density Door Gasket Kit 075-041 Baffle Holder (Each) 948-179 Black Varnish Wooden Handle 033-953 Air Tubes (Each) 210-550 Door Handle Assembly 075-955 Baffle Set Complete Left Side Fan Fascia... -
Page 27: Cast Faceplate
parts list Cast Faceplate Part # Description 210-921 Metallic Black Faceplate 210-925 Timberline Brown Faceplate Top Surround Left Side Surround Right Side Faceplate * Not available as a replacement part. Brick Panels 075-960 HI1150 Brick Kit Complete Fire bricks Size 4-1/4"... -
Page 28: Warranty
warranty Limited Lifetime Warranty FPI Fireplace Products International Ltd. (for Canadian customers) and Fireplace Products U.S., Inc. (for U.S. customers) (collectively referred to herein as “FPI”) extends this Limited Lifetime Warranty to the original purchaser of this appliance provided the product remains in the original place of installation. The items covered by this limited warranty and the period of such coverage is set forth in the table below. - Page 29 warranty All warranty claims must be submitted by the dealer servicing the claim, including a copy of the Bill of Sale (proof of purchase by you). All claims must be complete and provide full details as requested by FPI to receive consideration for evaluation. Incomplete claims may be rejected.
- Page 30 warranty Limitations of Liability: The original purchaser’s exclusive remedy under this warranty, and FPI’s sole obligation under this warranty, express or implied, in contract or in tort, shall be limited to replacement, repair, or refund, as outlined above. IN NO EVENT WILL FPI BE LIABLE UNDER THIS WARRANTY FOR ANY INCIDENTAL OR CONSEQUENTIAL COMMERCIAL DAMAGES OR DAMAGES TO PROPERTY.
- Page 31 warranty Product Registration and Customer Support: Thank you for choosing a Regency Fireplace. Regency strives to be a world leader in the design, manufacture, and marketing of hearth products. To provide the best support for your product, we request that you complete a product registration form found on our Web Site under Customer Care within ninety (90) days of purchase.
- Page 32 warranty 32 | HI1150 Hampton Wood Cast Insert...
- Page 33 notes HI1150 Hampton Wood Cast Insert |...
- Page 34 notes 34 | HI1150 Hampton Wood Cast Insert...
- Page 36 Installer: Please complete the following information Dealer Name & Address: _______________________________________ ___________________________________________________________ Installer: ___________________________________________________ Phone #: ___________________________________________________ Date Installed: _______________________________________________ Serial #: ____________________________________________________ Printed in Canada © Copyright 2022, FPI Fireplace Products International Ltd. All rights reserved.
Need help?
Do you have a question about the HI1155 and is the answer not in the manual?
Questions and answers