Advertisement
Quick Links
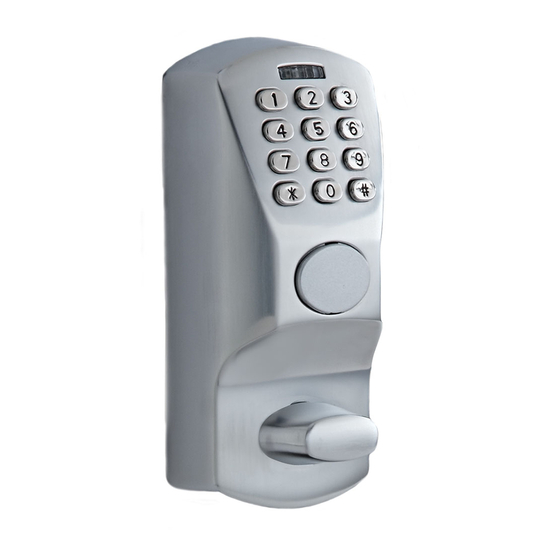
ORACODE 480 - 480i SERIES
INSTALLATION GUIDE FOR DOOR THICKNESS 1 3/8" TO 2"
1. Please read and follow all directions carefully.
2. Carefully inspect glass, door frame, door etc., to ensure that the recommended procedures will not cause damage.
dormakaba standard warranty does not cover damages caused by installation.
3. Wear safety glasses when making the holes.
4. All the following operations and testing of the lock to be done with door open.
Tools Required
1A
INSTALL STRIKE ON WOOD FRAME
• Safety Glasses
• 1/2" (13mm) Chisel
For maximum
• 1/8" (3mm) Drill Bit
security,
install
• 5/32" (4mm) Drill Bit
reinforcing
• 1" Drill Bit or Hole Saw
plate.
• 2 1/8" (54mm) Hole Saw
• Drill
• Awl or Center Punch
• Screwdriver, 1/8" slotted
• Phillips Screwdriver (#2)
• Adjustable Square
• Tape Measure
Install long screws in
door stop side.
DOOR PREPARATION
A = Backset = 2 3/4" (70mm) or 2 3/8" (60mm)
1C
A
1" (25mm)
2 1/8" (54mm) Hole saw
2
3
ADJUST BACKSET OF DEADBOLT
INSTALL DEAD BOLT IN DOOR
2
1
3
Do not remove tape
The dead bolt is pre-set at 2 3/4" (70mm)
Slot at the bottom
backset. Proceed as illustrated to change to
2 3/8" (60mm) backset, if required.
PK3700 2018-06-29
!
WARNING
1B
INSTALL STRIKE ON STEEL FRAME
1. Determine which template fits your 480 lock installation, either 2 3/8"
(60mm) or 2 3/4" (70mm) backset.
2. Place appropriate template (supplied) onto door and mark holes.
3. Drill holes as per dimensions on the template, the 1" (25mm) hole to be
on the center line of door thickness.
4. Mortise door edge for dead bolt face plate.
5. Drill 2 1/8" from both sides of the door to prevent unsightly damage.
Do not remove tape
PARTS LIST
1. Outside Housing Assembly (1)
2. Bar Code Label (1)
3. Outside Housing Gasket (1)
4. Dead Bolt (1)
5. Inside Trim Assembly (1)
6. Machine Screw, Pan Head, SS, PH #3, 12-24 (1)
7. Machine Screw, Pan Head, ZP, PH #2, 8-32 (2)
8. Machine Screw, Pan Head, ZP, PH #2, 6-32 (2)
9. Split Lock Washer, No. 8, SS 18-8 (2)
10. Split Lock Washer, No. 12, SS (1)
11. Machine Screw, Flat Head, Brass, PH #2, 8-32 x 7/32" (2)
12. Dust Box (1)
13. Striker Plate (1)
Door stop
14. Wood Screw, PH #2, #8 x 1" (4)
15. Wood Screw, PH #2, #8 x 3" (2)
16. Reinforcing Plate (1)
17. Tail Piece Door 1 3/8" to 2" (1)
18. Cap (1)
19. Override Key (May be shipped separately) (1)
20. Battery Cell, AA Alkaline (3)
21. Key Cylinder (May be shipped separately) (1)
22. Inside Cover (1)
23. Machine Screw, Flat Head, SS 304, PH #2, 6-32 x .750 (1)
LOCK DIAGRAM
When installing the lock, please carefully slide post
through dead bolt holes.
Page 1 of 4
Advertisement

Related Manuals for Dormakaba ORACODE 480 Series


Summary of Contents for Dormakaba ORACODE 480 Series
- Page 1 2. Carefully inspect glass, door frame, door etc., to ensure that the recommended procedures will not cause damage. 7. Machine Screw, Pan Head, ZP, PH #2, 8-32 (2) dormakaba standard warranty does not cover damages caused by installation. 8. Machine Screw, Pan Head, ZP, PH #2, 6-32 (2) 3.
- Page 2 KEY OVERRIDE CYLINDER INSTALL INSIDE TRIM ASSEMBLY If cylinder is not already assembled in the lock,proceed as follows: 1. Remove 4 screws Override Switch 2. Remove back plate 4. Wire must not be pinched when re-installing back plate Connect W1 to W2 (Communication) 5.
-
Page 3: Maintenance Unit
TESTING THE MECHANICAL OVERRIDE (with door open) COVER THE KEY HOLE For 480i Lock Programming with M-Unit LOCK PROGRAMMING IMPORTANT: If your lock is already pre-programmed, you can go directly to section 3 below. Otherwise, follow the instructions in sections 1 and 2 below to program the lock. 1. - Page 4 For 480i Wireless Lock with Smart Controller ORACODE SMART CONTROLLER INSTALLATION Smart Controller (Top) 2. ACTIVATION PROCESS (WITH ORACODE LIVE) • Once the Activation number is provided, a new field will be presented 1. SMART CONTROLLER POSITIONING where the Smart Controller’s MAC address is to be entered. •...
-
Page 5: Technical Support Hotline
• The Z-Wave device should be accessible in the BeHome247 website under the “Settings” tab. 7. Bluetooth TECHNICAL SUPPORT HOTLINE Call 1-888-217-5654 or 1-514-340-9025 (international) Full service from 8:30 am to 7:00 pm Eastern Time Emergencies 24/7 Email: Email: techsupport.lgs.ca@dormakaba.com www.kabalodgingsupport.com PK3700_2_27_2020 Page 5 of 4...
Need help?
Do you have a question about the ORACODE 480 Series and is the answer not in the manual?
Questions and answers