Table of Contents
Advertisement
Quick Links
Innovative Photonics
Manual or Serial Control (RS-232, USB, or Ethernet options)
Light Feedback Optical Stabilization (~0.1% short term)
Compact Form Factor
Sophisticated Full Operating Lamp Lifetime Algorithm
Front Panel Lamp Lifetime Indicator LED (3 color)
Analog Signal Gauge Lamp Lifetime Indicator (0-5VDC)
Automatic Lamp Characterization and Calibration
Revision 2 09/01/16
Illumination
Technologies, Inc.
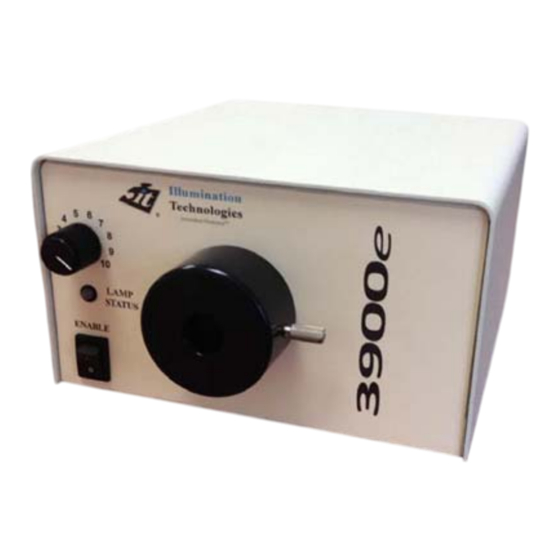
Model 3900e
Light Feedback Regulated Tungsten Halogen source
Illumination Technologies, Inc.
102 Route 5 West, Building 2, Elbridge, NY 13060 USA
www.illuminationtech.com
Owner's Manual
Page 1 of 28
Advertisement
Table of Contents

Summary of Contents for it 3900e
- Page 1 Owner’s Manual Illumination Technologies, Inc. Innovative Photonics Model 3900e Light Feedback Regulated Tungsten Halogen source Manual or Serial Control (RS-232, USB, or Ethernet options) Light Feedback Optical Stabilization (~0.1% short term) Compact Form Factor Sophisticated Full Operating Lamp Lifetime Algorithm...
-
Page 2: Safety Instructions
Power Cord - Use only the approved power cord supplied with the unit, or an equivalent IEC 320 power cord with proper certifications. Power cord should be routed such that it will not be pinched, severed or walked on. Illumination Technologies, Inc. - Page 3 (intake) and in the rear (exhaust) of the unit is observed. Use M4 hardware and ensure a minimum of 10mm clearance under the base to allow for proper cooling. Never mount the receptacle pointing down. Fig 1 – 3900e Lightsource Illumination Technologies, Inc.
-
Page 4: Power Supply
Pull the door straight out and swing it into the socket (see Figure 2). Lift the fuse holder out of the housing. Replace the fuses with T2.0 Amp, 5x20mm, size fuses. The fuses should be placed in the fuse holder as shown in Figure 2. - Page 5 LED. When the lamp is new and in good condition, the LED on the front panel will remain GREEN. As the lamp ages, it will eventually begin to show signs of aging. At about 250- 350 hours the lamp will begin to exhibit measureable signs of aging and the LED will turn YELLOW.
-
Page 6: Radio And Television Interference
Technologies, Inc. Innovative Photonics The unit will first characterize the new lamp, so that it has a good reference from which to make accurate lifetime predictions. During this process the indicator LED flashes YELLOW. The unit will then calibrate the lamp so that the optical output is very near the output level of the previous lamp. -
Page 7: Specifications
Owner’s Manual Illumination Technologies, Inc. Innovative Photonics Specifications Physical: Overall Dimensions: Height: 4.50" (114 mm) Width: 7.21" (183 mm) Length: 7.42" (189 mm) Weight/Mass: 4.4 pounds (2.0 kilograms) (excluding power cable) Standard Cable Length: 8.0 feet (2.4 meters) Electrical: ... - Page 8 LED lamp. The RS-232 interface is equipped with a DB-9 connection, and is wired as shown in Figure 5. It must be connected to a dedicated COM port. The USB option has a standard Mini USB receptacle (male), and creates its own COM port upon initialization, providing simple connection and multiple source control capabilities not limited by hardware.
- Page 9 Owner’s Manual Illumination Technologies, Inc. Innovative Photonics power up may be set by establishing the desired INT value, and then sending the command INP=1 prior to shut down. This saves the particular INT value which is then used on power up. COMMUNICATIONS To test the lightsource (in either RS-232, USB, or Ethernet mode) the Microsoft®...
- Page 10 Owner’s Manual Illumination Technologies, Inc. Innovative Photonics Illumination Technologies, Inc. 102 Route 5 West, Building 2, Elbridge, NY 13060 USA www.illuminationtech.com Revision 2 09/01/16 Page 10 of...
- Page 11 USB port as a new COM port in your computer system. You should save this file to a directory that you can easily access and remember in case you need to get to it in the future. Once this file download completes, open the directory in which that file resides, and double-click to execute it.
- Page 12 Owner’s Manual Illumination Technologies, Inc. Innovative Photonics COMMUNICATIONS Ethernet Option The command structure for the Ethernet interface is exactly the same. However, the unit’s Ethernet module must be set to the proper IP address to communicate within your specific network. To identify and update the IP address of the Ethernet device to your network, you will need to do the following: 1.
- Page 13 This opens up the following window: Click “Save File”. This may take a few minutes, depending on your download speed. When the download is finished, go to the folder in which it downloaded to and double left- click the icon to begin the installation process.
- Page 14 Owner’s Manual Illumination Technologies, Inc. Innovative Photonics If additional installation is needed, you will be required to restart your computer after completion. Illumination Technologies, Inc. 102 Route 5 West, Building 2, Elbridge, NY 13060 USA www.illuminationtech.com Revision 2 09/01/16 Page 14 of...
- Page 15 Owner’s Manual Illumination Technologies, Inc. Innovative Photonics Upon restart you will be asked to select a destination to save the program. By default, the Windows installer selects the path shown. You can accept the default or browse to find a more suitable location if you desire.
- Page 16 Owner’s Manual Illumination Technologies, Inc. Innovative Photonics Illumination Technologies, Inc. 102 Route 5 West, Building 2, Elbridge, NY 13060 USA www.illuminationtech.com Revision 2 09/01/16 Page 16 of...
- Page 17 Technologies, Inc. Innovative Photonics Once the installer launches, it will search the entire network and identify every lightsource attached. You should see the following screen: Expand the “Xport” folder on the left side to see the current IP address of the lightsource:...
- Page 18 Owner’s Manual Illumination Technologies, Inc. Innovative Photonics Illumination Technologies, Inc. 102 Route 5 West, Building 2, Elbridge, NY 13060 USA www.illuminationtech.com Revision 2 09/01/16 Page 18 of...
- Page 19 Owner’s Manual Illumination Technologies, Inc. Innovative Photonics The following window will open: At the command prompt, type “ipconfig” and then Enter The IP address of your computer is listed in the first line. When assigning the new IP address to the lightsource, the first 3 “blocks”...
- Page 20 Owner’s Manual Illumination Technologies, Inc. Innovative Photonics Illumination Technologies, Inc. 102 Route 5 West, Building 2, Elbridge, NY 13060 USA www.illuminationtech.com Revision 2 09/01/16 Page 20 of...
- Page 21 Owner’s Manual Illumination Technologies, Inc. Innovative Photonics In the below the toolbar below the menu bar, click on the “Assign IP” button and the following window appears: If you know the address you want to change the module to, keep the “Assign a specific IP Address” checked (RECOMMENDED).
- Page 22 Owner’s Manual Illumination Technologies, Inc. Innovative Photonics Change the IP address, Subnet Mask, and Default Gateway to your required network settings and click “Next”. Illumination Technologies, Inc. 102 Route 5 West, Building 2, Elbridge, NY 13060 USA www.illuminationtech.com Revision 2 09/01/16 Page 22 of...
- Page 23 Owner’s Manual Illumination Technologies, Inc. Innovative Photonics The following window appears. Click “Assign”. Once complete, the following window appears and you are done. You have now successfully changed your IP address of the Ethernet enabled device. Make note of the IP address of this device for future reference. You can run a quick test of the lightsource using Microsoft®...
- Page 24 Owner’s Manual Illumination Technologies, Inc. Innovative Photonics Go to “Call” and click on “Call” in the menu You are now ready to control the lightsource using HyperTerminal. Make sure you set the program to “Echo Characters.” To begin type the following commands (followed by a “” which is a carriage return) to test the unit’s Ethernet communications interface and functionality: HEL?...
-
Page 25: Maintenance
Do not attempt to repair this part for risk of fire and electric shock hazard. OverTemp - This unit is equipped with an internal thermal cut-off mechanism. It will remove power to the lamp upon an over temperature situation. Ensure that there is adequate airflow below (intake) and in the rear (exhaust) of the unit. - Page 26 Owner’s Manual Illumination Technologies, Inc. Innovative Photonics Power - Ensure that the power cord is inserted completely into the IEC connector on the back of the unit, and is connected to a power supply as specified on the rear panel. Check power cord for damaged or severed areas.
-
Page 27: Spare Parts/Accessories
Owner’s Manual Illumination Technologies, Inc. Innovative Photonics Spare Parts/Accessories Spare Parts: Description EKE Lamp, 3200K 150 Watt, 21V 9596 EKE-HC Lamp, 4200K 150 Watt, 21V 9596HC EKE-ER Lamp, 150 Watt, 21 Volt 9596ER Fuse, T2.0 Amp, 5x20mm (pack of 10) 1010-307 Must be used in –HC lightsource only Must be used in –ER lightsource only... - Page 28 Owner’s Manual Illumination Technologies, Inc. Innovative Photonics Warranty Statement: The Illumination Technologies products are warranted to the original purchaser to be free from defect for one year from the date of purchase of the product. Illumination Technologies, Inc. will repair or replace, at its discretion, any defective unit within two (2) weeks of its receipt.
Need help?
Do you have a question about the 3900e and is the answer not in the manual?
Questions and answers