Table of Contents
Advertisement
Available languages
Available languages
Quick Links
Advertisement
Chapters
Table of Contents

Related Manuals for Gastroback Design Milk & Chocolate Advanced


Summary of Contents for Gastroback Design Milk & Chocolate Advanced
- Page 1 BEDIENUNGSANLEITUNG DESIGN MILK & CHOCOLATE ADVANCED Art.-Nr. 42359 »Design Milk & Chocolate Advanced« Bedienungsanleitung vor Gebrauch unbedingt lesen! Modell- und Zubehöränderungen vorbehalten! Nur für den Hausgebrauch!
-
Page 2: Table Of Contents
Wir legen viel Wert auf Ihre Sicherheit. Deshalb bitten wir Sie, alle Hinweise und Anleitungen, die mit dem Gerät geliefert werden, sorgfältig und voll- ständig durchzulesen, bevor Sie das Gerät in Betrieb nehmen. Dadurch lernen Sie auch alle Funktionen und Eigenschaften Ihres Gerätes kennen. - Page 3 SEHR GEEHRTE KUNDIN, SEHR GEEHRTER KUNDE! Wir freuen uns, dass Sie sich für den neuen GASTROBACK »Design Milk & Cho- colate Advanced« entschieden haben! Problemlos und schnell bereiten Sie herrlich kremigen Milchschaum für Kaffee, Kakao, Milchgetränke und raffinierte Desserts. Aufgrund der innovativen Induktionstechnik kommt der Milchaufschäumer ohne eine Heizplatte aus –...
-
Page 4: Ihren Neuen Milchaufschäumer Kennen Lernen
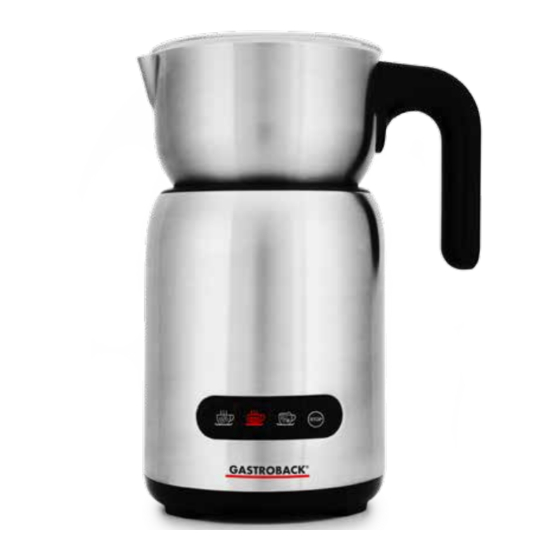
IHREN NEUEN MILCHAUFSCHÄUMER KENNEN LERNEN Deckel – verhindert Spritzer und dient als Führung für den Rührstab, die abnehmbare Silikondichtung hält den Deckel fest auf dem Krug. Milchkrug aus Edelstahl; mit Füllmarken an der Innenwand und Gießtülle. Thermisch isolierter Henkel Motorsockel – Induktionsspule und motorgetrie- bener Rührmagnet heizen und rühren die Milch im Milchkrug kontaktlos. -
Page 5: Sicherheitshinweise
Wartung am Gerät oder Netzkabel dürfen nur von dafür autori- sierten Fachwerkstätten durchgeführt werden (siehe: ‚Gewährleistung / Garantie‘). Fragen zum Gerät beantwortet: GASTROBACK GmbH, Gewerbestr. 20, D-21279 Hollenstedt, Telefon: (04165) 22250. ALLGEMEINE HINWEISE ZUR SICHERHEIT • Dieses Gerät ist nur für die Verwendung im Haushalt vorgese- hen. - Page 6 keiten, Verformungen, Verfärbungen an den Steckkontakten des Netz- steckers). Niemals das Gerät betreiben, wenn während des Betriebes Flüssigkeiten auslaufen! Niemals das Gerät betreiben, wenn Bauteile beschädigt sind (Beispiel: Rührstab ist verformt, Heizwendel ist verkrustet, Netzkabel ist beschädigt) oder nicht mehr erwartungsgemäß arbeiten, oder wenn das Gerät übermäßigen Belastungen ausgesetzt war (Beispiel: Sturz, Schlag, in den Motorsockel eingedrungene Flüssigkeiten).
- Page 7 starken Wärmequellen und heißen Oberflächen bringen (Beispiel: Hei- zung, Ofen, Feuer). Niemals die Bauteile des Gerätes für andere Geräte oder für Zwecke verwenden, die in diesem Heft nicht beschrieben sind. Lassen Sie zum Betrieb immer mindestens 50cm Platz über dem Gerät und mindestens 20cm auf allen Seiten des Gerätes frei, um Schäden durch Spritzer zu vermeiden.
-
Page 8: Vorsichtsmaßnahmen Beim Umgang Mit Elektrizität
• Reinigen Sie das Gerät sofort nach jeder Verwendung. Lebensmittel- rückstände auf dem Rührstab könnten die Leistung des Gerätes erheblich beeinträchtigen. VORSICHTSMASSNAHMEN BEIM UMGANG MIT ELEKTRIZITÄT Das Gerät wird über ein Induktionssystem kontaktlos beheizt und darf nur an eine Schukosteckdose mit den richtigen Nennwerten (220/240 V Wechselstrom, 50/60 Hz) angeschlossen werden. -
Page 9: Hohe Temperaturen - Verbrennungsgefahr
stecker oder das Gerät mit nassen Händen anfassen, wenn das Gerät an die Stromversorgung angeschlossen ist. • Niemals den Motorsockel oder das Netzkabel in Wasser oder andere Flüssigkeiten eintauchen oder stellen oder Flüssigkeiten über oder in den Motorsockel laufen lassen, um eine Gefährdung durch Elektrizität zu ver- meiden. -
Page 10: Technische Daten
TECHNISCHE DATEN Modell: Art.-Nr.: 42359 Design Milk & Chocolate Advanced Stromversorgung: 220/240 V Wechselstrom, 50/60 Hz Leistungsaufnahme: max. 650 W; max. 1 W in Standby (alle Tasten leuchten) Länge des Netzkabels: ca. 80 cm Gewicht: ca. 1,7 kg Abmessungen: ca. 190 x 140 x 252 mm (Breite x Tiefe x Höhe) Fassungsvermögen: ca. -
Page 11: Überhitzungsschutz
heiße Milch Heiße Milch- bis 360 Sekun- 600 ml ca. 67°C Taste den (6 Minuten) ergibt ca. 1/5 Schaum heiße Schokolade- bis 415 Sekun- 300 ml (ohne Körbchen) ca. 77°C Schokolade Taste den (fast 7 600 ml (mit Körbchen) Minuten) plus 2-6 Stück einer 100g-Schokoladentafel Wenn bereits eine Funktion gestartet ist, dann sind die Funktionstasten inaktiv. -
Page 12: Vor Der Ersten Verwendung
VOR DER ERSTEN VERWENDUNG WARNUNG: Niemals kleine Kinder mit dem Gerät oder den Bauteilen des Gerätes oder dem Verpackungsmaterial spielen lassen! Bedenken Sie bitte, dass der Rührmagnet von kleinen Kindern leicht verschluckt werden könnte. Erstickungsgefahr! Achten Sie immer darauf, dass besonders der Rührmagnet außerhalb der Reichweite von kleinen Kindern ist. - Page 13 Arbeitsfläche ab. Stellen Sie das Gerät zum Betrieb niemals an die Kante der Arbeits- fläche oder auf geneigte Oberflächen. Betreiben Sie das Gerät nicht auf einer Metall- fläche. Wenn Flüssigkeiten auslaufen oder herausspritzen, könnte dies zu einer erhöh- ten Gefährdung durch Elektrizität führen. Wenn während des Betriebes Flüssigkeiten aus dem Milchkrug auslaufen, dann zie- hen Sie sofort den Netzstecker aus der Steckdose (siehe: ‚Hilfe bei Problemen‘).
- Page 14 Der Flüssigkeitsstand im Milch- 3. Füllen Sie den Milchkrug mit frischer, kalter Milch. krug muss zum Betrieb immer zwischen den Markierungen MIN (ca. 300ml) und MAX (ca. 600ml) liegen. Halten Sie den Milchkrug immer waagerecht, sobald er gefüllt ist. Wenn Sie mit den Funktionen zum Aufschäumen (Schaum-Taste ) arbeiten wollen oder die Schokolade-Funktion ohne das Körbchen verwenden wollen (Schokolade- Taste...
- Page 15 Heiße Milch (maximal 1/5 Milchschaum). Heiße Schokolade HINWEIS: Während des Betriebes ist nur die STOP-Taste aktiv. Alle anderen Tasten zeigen keine Reaktion. Wenn Sie die laufende Funktion während des Betriebes abbrechen wollen, dann drücken Sie die STOP-Taste. Das Gerät kehrt dann sofort in den Standby-Modus zurück.
- Page 16 Ein ernstes Problem ist auf- Ziehen Sie sofort den Netzstecker aus der Steckdose. Wenden getreten. Sie sich an GASTROBACK, Tel. 04165/2225-0 oder info@ GASTROBACK.de Der Deckel lässt Sie haben die Silikondich- Der Wulst an der Silikondichtung muss am Deckel nach oben...
- Page 17 Sie die Zutaten dann langsam ein. der Rührmagnet stecken Verwenden Sie bei größeren Stücken das Körbchen. bleiben. Der Rührstab ist beschädigt. Wenden Sie sich an GASTROBACK, Tel. 04165/2225-0 oder info@GASTROBACK.de Nur wenig Sie haben die falsche Funk- Verwenden Sie zum Aufschäumen die Schaum-Taste (siehe:...
- Page 18 Heizwendel ausgeschaltet. Drücken Sie die Schaum- kalt. Taste nur kurz, um heißen Milchschaum zu erhalten. Die Heizwendel ist beschä- Wenden Sie sich an GASTROBACK, Tel. 04165/2225-0 oder digt. info@GASTROBACK.de Flüssigkeit Sie haben zu viel Flüssig- Ziehen Sie sofort den Netzstecker aus der Steckdose.
-
Page 19: Pflege Und Reinigung
PFLEGE UND REINIGUNG WARNUNG: Schalten Sie das Gerät immer zuerst in den Standby-Modus (STOP- Taste drücken), ziehen Sie den Netzstecker aus der Steckdose und lassen Sie das Gerät abkühlen, bevor Sie das Gerät reinigen, und wenn Sie das Gerät nicht benut- zen. - Page 20 Wenn der Rührstab jedoch nicht vollständig sauber geworden ist, dann arbeiten Sie nach der folgenden Anleitung ‚Hartnäckige Ablagerungen vom Rührstab ent- fernen‘. HINWEIS: Sie können den Milchkrug, Deckel und Rührstab in der Geschirrspülma- schine reinigen. Legen Sie Rührstab und Deckel dazu in den oberen Korb. ACHTUNG: Legen Sie den Rührstab immer nur zusammengesetzt in die Spül- maschine, da die kleinen Teile sonst während des Spülvorganges leicht verloren gehen können oder beschädigt werden.
-
Page 21: Aufbewahrung
4. Reinigen Sie die Teile des Rührstabes danach mit einer kleinen weichen Bürste (Beispiel: saubere Zahnbürste). Bürsten Sie dabei die Heizwendel am Rand des Rührmagneten, die Innenseiten des Magnethalters und das Gewinde am Ende des Schaftes vorsichtig ab. Das Körbchen und den Schaft können Sie mit einem weichen Tuch oder Schwamm reinigen. -
Page 22: Entsorgungshinweise
Wenn Sie das Gerät durch ein neues ersetzen, ist der Verkäufer gesetzlich verpflichtet, das alte mindestens kostenlos zur Entsorgung entgegenzunehmen. INFORMATION UND SERVICE Weitere Informationen erhalten Sie im Internet unter www.GASTROBACK.de. Wenden Sie sich mit Problemen, Fragen und Wünschen gegebenenfalls an: GASTROBACK Kundenservice, Tel.: 04165/2225-0... -
Page 23: Gewährleistung/Garantie
Kosten und das Risiko des Transportes. Hinweis: Kunden aus Deutschland und Österreich: Für die Reparatur- und Serviceabwicklung möchten wir Sie bitten, GASTROBACK Produkte an folgende Anschrift zu senden: GASTROBACK GmbH, Gewerbestr. 20, 21279 Hollenstedt. Kunden anderer Länder: Bitte kontaktieren Sie Ihren Händler Bitte haben Sie dafür Verständnis, dass unfreie Sendungen nicht angenommen wer-... -
Page 24: Rezepte
REZEPTE LATTE Für 3 Personen » ca. 150ml schwarzer Kaffee (z.B. Espresso) » 300ml frische, kalte, fettarme Milch Nehmen Sie den Milchkrug vom Gerät und füllen Sie die Milch in den Milchkrug. Setzen Sie den Rührstab (ohne Körbchen) in den Milchkrug und stellen Sie den Milchkrug auf den Motorsockel. - Page 25 HEISSE SCHOKOLADE KAKAO RUSTIKAL Für 2 Personen Für 2 Personen » 4 Stück Schokolade » 300ml fettarme Milch » 300ml frische, kalte Milch » 25ml Schlagsahne (ca. 30%ig) » Zum Garnieren: » 3 leicht gehäufte Teelöffel Kakaopulver Etwas steif geschlagene Sahne »...
- Page 27 OPERATING INSTRUCTIONS DESIGN MILK & CHOCOLATE ADVANCED Art.-No. 42359 »Design Milk & Chocolate Advanced« Read all provided instructions before first usage! Model and attachments are subject to change For household use only!
- Page 28 We attach a certain importance to your safety. Thus, we ask you to read all provided instructions and information in this booklet carefully and complete- ly, before you start running the appliance. This will help you to know all functions and properties of your new appliance. We especially ask you to adhere strictly to the safety information mentioned in these instructions.
- Page 29 Thus, cleaning is made easy, too. The integrated temperature detection ensures heating the milk always to the optimum temperature. These instructions for use will inform you about the various functions and features, which make it easy to take pleasure in your new Milk Frother. Your GASTROBACK GmbH...
-
Page 30: Knowing Your New Design Milk & Chocolate Advanced
KNOWING YOUR NEW DESIGN MILK & CHOCOLATE ADVANCED Lid – for preventing splashes and guiding the frothing rod, the removable silicone seal keeps the lid tightly in position. Stainless steel milk jug with filling markings on the inner side wall and spout. Thermal insulated handle Power base –... -
Page 31: Important Safeguards
IMPORTANT SAFEGUARDS Carefully read all instructions, before operating this appliance and save for further reference. Do not attempt to use this appli- ance for any other than the intended use, described in these instructions. Any other use, especially misuse, can cause severe injuries or damage by electric shock, heat, or fire. - Page 32 • Operate the appliance on a well accessible, stable, level, clean, dry, and suitable large table or counter that is resistant against heat and moisture. Always wipe off spilled liquids immediately. Always ensure that the exterior of the milk jug is completely dry before placing the milk jug onto the power base.
-
Page 33: Important Safeguards For Electrical Appliances
fill in more than the maximum amount (MAX marking: 300 ml for frothing, 600 ml for heating). If the milk jug is overfilled, hot liquid may run out and onto the base. • If liquids run out or are spilled onto the power base or the exterior of the milk jug during use, immediately unplug the appliance. -
Page 34: High Temperature-Risk Of Burns
accessible so that it would be possible to unplug the appliance immedia- tely in case of any malfunction or danger. • The pins of the power plug must be smooth and clean without dis- colourations. Always handle power cords with care. Do not place the appliance on a power cord. -
Page 35: Technical Specifications
operation. Only touch the power base and milk jug at the operating ele- ments and handle, when it is hot. TECHNICAL SPECIFICATIONS Model: Art.-No.: 42359 »Design Milk & Chocolate Advanced« Power supply: 220/240 V AC, 50/60 Hz Power consumption: max. 650 W; max. -
Page 36: Properties Of Your Milk Frother
PROPERTIES OF YOUR MILK FROTHER Your new »Design Milk & Chocolate Advanced« is intended for heating and texturing milk, and for preparing hot chocolate and other delicious drinks. After reaching the pre-programmed optimum temperature and/or time, the appliance will shut off the frothing/stirring process automatically with an acoustic signal. -
Page 37: Before First Use
Solve the problem. Thereafter, you may start the desired function again. An automatic shut-off may be a result of the following conditions: • Not enough liquid (milk or water) in the milk jug. Always observe the MIN filling level (300ml). •... -
Page 38: Operation
OPERATION WARNING: Always ensure that the appliance and all its parts and accessories, especially the frothing magnet, are out of reach of young children. The appliance is intended for heating beverages and frothing milk via contact-less operated systems. Do not attempt to heat the milk jug via any other device than the dedicated power base. - Page 39 OPERATING THE APPLIANCE 1. Place the power base on the designated working place near an appropriate wall power outlet. Leave at least 20 cm of free space to the edge of the workspace and any other objects (see: ‘General Safety Instructions’) 2.
- Page 40 8. Simply press the dedicated button to start the desired function (see: ‘Properties of Your Milk Frother / Functions’). Cold milk froth: hold this button pressed for 2 seconds to get approx. 2/3 of froth and 1/3 of milk. The button will be illuminated in blue. Hot milk froth: press this button only shortly to get approx.
-
Page 41: Solving Problems
SOLVING PROBLEMS If any problems occur during operation, you will find the solution here. Problem Reason The Solution All buttons The appliance is not Ensure that the appliance is connected to a suitable wall power out- remain dark. live. let. Ensure that the wall power outlet is live by connecting a lamp. The appliance A severe problem occur- Immediately unplug the appliance. - Page 42 Problem Reason The Solution Not enough The wrong function has For frothing, use the frothing function (see: ‘Properties of Your Milk froth. been selected. Frother’). The chocolate basket is For frothing, remove the chocolate basket. Add large pieces of installed on the frothing ingredients manually after frothing.
- Page 43 Problem Reason The Solution The power The upper part of the No need for any action. base gets hot power base gets warm during opera- during operation. This is tion. normal. If the power base gets Immediately unplug the appliance. Get in contact with an authorised really hot, a severe pro- service centre for examination and repair.
-
Page 44: Care And Cleaning
CARE AND CLEANING WARNING: Always switch the appliance to standby mode (pressing the STOP button), unplug, and leave the appliance cool down, before cleaning the appliance. Always ensure that all parts of the appliance are out of reach of young children. Risk of Suffocation! Especially ensure that young children do not swallow the frothing magnet. - Page 45 Avoid spilling or dripping any liquid onto the power base. 6. Wipe the power base and power cord with a slightly damp cloth. Then thorough- ly wipe dry all parts. out of reach of 7. Leave all parts dry naturally for approx. 1 hour, where they are young children.
-
Page 46: Storage
ASSEMBLING THE FROTHING ROD 7. Place the retaining tool on the table with the flat side downwards. Place the frothing magnet into the retaining tool with the flat side downwards, too. 8. Hold the retaining tool with one hand and screw the shaft of the frothing rod into the hole in the centre of the retaining tool, until a resistance is felt. -
Page 47: Notes For Disposal
INFORMATION AND SERVICE Please check www.gastroback.de for further information. For technical support, please contact GASTROBACK Customer Care Center by phone: +49 (0)4165/22 25-0 or e-mail info@gastroback.de. Please refer to our home page for a copy of these operating instructions in pdf format. -
Page 48: Warranty
1 year. Note: Customers from Germany and Austria: For repair and service, please send GAS- TROBACK products to the following address: GASTROBACK GmbH, Gewerbestr. 20, D-21279 Hollenstedt, Germany. Customers from other countries: Please contact your dealer. -
Page 50: Recipes
RECIPES LATTE 3 Serves » approx. 150 ml hot, black coffee (e.g. Espresso) » 300ml fresh, cold, low-fat milk (1.5% fat) Remove the milk jug from the power base and fill in the milk. Insert the frothing rod (without cho- colate basket) and place the milk jug onto the power base. - Page 51 HOT CHOCOLATE COCOA RUSTIC 2 serves 2 serves » 4 pieces dark chocolate » 300ml low-fat milk » 300ml milk » 25ml cream (approx. 30%) » To garnish: » 3 lightly heaped teaspoons cocoa powder some whipped cream » 2 teaspoons brown sugar, to taste »...
- Page 52 GASTROBACK GmbH Gewerbestraße 20 . 21279 Hollenstedt / Germany Telefon + 49 (0) 41 65 / 22 25 - 0 . Telefax + 49 (0) 41 65 / 22 25 -29 info@gastroback.de . www.gastroback.de...
Need help?
Do you have a question about the Design Milk & Chocolate Advanced and is the answer not in the manual?
Questions and answers