KERN EOB Series Service Manual
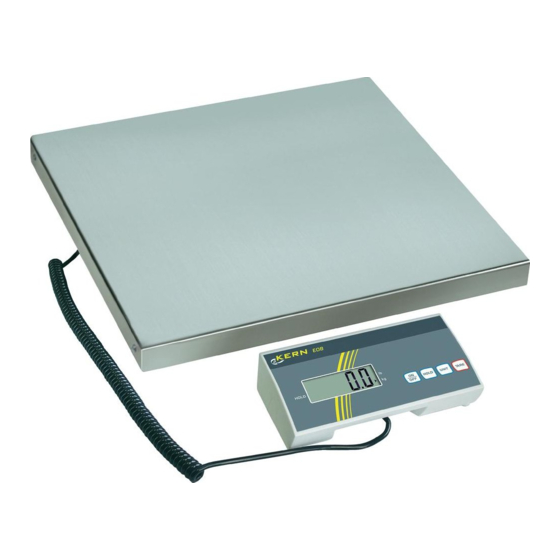
Platform/floor scales
Hide thumbs
Also See for EOB Series:
- Operating instructions manual (26 pages) ,
- Operating manual (85 pages) ,
- Operating instructions manual (28 pages)
Table of Contents
Advertisement
Quick Links
Servicemanual
Platform/floor scales
KERN EOB / EOE / EOS
Typ EOB_B
Typ EOE_B
Typ EOS_B
Version 1.1
08/2019
GB
KERN & Sohn GmbH
Ziegelei 1
D-72336 Balingen
E-Mail: info@kern-sohn.com
Tel: +49-[0]7433- 9933-0
Fax: +49-[0]7433-9933-149
Internet: www.kern-sohn.com
Importør:
Impex Produkter AS
Gamle Drammensvei 107
1363 Høvik
www.impex.no
info@impex.no
Tel.: 22 32 77 20
EOB-B_EOE-B_EOS-B-SH-e-1911
Advertisement
Table of Contents

Related Manuals for KERN EOB Series


Summary of Contents for KERN EOB Series
- Page 1 Fax: +49-[0]7433-9933-149 E-Mail: info@kern-sohn.com Internet: www.kern-sohn.com Servicemanual Platform/floor scales Importør: Impex Produkter AS Gamle Drammensvei 107 1363 Høvik www.impex.no KERN EOB / EOE / EOS info@impex.no Tel.: 22 32 77 20 Typ EOB_B Typ EOE_B Typ EOS_B Version 1.1 08/2019 EOB-B_EOE-B_EOS-B-SH-e-1911...
-
Page 2: Table Of Contents
KERN EOB-B / EOE-B / EOS-B Version 1.1 08/2019 Servicemanual Contents Basic Information ................... - 3 - Introdution ...................... - 3 - Overview of display ..................- 4 - Keyboard overview ........................ - 4 - Basic Information (General) ................- 5 - Proper use .......................... -
Page 3: Basic Information
Basic Information The device must be repaired only by trained specialist staff or personnel with professional formation (such as a repair-specialist accredited by law concerning verification). The service manual is obligatory for repair work. After repair, original conditions of the device have to be restored. Only original spare parts should be used. -
Page 4: Overview Of Display
Overview of display Example EOB: Description Balance zero display: Should the balance not display exactly zero despite empty scale pan, press the TARE button. The balance will be set to zero after a short standby time. Stability display: If the display shows the stability display [0] the balance is in a stable status. If the status is instable the [0] display disappears. -
Page 5: Basic Information (General)
The structure of the balance may not be modified. This may lead to incorrect weighing results, safety-related faults and destruction of the balance. The balance may only be used according to the described conditions. Other areas of use must be released by KERN in writing. Warranty Warranty claims shall be voided in case ... -
Page 6: Monitoring Of Test Resources
The responsible user must define a suitable interval as well as type and scope of this test. Information is available on KERN’s home page (www.kern-sohn.com) with regard to the monitoring of balance test substances and the test weights required for this. -
Page 7: Unpacking, Setup And Commissioning
Unpacking, Setup and Commissioning Installation Site, Location of Use The balances are designed in a way that reliable weighing results are achieved in common conditions of use. You will work accurately and fast, if you select the right location for your balance. Therefore, observe the following for the installation site: ... -
Page 8: Scope Of Delivery / Serial Accessories
Scope of delivery / serial accessories Platform and display unit, see chap. 2 4 x adjustable feet 4 x AA batteries Wall fixture (with fixing screws) Operating manual Battery operation On the rear side of the display unit remove the battery cover and connect 4 x 1.5V mignon cells. -
Page 9: Adjustment
Adjustment As the acceleration value due to gravity is not the same at every location on earth, each balance must be coordinated - in compliance with the underlying physical weighing principle - to the existing acceleration due to gravity at its place of location (only if the balance has not already been adjusted to the location in the factory). -
Page 10: Operation
The specified adjustment weight is displayed flashing. (example) Place the adjustment weight centrically on the weighing pan and confirm with . "CAL Y" will flash briefly and a signalling tone will sound. Adjustment will be performed. Then the balance returns automatically into the weighing mode. An error message will be displayed in the event of an adjustment error or incorrect adjustment weight. -
Page 11: Taring
Taring Place an empty weighing container, the weight of the weighing container will be displayed. Press , the zero display appears. The indicator [NET] is displayed. The tare weight is saved until it is deleted. Weigh the material, the net weight will be indicated. The taring process can be repeated any number of times, e.g. -
Page 12: Menu
There is no average value calculation in the event of too much movement (heavy display oscillation). Menu Navigation in the menu Press at the same time in weighing mode. [UF 1] is displayed. Press as often as necessary until the required function is displayed. ... - Page 13 Hold function (animal weighing function) Adjustable: Average value is calculated for unstable weighing conditions from approx. 20 d Average value is calculated for unstable weighing conditions from approx. 5 d Average value is calculated for unstable weighing conditions from approx. 10 d Auto Zero Adjustable: ZP 0 *...
-
Page 14: Service Menu
Service menu Turn on the scale and press and hold the until the countdown sequence, then release the and the scale will show LF 1 Weight calibration LF 2 Spec Calibration LF 3 Gravtational (G value) pRe-Calibration CAL switch hs to be on Password is required to use when CAL switch is OFF LF 1 Weight Calibration : Calibration can be done with any weight, but the weight should not be less than 1/100 of the max. - Page 15 Use ▶﹑▲ and then ↵ key to enter the high weight to be calibrated (Press the ESC key to back to menu LF 1) Place the required weight mass onto the scale as indicated on display and press the ↵ key to calibrate the scale (Press the ESC key to back to menu LF 1) Calibration procedure completed and the scale will return back to weighing mode automatically...
-
Page 16: Lf 2 Spec Calibration
Calibration procedure completed and the scale will return back to weighing mode automatically LF 2 Spec calibration Press to enter Confirm display of [ECF 1] with . [CAL Z] is displayed. Internal value Press to confirm A : Metric Units 0 : None 1 : kg B : American Units 0 : None 1 : lb... - Page 17 Full range Flashing 2 seconds Put in the full range Switch to the next digit to the right with Increase number with Press to confirm Input high division Switch to the next digit to the right with Increase number with Only if two point calibration is chosen before Input low range Flashing for 2 seconds...
- Page 18 Increase number with After entering LF 2, the scale will display the last saved setup. All steps have to be completed to save the changes, otherwise the scale will keep the last setup Proceed with Weight Calibration after LF2 Spec Calibration LF 3 Gravitational (G value) Pre-Calibration: Sender G value: Set it before Weight Calibration The G value will be denied when the value is greater than...
-
Page 19: Servicing, Maintenance, Disposal
Spilled weighing goods must be removed immediately. Servicing, maintenance The appliance may only be opened by trained service technicians who are authorized by KERN. Before opening, disconnect from power supply. Disposal Disposal of packaging and appliance must be carried out by operator according to valid national or regional law of the location where the appliance is used. - Page 20 The displayed weight does not glow. The mains supply connection has been interrupted (mains cable not plugged in/faulty). Power supply interrupted. The displayed weight is permanently Draught/air movement changing Table/floor vibrations The weighing pan is in contact with foreign matter.
Need help?
Do you have a question about the EOB Series and is the answer not in the manual?
Questions and answers