Table of Contents
Advertisement
WARNING: If the information in this manual is not
followed exactly, a fire or explosion may result causing
property damage, personal injury or loss of life.
— Do not store or use gasoline or other flammable va-
pors and liquids in the vicinity of this or any other
appliance.
— WHAT TO DO IF YOU SMELL GAS
• Do not try to light any appliance.
• Do not touch any electrical switch; do not use any
phone in your building.
• Immediately call your gas supplier from a neighbor's
phone. Follow the gas supplier's instructions.
• If you cannot reach your gas supplier, call the fire
department.
— Installation and service must be performed by a quali-
fied installer, service agency or the gas supplier.
WARNING: This appliance is equipped for Natural and
Propane gas. Field conversion is not permitted other than
between natural or propane gases.
Questions, problems, missing parts? Before returning to your retailer, call
our customer service department at 1-866-573-0674, 7:30 am - 4:15 pm CST,
Monday through Friday or email customerservice@usaprocom.com
VENT-FREE GAS WALL HEATER
OWNER'S OPERATION AND
INSTALLATION MANUAL
BLUE FLAME MODELS
MNSD300HGA
MNSD300TGA
PFS
®
US
Advertisement
Table of Contents

Subscribe to Our Youtube Channel
Related Manuals for Procom MNSD300HGA


Summary of Contents for Procom MNSD300HGA
- Page 1 VENT-FREE GAS WALL HEATER OWNER’S OPERATION AND INSTALLATION MANUAL BLUE FLAME MODELS MNSD300HGA MNSD300TGA ® WARNING: If the information in this manual is not followed exactly, a fire or explosion may result causing property damage, personal injury or loss of life.
-
Page 2: Table Of Contents
* Aftermarket: Completion of sale, not for purpose of resale, from the manufacturer. PROCOM HEATING, INC. PATENT INFORMATION This product may be covered by one or more of the following United States patents:... -
Page 3: Safety
SAFETY NATURAL AND PROPANE/LP GAS: Natural IMPORTANT: Read this owner’s and Propane/LP gas are odorless. An odor- manual carefully and completely making agent is added to the gas. The odor before trying to assemble, op- helps you detect a gas leak. However, the erate, or service this heater. -
Page 4: Specifications
• Where flammable liquids or vapors are not use propane/LP fuel tank of less than used or stored. 100 lbs. capacity. • Under dusty conditions. SPECIFICATIONS MODEL MNSD300HGA MNSD300TGA Ignition Piezo Ignitor Piezo Ignitor Gas Type Using Natural Gas Using Natural Gas BTU (available) Min. -
Page 5: Qualified Installing Agency
QUALIFIED INSTALLING AGENCY Only a qualified agency should install and a) Installing, testing, or replacing gas piping replace gas piping, gas utilization equipment or accessories, and repair and equipment ser- b) Connecting, installing, testing, repairing, vicing. The term “qualified agency” means any or servicing equipment;... -
Page 6: Air For Combustion And Ventilation
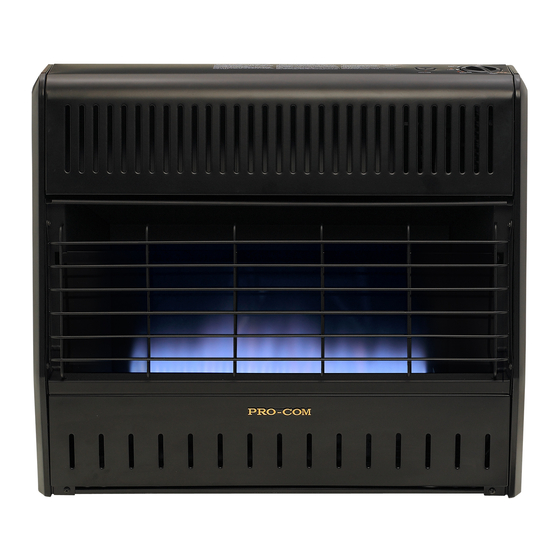
PRODUCT IDENTIFICATION Ignitor Button Control Knob Grill Front Heater Panel Burner Cabinet Figure 1 - Vent-Free Gas Heater UNPACKING 1. Remove heater from carton. 3. Check heater for any shipping damage. If heater is damaged, promptly inform dealer 2. Remove all protective packaging applied where you bought heater. - Page 7 AIR FOR COMBUSTION AND VENTILATION While it is good to make your home energy efficient, your home needs to breathe. Fresh air must enter your home. All fuel-burning ap- 12" pliances need fresh air for proper combustion and ventilation. Ventilation Grills Exhaust fans, fireplaces, clothes dryers and Into Adjoining Room, Ventilation...
-
Page 8: Installation
INSTALLATION NOTICE: This heater is intended CAUTION: This heater creates for use as supplemental heat. warm air currents. These currents Use this heater along with your move heat to wall surfaces next primary heating system. Do not to heater. Installing heater next install this heater as your pri- to vinyl or cloth wall coverings or mary heat source. - Page 9 INSTALLATION FOR PROPANE/LP GAS You will notice a color coded INSTALLATION: BLUE plunger on the inside of the regu- 1. Remove blue dust cover. lator. This is normal. When the in- let connection fitting is inserted and tightened, this plunger will be pushed back by the fitting making all of the adjustments DO NOT REMOVE...
- Page 10 INSTALLATION 2. Remove the metal cap installed over the NG regulator inlet. Metal Cap 3. Install metal cap over LP/Propane regulator inlet. This will keep debris out of regulator. DO NOT use an off the shelf 3/8" NPT pipe plug. This will damage DO NOT REMOVE the plungers located inside the Metal Cap...
- Page 11 INSTALLATION LOCATING HEATER Methods For Attaching Mounting Bracket To Wall This heater is designed to be mounted on a Use only the last hole on each end of mounting wall. For convenience and efficiency, install bracket to attach bracket to wall. Attach mount- heater: ing bracket to a wall only in one of two ways: 1.
- Page 12 INSTALLATION Attaching Mounting Bracket To Wall Placing Heater On Mounting Bracket Note: Wall anchors, mounting screws, and spacers are in hardware package. The hard- 1. Locate two horizontal slots on back panel ware package is provided with heater. of heater (see Figure 12). 2.
- Page 13 INSTALLATION 6. Replace heater onto mounting bracket. 9. Tighten both screws until heater is firmly secured to wall. Do not over tighten. 7. Place spacers between bottom mounting holes and wall anchor or drilled hole. Note: Do not replace front panel at this time. Replace front panel after making gas connec- 8.
- Page 14 INSTALLATION Typical Inlet Pipe Diameters For propane/LP gas, the installer must supply Use 3/8" black iron pipe or greater. Installa- an external regulator. The external regulator tion must include an equipment shutoff valve, will reduce incoming gas pressure. You must union, and plugged 1/8"...
- Page 15 INSTALLATION CHECKING GAS CONNECTIONS 3. Check all joints from gas meter (natural WARNING: Test all gas piping gas installations, see Figure 17) or from and connections for leaks after propane/LP tank (propane/LP gas installa- installing or servicing. Correct tions, see Figure 18) to equipment shutoff valve.
-
Page 16: Operation
• Do not try to light any appliance. which has been under water. • Do not touch any electric switch; do not use any phone in your building. MODEL MNSD300HGA LIGHTING INSTRUCTIONS 1. STOP! Read the safety information above. will light pilot. The pilot is attached to the front of burner. - Page 17 OPERATION Note: If pilot goes out, repeat steps 3 should light. Set control knob to any heat through 7. This heater has a safety inter- level between HI and LOW. lock system. Wait one (1) minute before CAUTION: Do not try to ad- lighting pilot again.
-
Page 18: Inspecting Heater
OPERATION TO TURN OFF GAS TO APPLIANCE Shutting Off Heater Shutting off burner only (pilot stays lit) 1. Turn control knob clockwise to the OFF position. Turn control knob clockwise to the PILOT position. 2. Turn off all electric power to the appliance if service is to be performed. -
Page 19: Care And Maintenance
INSPECTING HEATER Notice: Do not mistake orange flames with yellow tipping. Dirt or other fine particles enter the heater and burn causing brief patches of orange flame. BURNER FLAME PATTERN Figure 24 shows a correct burner flame pat- tern. Figure 25 shows an incorrect burner flame pattern. -
Page 20: Troubleshooting
CARE AND MAINTENANCE CLEANING BURNER PILOT AIR INLET HOLE The primary air inlet hole allows the proper 3. Blow air across the ports/slots and holes amount of air to mix with the gas. This pro- in the burner. vides a clean burning flame. Keep this hole 4. - Page 21 TROUBLESHOOTING Problem Possible Cause Corrective Action Using natural gas and I n l e t p r e s s u r e e x c e e d s Bypass pressure switch. See pilot will not light. 9.5" WC. instructions below.
- Page 22 TROUBLESHOOTING Problem Possible Cause Corrective Action When ignitor button is 1. Gas supply is turned off or 1. Turn on gas supply or open pressed in there is a equipment shutoff valve is equipment shutoff valve. spark at ODS/pilot but closed.
- Page 23 TROUBLESHOOTING Problem Possible Cause Corrective Action Burner backfiring during 1. Burner orifice is clogged or 1. Clean burner orifice (see combustion damaged. Care and Maintenance, page 19). 2. Burner is damaged. 2. Contact customer service. 3. Gas regulator is damaged. 3.
-
Page 24: Service Hints
TECHNICAL SERVICE You may have further questions about installation, operation, or troubleshooting. If so, contact ProCom Heating, Inc. at 1-866-573-0674. When calling, please have your model and serial numbers of your heater ready. www.usaprocom.com... -
Page 25: Replacement Parts
1-866-573-0674 for referral information. ACCESSORIES Purchase these heater accessories from your local dealer. If they can not supply these ac- cessories, contact ProCom Heating, Inc. for information. EQUIPMENT SHUTOFF VALVE For all models. Equipment shutoff valve with 1/8" NPT tap. -
Page 26: Parts
PARTS MODEL MNSD300HGA www.usaprocom.com 200233-01B... - Page 27 PARTS MODEL MNSD300HGA This list contains replaceable parts for your heater. When ordering replacement parts, follow the instructions listed under Replacement Parts on page 25 of this manual. ITEM PART # DESCRIPTION Cabinet Assembly Reflector Unit ML087-01 Upper Glass Retainer...
- Page 28 PARTS MODEL MNSD300TGA www.usaprocom.com 200233-01B...
- Page 29 PARTS MODEL MNSD300TGA This list contains replaceable parts for your heater. When ordering replacement parts, follow the instructions listed under Replacement Parts on page 25 of this manual. ITEM PART # DESCRIPTION Cabinet Assembly Reflector Unit ML087-01 Upper Glass Retainer ML086-01 Glass ML088-01...
- Page 30 NOTES ________________________________________________________________ ________________________________________________________________ ________________________________________________________________ ________________________________________________________________ ________________________________________________________________ ________________________________________________________________ ________________________________________________________________ ________________________________________________________________ ________________________________________________________________ ________________________________________________________________ ________________________________________________________________ ________________________________________________________________ ________________________________________________________________ ________________________________________________________________ ________________________________________________________________ ________________________________________________________________ ________________________________________________________________ ________________________________________________________________ ________________________________________________________________ ________________________________________________________________ ________________________________________________________________ ________________________________________________________________ ________________________________________________________________ ________________________________________________________________ ________________________________________________________________ www.usaprocom.com 200233-01B...
- Page 31 NOTES ________________________________________________________________ ________________________________________________________________ ________________________________________________________________ ________________________________________________________________ ________________________________________________________________ ________________________________________________________________ ________________________________________________________________ ________________________________________________________________ ________________________________________________________________ ________________________________________________________________ ________________________________________________________________ ________________________________________________________________ ________________________________________________________________ ________________________________________________________________ ________________________________________________________________ ________________________________________________________________ ________________________________________________________________ ________________________________________________________________ ________________________________________________________________ ________________________________________________________________ ________________________________________________________________ ________________________________________________________________ ________________________________________________________________ ________________________________________________________________ ________________________________________________________________ www.usaprocom.com 200233-01B...
-
Page 32: Warranty
We make no other warranty, expressed or implied. LIMITED WARRANTY ProCom Heating, Inc. warrants this product to be free from defects in materials and components for ONE (1) year from the date of first purchase, provided that the product has been properly installed by a qualified installer in accordance with all local codes and instructions furnished with the unit, operated and main- tained in accordance with all applicable instructions.
Need help?
Do you have a question about the MNSD300HGA and is the answer not in the manual?
Questions and answers
I cant get the pilot light to light I followed the instructions correctly ??
To troubleshoot the pilot light issue on a Procom MNSD300HGA:
1. Check Gas Supply – Ensure the equipment shutoff valve is fully open.
2. Follow Lighting Instructions – Turn the control knob to OFF, wait five minutes, then try lighting the pilot again by pressing the ignitor button.
3. Manual Lighting – If the ignitor does not work, light the pilot with a match following the Manual Lighting Procedure (page 18).
4. Hold Control Knob – After lighting, keep the control knob pressed for 30 seconds.
5. Check Gas Pressure – If the pilot does not stay lit, gas pressure may be too low. Contact your gas supplier.
6. Consult Troubleshooting Guide – Refer to pages 20-24 for additional troubleshooting steps.
7. Seek Professional Help – If the issue persists, contact a qualified service technician or gas supplier for repairs.
This answer is automatically generated