Sign In
Upload
Download
Table of Contents
Contents
Add to my manuals
Delete from my manuals
Share
URL of this page:
HTML Link:
Bookmark this page
Add
Manual will be automatically added to "My Manuals"
Print this page
×
Bookmark added
×
Added to my manuals
Manuals
Brands
Leica Manuals
Microscope
S Series
User manual
Leica S Series User Manual
Hide thumbs
Also See for S Series
:
User manual
(59 pages)
1
2
3
4
5
6
7
Table Of Contents
8
9
10
11
12
13
14
15
16
17
18
19
20
21
22
23
24
25
26
27
28
29
30
31
32
33
34
35
36
37
38
39
40
41
42
43
44
45
46
47
48
49
50
51
52
53
54
55
56
57
58
59
60
61
62
63
64
65
66
67
68
69
70
71
72
73
74
75
76
77
78
79
80
81
82
83
84
85
page
of
85
Go
/
85
Contents
Table of Contents
Troubleshooting
Bookmarks
Table of Contents
General Instructions
Important Safety Notes
Symbols Used
Safety Instructions
Table of Contents
Contents
Leica S Series
Congratulations
The Modular Design: Everything Is Possible
What Your Stereo Microscope Has to Offer You
Microscopes of the S Series
On We Go
Assembly
Installing the Basic Equipment (Overview)
Focusing Column
Sub-Base for Transmitted Light and Cold Light Source
Optics Carrier and Additional Objective
Available Graticules
Inserting Graticules
Eyepieces
Leica LED Illumination
Camera Design (Leica S9 D and S APO)
Quick Start Guide
An Overview of a S Series Stereo Microscope
Using the Eyepieces
The Correct Interpupillary Distance
Focusing
Changing Magnification (Zooming)
Limiting Zoom Range
Regulating the Resistance of the Focusing Drive
Changing the Position of the Optics Carrier
Diopter Settings and Parfocality: 1 Adjustable & 1 Fixed Eyepiece
Dioptric Correction with Two Adjustable Eyepieces
Connectivity of the S9 I Stereo Microscope with Integrated Camera
The S9 I with Integrated Camera
S9 I: Overview
Get Set
USB Mode - Capturing and Adjusting Images Using a Computer
HDMI Mode - Capturing Images Without a Computer or Without a Wireless Device
Adjusting Settings While in SD Mode
Ethernet Mode - Capturing and Adjusting Images Using a Network
Extend
How to Install the Coded Zoom
Installation of the Coded Zoom in las X
The Camera Remote Control
Optional Remote Control
Viewing Images and Movies with the Optional Remote Control
Calling up the Camera Menu
COLOR (Automatic White Balance)
COLOR (Manual White Balance)
Exposure
Resolution
SETUP CAMERA (Camera Settings)
Setup User
Pairing Cameras with Remotes
Photography & Video
Photography with the Leica S9 D and S APO
Dimensional Drawings in MM
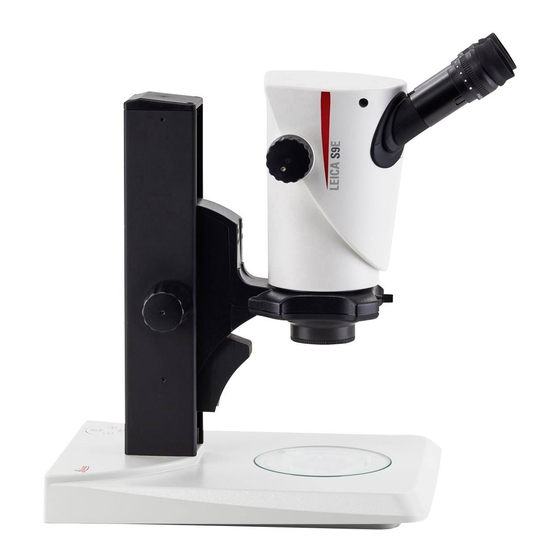
Leica S9 E with Incident Light and Transmitted Light Illumination
Leica S9 D with Incident Light and Transmitted Light Illumination
Leica S9 I with Incident Light and Transmitted Light Illumination
Leica S APO with Incident Light and Transmitted Light Illumination
Technical Data
Appendix
Calculating the Total Magnification/Field of View Diameter
Troubleshooting
Contact Persons, Care, Maintenance, Transport
Advertisement
Quick Links
1
General Instructions
2
Installing the Basic Equipment (Overview)
3
Usb Mode - Capturing and Adjusting Images Using a Computer
Download this manual
Leica S Series
User Manual
Table of
Contents
Previous
Page
Next
Page
1
2
3
4
5
Advertisement
Table of Contents
Need help?
Do you have a question about the S Series and is the answer not in the manual?
Ask a question
Questions and answers
Related Manuals for Leica S Series
Microscope Leica S Series User Manual
(59 pages)
Microscope Leica StereoZoom User Manual
(48 pages)
Microscope Leica SP2 Manual
Confocal microscope (15 pages)
Microscope Leica SP2 Manual
(10 pages)
Microscope Leica ES2 User Manual
(81 pages)
Microscope Leica Stereo 1 Service Manual
(9 pages)
Microscope Leica SP5 confocal User Manual
(65 pages)
Microscope Leica S7 E User Manual
(45 pages)
Microscope Leica SP8 Training Manual
Confocal/multiphoton microscope las af v3.3, optical imaging & vital microscopy core baylor college of medicine 2017 (26 pages)
Microscope Leica SP8 Manual
Inverted confocal microscope (12 pages)
Microscope Leica SP8 Manual
Upright confocal microscope (15 pages)
Microscope Leica SP8-X Abridged Instructions
Confocal microscope (12 pages)
Microscope Leica S9 i User Manual
(85 pages)
Microscope Leica S9 E User Manual
(85 pages)
Microscope Leica SP5 II Instructions Manual
Laser scanning confocal microscope (16 pages)
Microscope Leica Stellaris 8 FALCON Quick Manual
(7 pages)
This manual is also suitable for:
S9 d
S apo
S9 i
S9 e
Table of Contents
Print
Rename the bookmark
Delete bookmark?
Delete from my manuals?
Login
Sign In
OR
Sign in with Facebook
Sign in with Google
Upload manual
Upload from disk
Upload from URL


Need help?
Do you have a question about the S Series and is the answer not in the manual?
Questions and answers