Leica SP8 Manual
Inverted confocal microscope
Hide thumbs
Also See for SP8:
- Training manual (26 pages) ,
- Manual (15 pages) ,
- Quick start manual (2 pages)
Advertisement
Quick Links
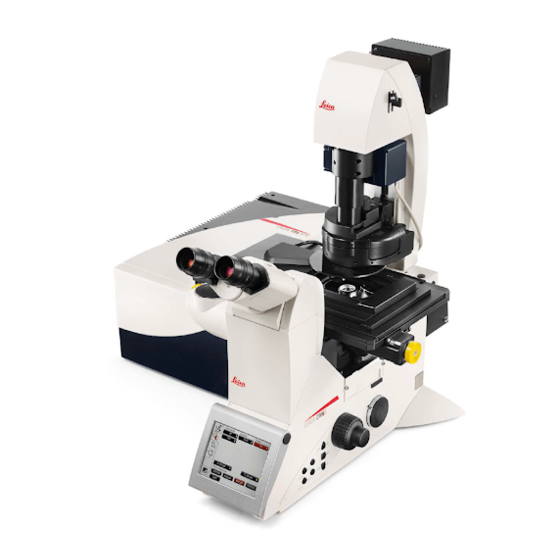
Leica SP8 inverted confocal microscope
• System description:
• DMi8, inverted microscope: BF, Fluo (blue, green, red)
• BF TL Detector (transmitted light image, no additional illumination or time)
• Scanning stage with z-Galvo and Navigator (overviews, selection of regions of
interest,...)
• Scanner with Scanfield Rotation
• 2 PMT detectors (photo multipliers)
• 1 Hybrid Detector normal (more sensitive and no detector noise nor background)
• 1 Hybrid Detector SMD (fast, for FLIM, FALCON)
• Laser lines: 405, White Light Laser (470-670nm, up to 8 laser lines simultaneously)
• FALCON including Pulse Picker for WLL
• LIGHTNING (Deconvolution) for Superresolution and super sensitive imaging
Objectives:
•
• Objective PL FLUOTAR 10x/0.30 (overview)
• Objective PL APO 20x/0.75 dry CS2
• Objective PL APO 20x/0.75 IMM Corr CS2 (Oil, water, glycerol, silicon oil)
• Objective PL APO 40x/1.20 Water Corr CS2
• Objective PL APO 63x/1.30 Glycerol Corr CS2
• System Start Up
• Switch on 'PC-microscope' button (1). Gives power on the computer and microscope
controller
• Switch on 'scanner power' (2)- enables the scanning head
• Switch on 'Laser power' (3)
• Turn the key (4) in position 'on'- enables Laser shutters
• Switch on fluorescent lamp(5) for visual examination
• (if temperature control needed) switch on the temperature controller (6). Set up
temperature for the heating stage (port 2) and objective heater (port 1)
!!!!!! If you are not using Z-galvo stage, always place it UPSIDE DOWN on the
optical table
• For imaging: start LAS AF software. Select configuration Machine.xlhw and DMI8
microscope (default). Load of "Standard" settings possible (Fig.1)
• !!!!! Never use "Use last system settings"
November 18,2019
Advertisement

Related Manuals for Leica SP8


Summary of Contents for Leica SP8
- Page 1 Leica SP8 inverted confocal microscope November 18,2019 • System description: • DMi8, inverted microscope: BF, Fluo (blue, green, red) • BF TL Detector (transmitted light image, no additional illumination or time) • Scanning stage with z-Galvo and Navigator (overviews, selection of regions of interest,…)
- Page 2 Fig.1 In the LAS AF software, go to ‘configuration’ –‘lasers’- select the lasers you want to • use. Default Laser power of the WLL is 85% Fig.2 • make sure the pulse picker is set to 80 mHz, otherwise laser power is significantly lower (Fig.2) •...
-
Page 3: Before You Start
• small intensity wheel (same as for BF) on the left side of the microscope stand lets you change the LED intensity • FOCUS on your sample !!! • Visual illumination is disabled during scanning, the system is automatically changing to "CS"... - Page 4 • The system is turning on laser lines (tunes to the excitation maxima of selected dyes), activates detectors with appropriate bandwidth and shows the emission spectra of selected dyes. • Switch on T-PMT if needed for transmitted light imaging. • Press “Live” to get an image preview •...
- Page 5 Adjust the pinhole: Changes will alter the confocal section thickness And the SNR of the image ; default is AU 1 Adjust your Signal to Noise ratio (SNR): apply frame or line averaging, reduce the scan speed check the pixel dwell time •...
- Page 6 • select line, frame or stack sequential • Set up first configuration • ATTENTION!!! in line sequecial only PMTs and Lasers are switched on/off between the lines (laser shutters, detector bandwidth remain the same, NO HARDWARE MOVEMENT between lines is possible !!! •...
- Page 7 Select ‘Z-galvo’ or z-Wide in the ‘Z-stack’ menu Start scanning with ‘live’. Use ‘Z position’ on the control panel, select the first slice. Press ‘begin’ in the Z-stack menu. Move focus up with ‘Z position’, select the most superficial slice, press ‘end’. Set up Z-step size according to your needs activate system optimized for Nyquist settings according to the objective and pinhole settings used...
- Page 8 • Press ‘Apply’ • To start time series, press ‘start’ • Tile Scan See the manual for Navigator module on the desktop • Saving your data • go to “Open projects” menu • Save your data directly to DATAINT (E) on the computer or in your external file server •...
- Page 9 • Acquiring confocal images using the Lightning – Deconvolution environment Fig.9 • Choose Lightning option from the drop down menu (Fig.9) • The Lightning slider (Fig.10) controls the deconvolution strength by acting on imaging parameters such as: Pixel size, scan speed, number of averages, pinhole settings Fig.10...
- Page 10 • Select your deconvolution Strategy: Adaptive or Global !!! Note: In the Adaptive setting Background and bright pixels are treated differently which might lead to un-linearities in your result (may create problems in quantitative measurements). The Global method is treating every pixel in the same way!!! •...
- Page 11 • Switching the system off: • Switch off lasers in the LAS AF software- ‘Configuration’-‘lasers’ • Shut down LAS AF, shut down the computer. • Turn the ‘Laser emission’ key (4) to the ‘off’ position • Then switch off ‘Laser Power’ (3), ‘Scanner Power’ (2) and ‘PC/Microscope’ (1). •...
-
Page 12: Laser Safety Instructions
Laser Safety Instructions • During operation of class 3B and class 4 lasers red warning lights have to be switched on manually • Red warning light at the door of the room, containing laser-based equipment, prohibits the entrance • Optical path of the laser beam at all setups has to stay intact and should never be disassembled by a user.
Need help?
Do you have a question about the SP8 and is the answer not in the manual?
Questions and answers