Matrix ETERNITY NE Quick Start Manual
Hide thumbs
Also See for ETERNITY NE:
- System manual (997 pages) ,
- Quick start manual (48 pages) ,
- User manual (23 pages)
Table of Contents
Advertisement
Advertisement
Table of Contents

Related Manuals for Matrix ETERNITY NE


Summary of Contents for Matrix ETERNITY NE
- Page 1 ETERNITY NE Quick Start...
- Page 3 ETERNITY NE The Next Generation IP PBX for Small Businesses Quick Start...
- Page 4 This is a general documentation for all models/configurations of the product. The product may not support some of the features/facilities described in this document. Matrix Comsec makes no warranties with respect to this documentation and disclaims any implied warranties. While every reasonable effort has been made to ensure accuracy of content in this document, Matrix Comsec assumes no responsibility for errors or omissions in this document.
-
Page 5: Table Of Contents
Contents Know Your ETERNITY NE ................1 Overview ......................1 Ports and Connectors .................. 2 LED ......................2 Installing ETERNITY NE ................. 3 Preparing for Installation ................... 3 Selecting the Site ..................3 Getting Started ....................4 Package Contents ..................4 Installing Optional Modules ................ - Page 6 Configuring ETERNITY NE ................31 Using the Wizard ..................... 31 Using Selective Configuration ................. 32 Activating License Key ..................33 Instructions for Matrix Channel Partners..............33 Instructions for Customers..................41 Table of Contents...
-
Page 7: Know Your Eternity Ne
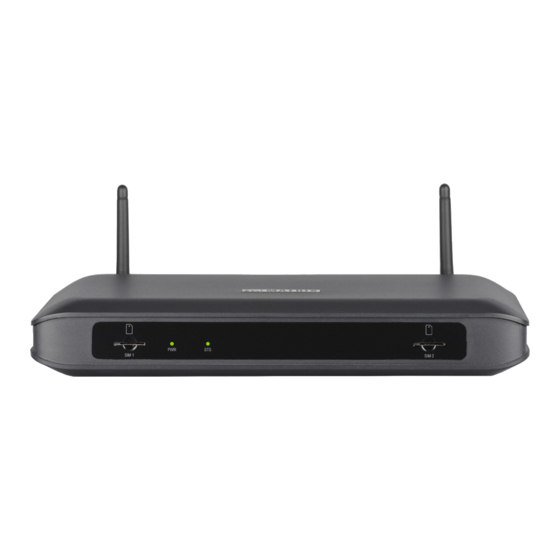
Know Your ETERNITY NE Thank you for choosing the Matrix ETERNITY NE! Please read the instructions in this Quick Start to install and operate this feature-rich IP PBX. This is a common Quick Start for all configurations of ETERNITY NE. -
Page 8: Ports And Connectors
3. VoIP interface is optional. However to connect SIP Trunks/IP extensions, VoIP module must be present in the ETERNITY NE. ETERNITY NE has inbuilt 8 IP Extensions. To connect another 8 IP extensions, you must purchase the IP8 license. Ports and Connectors... -
Page 9: Installing Eternity Ne
You may select any standard telephone instrument like rotary phone, Pulse/Tone switchable push-button phone, Feature phone or Cordless phone. • A fax machine, if you want to connect one to the SLT Port of ETERNITY NE. • One or more active, analog trunk lines from the CO network, as required. -
Page 10: Getting Started
Please dispose-off used Batteries. For Safety Instructions, see “Protecting ETERNITY NE and Yourself” in the System Manual. Getting Started • Unpack ETERNITY NE and verify the package contents. In case, any of the items is missing or damaged, contact your Dealer/Distributor. Package Contents •... - Page 11 • When the module is seated firmly on the studs on the mainboard, secure the module with the screws. • Remove the rubber cap and fix the antenna holder of the Antenna wire onto the Antenna connector of the enclosure. Antenna Antenna Wire Holder Matrix ETERNITY NE Quick Start...
- Page 12 Patch antenna connector • Similarly, you can install another GSM/UMTS module. • If you do not want to install any other module, replace the top cover and secure the cover with the screws. Matrix ETERNITY NE Quick Start...
-
Page 13: Voip Module
VMS License. • Make sure power supply is turned off before you begin installation. • Unscrew and remove the top cover of the enclosure. Keep the screws and the cover aside. Matrix ETERNITY NE Quick Start... -
Page 14: Connecting To Trunks
CO Trunks (Analog two-wire Trunks) • Use standard, good quality, twisted-wire pair telephone cables with RJ11 plugs to connect the CO Ports of ETERNITY NE to the Trunk Lines from your CO (central office). Mobile Networks Enabling SIM PIN Protection •... -
Page 15: Voip Network
Once registration with the mobile network is completed, the Mobile Port can be used. The UMTS Mobile Ports of ETERNITY NE also provide Wireless WAN Interface. If you want to use wireless WAN over the Mobile Port, you must have UMTS module installed in the system and Internet services activated on the SIM. - Page 16 IP network, which may be Public Internet or a LAN. If connecting to the Public IP Network, • Plug one end of the RJ45 Ethernet cable into the Ethernet Port of ETERNITY NE and the other end into the Broadband Router/Modem.
- Page 17 If connecting to a Private Network (Behind a NAT Router), • Plug one end of the RJ45 Ethernet cable into the Ethernet Port of ETERNITY NE and the other end into the LAN Switch/Hub. LAN Switch/ DSL Modem/ Router ISDN...
-
Page 18: Connecting Extensions
Connecting SIP Extensions ETERNITY NE supports up to 16 SIP Extensions. You can register SIP enabled devices like an IP Phone, a Softphone, Analog Telephone Adapter, as SIP Extension of ETERNITY NE. The first 8 SIP extensions are free. To increase the number of SIP extensions, you will require the IP8 License. - Page 19 When you register any SIP device, other than the Extended IP Phone, on the public network as SIP Extension, you must configure the Registrar Server Address of ETERNITY NE, the Registrar Server Port, the SIP ID, Authentication ID and Password in the SIP device.
- Page 20 LAN Switch/Hub SIP Extensions If ETERNITY NE is connected to a Private Network (Behind the NAT), • Connect the Extended IP Phone, or any Open IP Phone to the LAN Switch. • Register any SIP device (Extended IP Phone/ Softphone client or Open IP phone) on the public network as SIP Extension.
-
Page 21: Sparsh Vp248
• Register any SIP device (Extended IP Phone/Softphone client or Open IP phone) on the public network as SIP Extension. Wireless WAN (Mobile1) UMTS LAN Switch/Hub Ethernet SLT Extensions SIP Extensions SPARSH VP248 SPARSH VP248 is available in two models — SPARSH VP248S and SPARSH VP248P. SPARSH VP248S Matrix ETERNITY NE Quick Start... - Page 22 • For instructions on installing and connecting the phone, refer the SPARSH VP248 Quick Installation Guide (QIG). • For detailed configuration instructions, refer the ETERNITY NE System Manual. • For information regarding the features that can be accessed from the phone, refer the EON48_310_SPARSH VP248_310_User Guide.
-
Page 23: Sparsh Vp310
• For instructions on installing and connecting the phone, refer the SPARSH VP310 Quick Installation Guide (QIG). • For detailed configuration instructions, refer the ETERNITY NE System Manual. • For information regarding the features that can be accessed from the phone, refer the EON48_310_SPARSH VP248_310_User Guide. -
Page 24: Sparsh Vp330
• For instructions on installing and connecting the phone, refer the SPARSH VP330 Quick Installation Guide (QIG). • For detailed configuration instructions, refer the ETERNITY NE System Manual. • For information regarding the features that can be accessed from the phone, refer the SPARSH VP330 User Guide. -
Page 25: Sparsh Vp510
• For instructions on installing and connecting the phone, refer the SPARSH VP510 Quick Installation Guide (QIG). • For detailed configuration instructions, refer the ETERNITY NE System Manual. • For information regarding the features that can be accessed from the phone, refer the EON510_SPARSH VP510 User Guide. -
Page 26: Varta Win200
VARTA WIN200 • For detailed configuration instructions, refer the ETERNITY NE System Manual. • For instructions on installing the Windows Client and operating the features, refer the MATRIX VARTA WIN200 User Guide. To download the respective documents, click https://www.matrixtelesol.com/product- manuals.html... -
Page 27: Varta Mobile Softphone Clients
Matrix SPARSH M2S Android Application • For detailed configuration instructions, refer the ETERNITY NE System Manual. • For instructions on installing the Softphone Client and operating the features, refer the Matrix SPARSH M2S Android Application User Guide. To download the respective documents, click https://www.matrixtelesol.com/product-... - Page 28 Matrix SPARSH M2S iPhone Application • For detailed configuration instructions, refer the ETERNITY NE System Manual. • For instructions on installing the Softphone Client and operating the features, refer the Matrix SPARSH M2S iPhone Application User Guide. To download the respective documents, click https://www.matrixtelesol.com/product-...
-
Page 29: Setting Up The Voice Mail System
Setting up the Voice Mail System To complete the installation of the Voice Mail System (VMS), all you need to do is: • connect a computer to the Ethernet Port of ETERNITY NE using the RJ45 cable supplied for the port. - Page 30 Matrix ETERNITY NE Quick Start...
-
Page 31: Accessing Jeeves
To connect a standalone computer, • Plug one end of the RJ45 cable supplied into the Ethernet Port of ETERNITY NE. Plug the other end into the LAN port of the computer. • Make sure the IP Address of the computer and the Ethernet Port of ETERNITY do not conflict, and that both are in the same Subnet. - Page 32 • Enter the IP address of the Ethernet Port of ETERNITY in the address bar of the browser. • You will be redirected to the HTTPS protocol for secure access. • Click the https://192.168.1.101 link. Matrix ETERNITY NE Quick Start...
- Page 33 • Click the Login button. • You will be prompted to change the default password. To avoid unauthorised access, we recommend you to change the password. Make sure it is strong and is kept confidential. Matrix ETERNITY NE Quick Start...
- Page 34 The left pane shows the links Basic Settings, Advanced Settings, Maintenance and Status. Basic Settings break down the complexities of configuration and are sufficient to get your system into operation. Advanced Settings enable you to configure the advanced features and facilities of ETERNITY Matrix ETERNITY NE Quick Start...
- Page 35 Maintenance allows you to carry out system maintenance and monitoring like uploading configuration and firmware, debug, system restart. Status allows you to view the system details and status of all trunk and extension ports. • You may now configure the Basic Settings of ETERNITY NE. Matrix ETERNITY NE Quick Start...
- Page 36 Matrix ETERNITY NE Quick Start...
-
Page 37: Configuring Eternity Ne
• The Expand button expands a link on the page to display all parameters under the link. • The Collapse button collapses a link hides all the parameter under a link on the page. Matrix ETERNITY NE Quick Start... -
Page 38: Using Selective Configuration
• Get familiar with the buttons and icons listed below before you begin to change the settings of the parameters on each page. More: displays all the parameter links on the page. Less: displays the essential parameter links on the page. Expand: expands a link to display all parameters under the link. Matrix ETERNITY NE Quick Start... -
Page 39: Activating License Key
You may activate your License Online. For this, keep the following items ready: • The License Voucher containing the 16-digit PIN. • A valid, unique User ID and Password from the Matrix License Support Centre. • Access to Internet. • Current License Key of the system. - Page 40 The features and functions that are currently available on your system appear under Service Profile. To activate the License Key online, • Keep your Current License Key and the License Voucher ready. • Open a new window on your browser and enter http://www.matrixcomsec.com/ MatrixLicense in the address bar. Matrix ETERNITY NE Quick Start...
- Page 41 • The Login to Access page will open. • Enter your User Name and Password provided by Matrix and click the Login button. Matrix ETERNITY NE Quick Start...
- Page 42 • As Product Family, select the ETERNITY option. • In the Current License Key field, type the current product license key you noted or paste the current product license key you copied from the License Management page of Jeeves. Matrix ETERNITY NE Quick Start...
- Page 43 • Click View button. • The page will show the current License Profile on ETERNITY. Click the Next button to continue. The License Activation page opens. Matrix ETERNITY NE Quick Start...
- Page 44 Details. • The details appear in the Product Family, Product Name, Product Variant fields. • Click the Next button. Your Current License Profile and your New License Profile will appear on this page. Matrix ETERNITY NE Quick Start...
- Page 45 • Click the Activate button and wait for a few seconds, as the activation is initiated. On successful activation, the confirmation message will appear on your screen along with the activation date and time. You will also be sent a confirmation mail to your e-mail ID (registered with Matrix). Matrix ETERNITY NE Quick Start...
- Page 46 • Open the License Management page under Advanced Settings. • Enter or paste the copied new License Key generated in the Enter License Key field. • Click Submit button. The Service Profile on this page will be updated according to the license. Matrix ETERNITY NE Quick Start...
-
Page 47: Instructions For Customers
• To log off, click Logout. If you are unable to use Online Activation of the License Key or have no internet access, contact the Matrix License Support Centre for assistance in generating the new License key. Instructions for Customers To activate your License, you would need the License Voucher containing the 16-digit License PIN. - Page 48 You may view the features and functions that are currently available to you under Service Profile. • Send your Current License Key and the License PIN (on the Voucher) to the Matrix License Support Centre. • You will receive a new License Key.
- Page 49 The Service Profile on this page will be updated accordingly. • To log off, click Logout. The current License Key and Service Profile will remain unchanged when the system is set to default or the firmware is upgraded. Matrix ETERNITY NE Quick Start...
- Page 50 Matrix ETERNITY NE Quick Start...
- Page 51 Matrix ETERNITY NE Quick Start...
- Page 52 MATRIX COMSEC Head Office 394-GIDC, Makarpura, Vadodara - 390010, India. M: +91 85111 73344 E-mail: Customer.Care@MatrixComSec.com www.MatrixTeleSol.com...
Need help?
Do you have a question about the ETERNITY NE and is the answer not in the manual?
Questions and answers