Table of Contents
Advertisement
Advertisement
Table of Contents

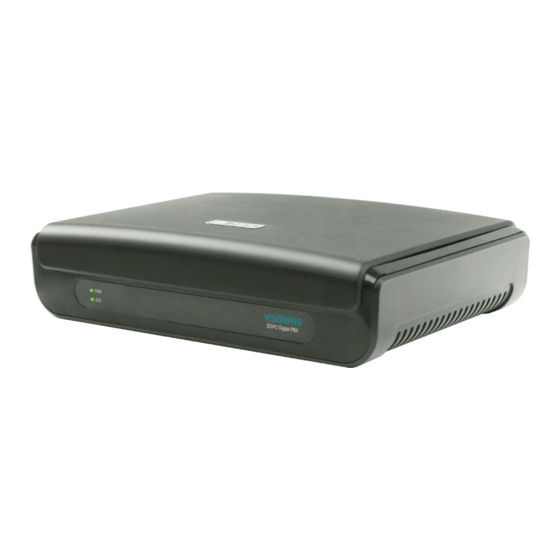
Summary of Contents for Matrix Visionpro
- Page 1 VISIONPRO Quick Start...
- Page 2 VISIONPRO The Digital PBX for Small Offices Quick Start...
- Page 3 Documentation Disclaimer Matrix Comsec reserves the right to change, at any time, without prior notice, the product design, specifications, components, as engineering and manufacturing may warrant. This is a general documentation for all models/configurations of the product. The product may not support some of the features/facilities described in this document.
-
Page 4: Table Of Contents
Contents Know Your VISIONPRO ................. 1 Overview ......................1 Installing VISIONPRO ..................3 Preparing for Installation ................... 3 Getting Started ....................3 Connecting VISIONPRO .................. 4 Power On VISIONPRO ..................6 Configuring VISIONPRO ................9 Test Calls ......................14 Table of Contents... -
Page 5: Know Your Visionpro
Thank you for choosing the Matrix VISIONPRO. Please read the instructions in this Quick Start carefully to install and configure it. This Quick Start is meant to help you install and configure the VISIONPRO quickly. For detailed instructions on configuring the product and its feature description, refer to the System Manual. - Page 6 This Quick Start is written with reference to the default configuration, VISIONPRO 308, unless otherwise specified. Ports and Connectors Port Description Power Port To connect the external power adapter of 12V DC (input). Earth To connect the telecom earth to the system.
-
Page 7: Installing Visionpro
• As many standard analog telephone instruments with CLI display to connect as SLT stations. • A fax machine, if you want to connect one to the SLT Port of VISIONPRO. • One or more active, analog trunk lines from the CO network, as required. -
Page 8: Connecting Visionpro
Package Contents The ideal sales package for VISIONPRO should contain the following items: • One VISIONPRO Unit • A 12V Power Adapter • A Wall Mounting Template • Two Screw Grips • Two M7/30 Screws You can view or download the documentation of the product by scanning the QR code printed on the Product Label/Packaging Label. - Page 9 • Use standard, good quality, twisted-wire pair telephone cables to connect the CO Ports of VISIONPRO to the Trunk Lines from the CO (central office) network. • Strip off about half a centimeter of the insulation off the wire ends of the CO cable.
-
Page 10: Power On Visionpro
• Make sure system’s earthing is proper. • Plug in the power adapter of VISIONPRO into the power outlet. Ensure proper contacts. Switch ON the system. Observe the reset cycle on the front panel of the system. Reset Cycle •... - Page 11 System Powered ON Continuous (Power) System Powered OFF Slow Blinking Health is Normal 1sec ON 1sec OFF 500ms ON 500ms STS (System Fast Blinking AC Impedance test is running Status) Continuous ON/ System fault Continuous OFF Matrix VISIONPRO Quick Start...
-
Page 12: Configuring Visionpro
Configuring VISIONPRO All parameters of VISIONPRO are configured by dialing the relevant command strings from a station phone connected to the system. Phone Wizard only allows programming of the basic parameters. For detailed programming, refer the VISIONPRO System Manual. Follow the instructions given below to configure the system using the Phone Wizard from the SE mode. - Page 13 Ext is the flexible number of the station. Flexible number can be of 1,2,3 or 4 digits. Allowed List (AL) is from 0 to 7. Denied List (DL) is from 0 to 7. Clear All the Features To clear all features for a station, • Dial 343-Ext Where, Matrix VISIONPRO Quick Start...
- Page 14 To enable/disable a trunk and assign it a dial type, • Dial 41-Trunk-Enable/Disable Flag-Dial Type Flag To set the enable/disable flag and the dial type for all trunks at once, • Dial 41-*-Enable/Disable Flag-Dial Type Flag Where, Matrix VISIONPRO Quick Start...
- Page 15 Where, Trunk is from 0 to 2. Ext1 to Ext4 are the flexible numbers of destination stations. Flexible number can be of 1,2,3 or 4 digits. Maximum four destinations can be programmed for a single trunk. Matrix VISIONPRO Quick Start...
- Page 16 0 for Hunting Off 1 for Round Robin 2 for Delayed Simultaneous 3 for Immediate Simultaneous To exit the Phone Wizard programming mode, • Dial 0. You can exit the programming mode by dialing this command at any time. Matrix VISIONPRO Quick Start...
-
Page 17: Test Calls
If the caller is an external caller, and the trunk call lands on your station, then your phone rings as - Trin..Trin....Trin..Trin....This is called double ring. The ring type differentiates an internal caller from an external caller. Matrix VISIONPRO Quick Start... - Page 18 MATRIX COMSEC Head Office 394-GIDC, Makarpura, Vadodara - 390010, India. Ph: (+91)1800-258-7747 E-mail: Customer.Care@MatrixComSec.com www.MatrixTeleSol.com...


Need help?
Do you have a question about the Visionpro and is the answer not in the manual?
Questions and answers