Table of Contents
Advertisement
Quick Links
Advertisement
Table of Contents

Subscribe to Our Youtube Channel
Related Manuals for Kichler Lighting Eris


Summary of Contents for Kichler Lighting Eris
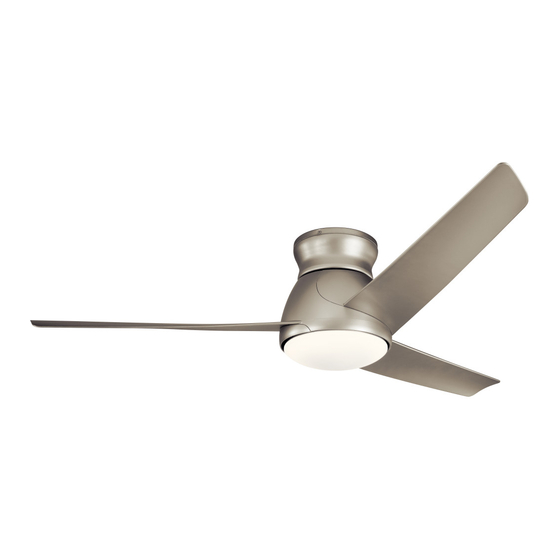
- Page 1 60" Eris LED...
-
Page 3: Table Of Contents
INSTALLING THE WALL CONTROL ………………………… 15 HANGING THE FAN ……………………………………………... 7 CONTROL SYSTEM SET-UP …………………………………… 16 INSTALLATION OF SAFETY SUPPORT ……………… 9 OPERATING INSTRUCTIONS …………………………………… 16 ELECTRIC CONNECTIONS ………………………………… 10 TROUBLESHOOTING ……………………………………………… 17 FINISHING THE INSTALLATION ………………………… 11 FCC WARNING ………………………………………………………….. 18 60" Eris... -
Page 4: Safety Rules
WARNING: WARNING:... -
Page 5: Tools Required
3) Safety cable hardware : H. Glass Assembly Wood screw (1) ,Spring washer (1), I. Wall Control System Flat washer (1) 4) Balance kit 5) Light Kit hardware: screw (4) 6) Mounting plate cover hardware: screw (4); screw with washer (4) 60" Eris... -
Page 6: Mounting Options
MOUNTING OPTIONS If there isn’t an existing UL (cUL for Canadian Installation) listed mounting box, then read the following instructions. Disconnect the Secure the outlet box directly to the building structure. Use appropriate fasteners and building materials. The outlet box and its Outlet Box support must be able to fully support the moving weight of the fan (at least 50 lbs). -
Page 7: Hanging The Fan
Step 3. Proceed with installing the rest two blades in the same way, be sure the tab on the blade already installed be inserted into the cave on the blade to be installed in place.(Fig. 7) Fig. 7 60" Eris... - Page 8 Screw with Washer HANGING THE FAN Mounting Plate Cover Step 4 . Carefully feed the wires up through the mounting plate cover, lightly attach mounting plate cover over the motor and securely tighten with three (3) screws with washer found in mounting plate cover hardware bag.(Fig. 8) Fig.
-
Page 9: Installation Of Safety Support
Tighten the wood screw Wood Screw securely. (Fig. 12) NOTE: Although the safety support cable is required for Canadian installations only. It’s a good idea to make the attachment with any installation. Fig. 12 60" Eris... -
Page 10: Electric Connections
MAKE THE ELECTRIC CONNECTIONS WARNING: To avoid possible electrical shock, be sure you have turned o the power Outlex box Black (hot) at the main circuit panel before wiring. Follow the steps below to connect the fan to Green or bare copper (ground) Black ("AC IN L") your household wiring. -
Page 11: Finishing The Installation
Step 1. Lift up the motor assembly onto the mounting plate, align the three (3) holes on the motor assembly and mounting plate, securely tighten them with three (3) screws found in mounting plate cover hardware bag.(Fig. 15) Fig. 15 60" Eris... -
Page 12: Installing The Switch Housing
INSTALLING THE SWITCH HOUSING Step 1. Remove one of three(3) screws preinstalled on adapter plate and keep Adapter Plate for later use. Loosen the other two (do not remove). Place the two slot holes on the switch housing over the 2 screws previously loosened from the adapter plate . -
Page 13: Installing Without Light Kit
IMPORTANT:Must install and tighten three (3) light kit assembly screws, otherwise may destroy your fan. Step 2. Assemble the steel cap to the switch housing by twisting in a clockwise direction. (Fig.18 ) Switch Housing Steel Cap Fig. 18 60" Eris... -
Page 14: Installing The Led Light Kit And Glass
INSTALLING THE LED LIGHT KIT AND GLASS NOTE: Before continuing installation, confirm that the power is still turned o at the main Switch Housing circuit breaker or by removing the circuit fuse. Turning the power o using a wall switch is not su cient to prevent electrical stock. -
Page 15: Installing The Wall Control
BLACK leads (hot) together and push back inside the outlet box. (Fig. 21) or select the desired location with a new wall outlet box. Step 2. Use the screws provided to secure the wall control to the outlet box.(Fig. 22) Fig. 22 60" Eris... -
Page 16: Control System Set-Up
CONTROL SYSTEM SET-UP Step 1. After installation is complete, press the LEARN button for 3 seconds within 30 seconds once AC power is turned on. Fan will turn on at medium speed and light (if installed) will turn on. This confirms that the SMART SYNC setting is active and ok. (Fig. 23) Step 2. -
Page 17: Troubleshooting
Repeat for each blade. The distance deviation should be equal within 1/8". 3.Use the enclosed Blade Balancing Kit if the blade wobble is still noticeable. 4.If the blade wobble is still noticeable, interchanging two adjacent (side by side) blades can redistribute the weight and possibly result in smoother operation. 60" Eris... -
Page 18: Fcc Warning
TROUBLESHOOTING Problem Solution Remote control 1.Ceiling Fans with remote control systems CAN NOT be operated in conjunction with any other control malfunction. system EXCEPT a basic On/O wall switch, if desired. FCC WARNING This device complies with part 15 of the FCC Rules. Operation is subject to the following two conditions: (1) This device may not cause harmful interference,and (2) this device must accept any interference received, including interference that may cause undesired operation. - Page 19 60" Eris...
Need help?
Do you have a question about the Eris and is the answer not in the manual?
Questions and answers