Table of Contents
Advertisement
Advertisement
Table of Contents

Subscribe to Our Youtube Channel
Related Manuals for Retevis RT72


Summary of Contents for Retevis RT72
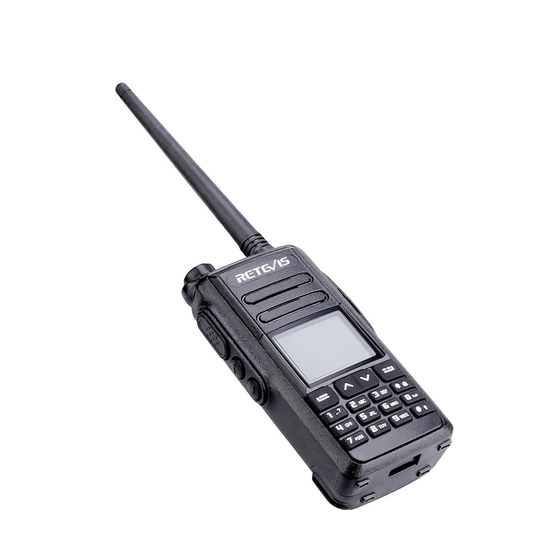
- Page 1 RT72...
- Page 2 TO USERS Thank you for your favor with our products. We are dedicated to providing high performance and high stability radio communication products. This two-way radio is no exception. The radio is a DMR dual-slot digital walkie-talkie developed and produced by my team with 1024 memory channels, full-color LCD display and full keyboard hand-tuning function.
- Page 3 SECURITY OVERVIEW standards for safe exposure to RF radiation. These standards consist of: FCC Regulations ● United States Federal Communications Commission, Federal Communication Commission (FCC) requires that Code of Federal Regulations; 47CFR part 2 sub-part J; all radio communication products should meet the ●...
- Page 4 MAIN FEATURES ● Manual writing-frequency Supports channel / frequency mode, allows manual ● Broadband radios writing-frequency in frequency mode, and programming Support UV double segment, frequency range software can be used to set the required frequency without UHF400.000-470.000MHz / VHF136.000-174.000MHz connecting the computer ●...
- Page 5 CONTENTS ITEMS IN THE PACKAGE ITEMS IN THE PACKAGE Please unpack carefully and check if all items listed below are received. RADIO OVERVIEW 02~07 If any item is missing or damaged, please contact your dealer. PREPARATION BEFORE USE 08~12 Item Quantity (PCS) BASIC OPERATION 13~22...
- Page 6 RADIO OVERVIEW 1.2. Description of LCD Icons Icon Icon name Description of product status Antenna The more signal bars, the stronger the signal is State indicator Signal strength icon lamp LED Indicator Transmission The current channel transmits at high power power icon The current channel transmits at low power Direct mode slot...
- Page 7 2. Description of Key Channel mode, changing the channel forward. ]key Move right in SMS editing interface. Switch between transmission and reception; when [PTT] transmitting, press this key and speak to the In standby mode, short press to switch between Transmit key microphone;...
- Page 8 3. Programmed Key Switch to the monitor squelch mode when this key is pressed, and return to the receive Monitor In order to improve the operational convenience, the function shortcut squelch mode when the key is pressed again. keys provided by this product are [SK1] key, [SK2]key, [TK1] key. For the Quick access to battery power.
- Page 9 PREPARATION BEFORE USE 1.4 Install external Headphones and Microphone (Optional Separately) 1.Accessories installation Open the headset cover, the headset plug into the headset 1.1 Install and Remove the Antenna hole will be ok. When you do not need to use the headset, Turn off the radio and insert the antenna into the mounting unplug the headset plug from the earphone jack and cover hole and turn clockwise.
- Page 10 Indicator display Current charge status 2)Do not short-circuit the battery terminals or discard the Red light In charging battery in a fire. Do not disassemble the battery pack. When Green light The charging is completed the battery is discarded, please put into a dedicated battery recycling box.
- Page 11 BASIC OPERATION 2)Dusting the battery contacts may affect the battery life. Please wipe the contacts with a clean, dry cloth before 1. Power on the Radio inserting the batteries into the radios. To turn on the power, turn the [Power Switch/Volume Control] knob clockwise until you hear a "click"...
- Page 12 You can select a zone in two ways: When the radio is standby, press [Up and Down Screen] 3.1 Select by programming key: key to switch the primary and secondary channels. If the dealer has set the [Zone Up] and [Zone Down] 1) The black pointer points to the primary channel and shortcuts key for you, press this shortcut to switch to the...
- Page 13 2) The top line of the screen displays status icons such as 2) The top line of the screen shows the status icons such RSSI. In the display area below the top line: the first line as RSSI. In the display area below the top line, The first shows the group alias, the group call icon is displayed in line shows a Private Call, the Private Call icon is displayed the middle and the received target band (CH A or CH B) is...
- Page 14 3) After the termination of all calls, the radios will return to 4) Release the [PTT] key to answer. When the target radio the screen before receiving the call. If "channel idle tone" is replies, the LED indicator will light green. The group call enabled, you will hear a short tone when the radios icon, call group alias or ID, and radios alias or ID is releases the [PTT] key, indicating that the channel is ready...
- Page 15 Press [PTT] key to answer, or if there is no voice activity for 1) Press preprogrammed one-touch call key to initiate a a predetermined period of time, the call is terminated. group or Private Call to a predefined alias or ID. 6) You will hear a short tone, the screen shows the call 2) Hold the radios in its upright position and keep it at a ended.
- Page 16 2) Receive Calls 2. Emergency Type When the host computer has configured DTMF as the The radio prompts in different modes for different Emergen- receiving signaling system of the current channel, when cy types, as shown in the following table. decoding the code word is DTMF personal ID code, the Emergency Type Description...
- Page 17 3. Alarm Mode 4. Send Emergency Alert Except the alarm type “Disable,Only whistle, alarm whistle”, This feature allows you to send an emergency alert, which other alarm types support the following alarm modes. You belongs to a non-voice signal and will trigger a prompt on can ask the dealer to select one of them another transceiver.
- Page 18 You will not be able to receive any other prompts or show pre-programmed alert jump channel), the screen briefly any other calls until you exit the screen for receiving an displays “No ACK” and the radios will continue to send emergency alert.
- Page 19 4) When an alarm tone sounds, the LED indicator flashes 3) The radio of the radios automatically activates and emits orange. Hold the intercom in a vertical position and keep it a signal, speaking clearly to the microphone until the end of 1 to 2 inches (2.5 to 5.0 cm) from the mouth.
- Page 20 10. Restart Emergency Mode The radio will automatically send alarm to your partner or It can happened in two situations: control center for help. •When the transceiver is in emergency mode and changes 1) Turn on individual operation channel, it will exit emergency mode. If an emergency alert ●...
- Page 21 MENU OPERATION 3. Simplified Chinese Pinyin Input Method 1) Press [#] to switch to Pinyin input method (LCD shows Press [MENU] key in digital mode or digital channel to enter PY). the digital main menu; press [MENU] key in analog modem 2) Press number keys to enter the pinyin, and the LCD or analog channel to enter the analog main menu.
- Page 22 2) Press [MENU] key to select a function or enter a 4) Press [ ] / [ ] key to the desired group name or ID. sub-menu; 5) Hold the radios in its upright position and keep it at a 3) Press [BACK] key to return to last menu.
- Page 23 • Or press [ ] / [ ] key to Manual Dial, then press 1.3 Contacts Application Functions Digital contacts on the digital channel can initiate [MENU] key to select, use keyboard to input a new ID. corresponding application functions: 5) Hold the radios in its upright position and keep it at a •...
- Page 24 6) Press [ ] / [ ] key to ”Call Alert”, then press [MENU] 6) Press [ ] / [ ] key to “Radio Check”, then press key, the screen will display“Call Alert…” [MENU] key, the screen will display“Radio check…” 7) When the radio sends a call prompt, the LED indicator 7) When the detection command transmitted intercom, LED light is red.
- Page 25 • Or press [ ] / [ ] key to Manual Dial, then press 3) Press [ ] / [ ] key to Digital Contacts, then press [MENU] key to select, flashing cursor appears, input the [MENU] key to select. user ID you want to call, then press[MENU] key.
- Page 26 2. SCAN 1.3.5.1 Initiate Radio Enable Scanning means that when radio scanned on a channel 1) Press [MENU] key to enter the main menu. and has activities, it will stay on the channel for listening, so 2) Press [ ] / [ ] key to Contacts, then press [MENU] as to understand the current activities of the relevant group key to select.
- Page 27 2.2 View and Add a Scan List Note:If priority is set, the priority icon P1 P2 displayed on 1) Select a pre programmed scan list channel by pressing the left side of the channel /member alias, which indicates ] / [ that the channel/member is priority channel 1 or priority channel 2.
- Page 28 3.1 Edit and Send Messages 2.4. Scanning Reply User menu function: The radio detects the active channel/call group when 1) Press [MENU] key to enter the main menu. scanning, the radio stays at the channel/call group for listening (this is called the "scan hanging time" preprogram- 2) Press [ ] / [ ] key to Messages, then press [MENU]...
- Page 29 3.2 Send Quick Text 9) If the message is sent successfully, a prompt will be The radio supports at most 20 fast text messages issued, and the screen will display “Message Sent". programmed by agents. When you predefine SMS, you can •...
- Page 30 • Or if the message is not sent successfully, a high pitched Note: At any time, press [BACK] key to return to the tone will be issued, and the screen will display "Msg Send previous screen. Failed". 3.5.1 View the Sent Messages 3.4.2 Forward Messages User menu function:...
- Page 31 • Or if the message is not sent successfully, a high pitched 4) Press [ ] / [ ] key to Outbox, then press [MENU] key tone will be issued, and the screen will display "Msg Send to select Failed".. 5) Press [MENU] key when prompted "Delete Outbox?", 5) Press [MENU] to resend SMS to the same user/call and the screen display"...
- Page 32 Note: At any time, press [BACK] key to return to the 5) Press [MENU] key again to enter the submenu. Press previous screen. ] / [ ] key to enter the Reply, then press [MENU] key with the flashing cursor, enter the SMS editing state, and 3.7 View Inbox Messages edit the short message with the keyboard.
- Page 33 4) Press [ ] / [ ] key to the required message, and CALL RECORDING FUNCTION The radios can record all recent incoming, answered and press [MENU] key to select and browse the current SMS. If unanswered calls. Use the call record function to view and text messages come from e-mail programs, then a topic line manage recent calls.
- Page 34 1) The screen displays “Missed Calls” and the number of ENCRYPTION missed calls. Encryption means encrypt the voice or data of the 2) Press [MENU] key to enter the missed call list. The latest end-to-end, which provides reliable security for voice or missed call entries are displayed at the top of the screen.
- Page 35 MENU SETTINGS 4) Press [ ] / [ ] key to Talk Around, then Press [MENU] key to select. The setting menu includes the following: 5) The radios are currently in the repeater mode. Select • Radio Settings “On”, press [MENU] key to confirm, the screen icon lights •...
- Page 36 4) Press [ ] / [ ] key to Tones/Alerts, then press [MENU] • or Press [MENU] key to “KeyTone Off”, then Press to select. [MENU] key to confirm turning off the keyboard sound. The 5) Press [ ] / [ ] key to Silence, then press [MENU] to screen displays”...
- Page 37 1.3 TX Power 1.4 Backlight This function can achieve quick switch of high/low power. You can turn on or off the screen backlight of the radios if When communication distance meets your requirements, needed. This setting will also affect the back light of the low power can be selected to save power.
- Page 38 1) Press [MENU] key to enter the main menu. 2) Press [ ] / [ ] key to Settings, then Press [MENU] key 2) Press [ ] / [ ] key to Settings, then press [MENU] to to select. select. 3) Press [ ] / [ ] key to Radio Settings, then Press...
- Page 39 1.7.1 Keypad Lock Switch 4) Press [ ] / [ ] key to the Keypad Lock, then press [MENU] key to select. Methods include manual keypad locking and automatic 5) The screen displays "KeyPad Lock Switch" and "KeyPad keyboard locking; among them the automatic keypad Delay Time"...
- Page 40 5) Press [ ] / [ ] key to select the corresponding 1.10 VOX Settings language, then press [MENU] key to select. The screen This function allows you to initiate voice activation for hands-free calls on programmed channels. Regardless of shows the language selected and returns to the main when the microphone on the attachment with VOX function screen.
- Page 41 1.11 Clock Settings • If you select “Off”, Press [MENU] key to cancel the VOX function. The real-time clock is used by the terminal to display local 1.10.2 Gain Level time in real time, view time details and set time format. The The higher the gain level, the higher the voice level, and the clock settings are divided into: lower the sensitivity.
- Page 42 1.11.2 Date Settings 5) The LCD indicate “ON/OFF” options, press [ ] / [ The menu functions as follows: key to select ,then press [MENU] key to save, and select 1) Press [MENU] key to enter the main menu. the matched type. 2) Press [ ] / [ ] key to Settings, then Press [MENU] key...
- Page 43 1.14.2 Recording Selection 1.14 Recorder (optional) The voice recorder for this radio can be select to receive NOTE:The recording function of this unit is optional and record, or transmit record, or receive and transmit record. depends on the firmware version. The lower version may The menu functions as follows: not support the recording function.
- Page 44 The menu functions as follows: 5) Press [ ] / [ ] to enter into Delete All, then press 1) Press [MENU] key to enter the main menu. [MENU] to select. 2) Press [ ] / [ ] key to Settings, then Press [MENU] key 6) The LCD screen will indicate “Are you sure?”, and then to select.
- Page 45 2) Press [ ] / [ ] key to select ON, then press the 2. Radio Information [MENU] key to confirm the GPS function is turned on, and Search the radio information, including: radio number (the the icon will be displayed on the first line of the screen. name of the owner and serial number for the radio) and the •Or select OFF, and then press the [MENU] key to confirm radio version (firmware version, CPS version) etc.
- Page 46 The menu functions as follows: 6) Press [BACK] key to delete the previous number bit by 1) Press [MENU] key to enter the main menu. bit, and input the corresponding receive frequency by 2) Press [ ] / [ ] key to Settings, then Press [MENU] key pressing the number keys.
- Page 47 Note: When the frequency editing is changed, the frequen- 3.4 Transmitting Contacts cy is changed according to the frequency range set on the Transmitting contactor only can be modified under the program software. If it is less than or less than the digital channels.
- Page 48 4) Press [ ] / [ ] key to Color Code, then press [MENU] of 12.5 kHz. The radios in the same distribution group must key to select. use the same time slot, and the group using time slot 1 will 5) Press [ ] / [ ] key to select a color code values...
- Page 49 • Or press [ ] / [ ] key to DCS_N , and press [MENU] • Or press [ ] / [ ] key to DCS_N , and press [MENU] key to select positive DCS, press [ ] / [ ] key to select key to select positive DCS, press [ ] / [...
- Page 50 MAIN TECHNOLOGICAL SPECIFICATION Reception Analog receive sensitivity -122dBm (12dB SINAD) General Digital receive sensitivity -120dBm(BER≤5%) Frequency Range 136-174MHz (V) , 400-470MHz (U) Audio power Channel Capacity 4000 channels Audio distortion <10% Channel Spacing 25KHz(Wide Band), 12.5KHz(Narrow Band) Audio response +1 ~ -3dB Phase-locked Step 5KHz, 6.25KHz Signal imitation...
- Page 51 TROUBLESHOOTING Note: As above method still cannot solve your problem, or you meet other problem, please get contact with local distributor to get the Problem Reason Solution technological support. The battery doesn’ t be Remove and re-install the installed correctly. battery.
- Page 52 ID from one of many available Amateur Radio sources. A The programming software and codeplug programming U.S. Amateur can obtain a DMR ID From: guide are available for download from RETEVIS website: https://www.radioid.net/cgi-bin/trbo-database/register.cgi https://www.retevis.com For DMR repeaters in your area please see: www.repeater- When programming this radio for the first time, it is book.com...
- Page 53 Exposure awareness can be facilitated by the use of a product label directing users to specific user awareness information. Your Retevis two-way radio has a RF Exposure Product Label. Also, your Retevis...
- Page 54 user manual, or separate safety booklet includes information Operation is subject to the condition that this device does and operating instructions required to control your RF not cause harmful interference. (Licensed radios are exposure and to satisfy compliance requirements. applicable); Radio License This device complies with part 15 of the FCC Rules.
- Page 55 Licence-exempt radio apparatus CE Requirements: This device contains licence-exempt transmitter(s)/ •(Simple EU declaration of conformity) Shenzhen Retevis receiver(s) that comply with Innovation,Science and Technology Co., Ltd. declares that the radio equipment type Economic Development Canada’s licence-exempt RSS(s). is in compliance with the essential requirements and other...
- Page 56 RF exposure require- •When operating in front of the face, worn on the body, ments. always place the radio in a Retevis approved clip, holder, •Occupational/Controlled Radio, this radio is designed for holster, case, or body harness for this product. Using and classified as “Occupational/Controlled Use Only”,...
- Page 57 Hand-held Mode To avoid electromagnetic interference and/or • Hold the radio in a vertical position with the microphone compatibility conflicts •Turn off your radio in any facility where posted (and other parts of the radio including the antenna) at least notices instruct you to do so, hospitals or health 2.5 cm (one inch) away from the nose or lips.
- Page 58 •When the transceiver is used for long transmis- exposure guidelines and may violate regulations. sions, the radiator and chassis will become hot. •For a list of Retevis-approved accessories for your Safety Operation radio model, visit the following website: http://ww- Forbid w.Retevis.com...
- Page 59 2.Most new products carry a two-year manufacturer’ s manual. warranty from the date of purchase. Further details, pls read http://www.retevis.com/after-sale/ 3.The user can get warranty and after-sales service as below: Contact the seller where you buy.
Need help?
Do you have a question about the RT72 and is the answer not in the manual?
Questions and answers