Advertisement
Advertisement
Table of Contents

Related Manuals for Sunjoy L-GZ660PST-D


Summary of Contents for Sunjoy L-GZ660PST-D
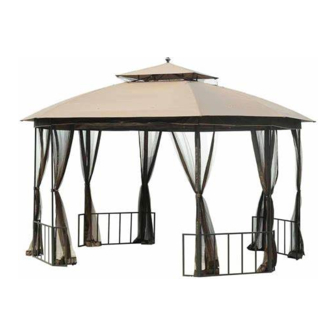
- Page 1 Assembly Instructions Item #: L-GZ660PST-D 10'x12 Gazebo...
- Page 2 IMPORTANT: Please read and follow all safety statements, warnings, assembly instructions, use & care directions before attempting to assemble. WARNING: 1. When installing and assembling your gazebo, it is recommended that 2 or more adults are involved. 2. This product is intended for outdoor use only and should be placed on flat, horizontal ground.
- Page 3 Parts List Small roof connector Top connector Finial Hook Small roof bar Bar connector (Upper) Top bar1 Top bar 2 Bar connector (Bottom) Crossbeam1 Crossbeam 2 Crossbeam 3 Post 1 Post 2 Fence (Middle) Fence Fence connector 1 Fence connector 2 Small canopy Large canopy Netting...
- Page 4 Fig.1: Insert fence (K1) and (K2) into post (J) Fig.2-1: Insert fence (K2) into post (I) . Fig.2-2: Insert fence connector (K3) and (K4) into the hole on the bottom of K2&K1 respectively. Fig.3: Insert crossbeam (H) and (F) into the post (J). Fig.4: Insert crossbeam (G) into the post (I).
- Page 5 Hardware Pack Ф6*180 Stakes 12 PCS Fig.5: Insert bar connector (C2) into top connector (A2) then fix the hook (B2) on the top connector (A2) Fig.6: Insert top bar (D) and (E) into bar connector (C2) (Attention: (E) should be on the right and (D) on the left side.) Fig.7: Insert the top bar (E) and (D) into connector (E1) Fig.8: Insert the connector (E1) into post (I) and (J).
- Page 6 Fig.12: Using plastic rings (Pre-assembled on the netting) to hang the netting (N) on crossbeam (H), (F) and (G). USE & CARE 1. This Gazebo is not a permanent structure and should be disassembled & stored away after use. 2. Do not repack your gazebo until completely dry. 3.
Need help?
Do you have a question about the L-GZ660PST-D and is the answer not in the manual?
Questions and answers